The Longest Walk
Overview
This short, documentary game situated in the Tayside area explores themes of suicidal thoughts, stigma, medication, therapy and family. This non-fictional narrative is grounded through the embedding of narration; taken directly from a semi-structured interview with my father.
A The Longest Walk is an intimate look into the thoughts and feelings that plague a father of 3 living with depression and highlights the support and coping mechanisms he uses to overcome them.
TRIGGER WARNING: This project contains content on depression and suicidal intent that some viewers may find distressing. If you are feeling suicidal please contact the Samaritans for free on 116 123.
1: Inspiration

I Had a Black Dog, His Name Was Depression (WHO, 2012) ; Actual Sunlight (O’Neill, 2013) ; Depression Quest (Quinn, 2013)
As a developer, I have always been interested in the creation of games based on real people and real stories. (Look for the term from Wanderlust in Edge magazine) ADD MORE HERE
Games such as Actual Sunlight (O’Neill, 2013) and Depression Quest (Quinn, 2013) explore themes of depression from an autobiographical standpoint through the use of a fictional character. O’Neill described Actual Sunlight as “almost 100 percent autobiographical” although told through the fictional character; Evan Winters. Depression Quest was developed by Zoë Quinn and Patrick Lindsey who have both had first-hand experience of living with depression, however, the game’s protagonist is nameless and benefits from support networks and resources that they themselves didn’t have.
Both games are impactful in their delivery through the ‘rawness’ and realism of the content that they portray. Lindsey states “Previous games that attempted to deal with depression or mental illness were too oblique and steeped in metaphor and symbolism to really get at the nasty heart of what living with these conditions can be like… It is more than ‘feeling sad’. We wanted to communicate what it’s like to be in that headspace.” It is through the indie lens of smaller Twine games and RPG Maker games that such complex, personal stories and emotions can be conveyed through this medium. - not a great sentence
It is in this space that “The Longest Walk” intends to exist, not as a game of challenge or high scores, but as a game of contemplation, healing, and learning through lived experience. Unlike the aforementioned games, The Longest Walk will take a fully autobiographical standpoint where the player will assume the roll of my father, walk in his shoes, and recollect his experience of depression with him.
Talk about I had a Black dog here… use of metaphor?
2: Reference Imagery
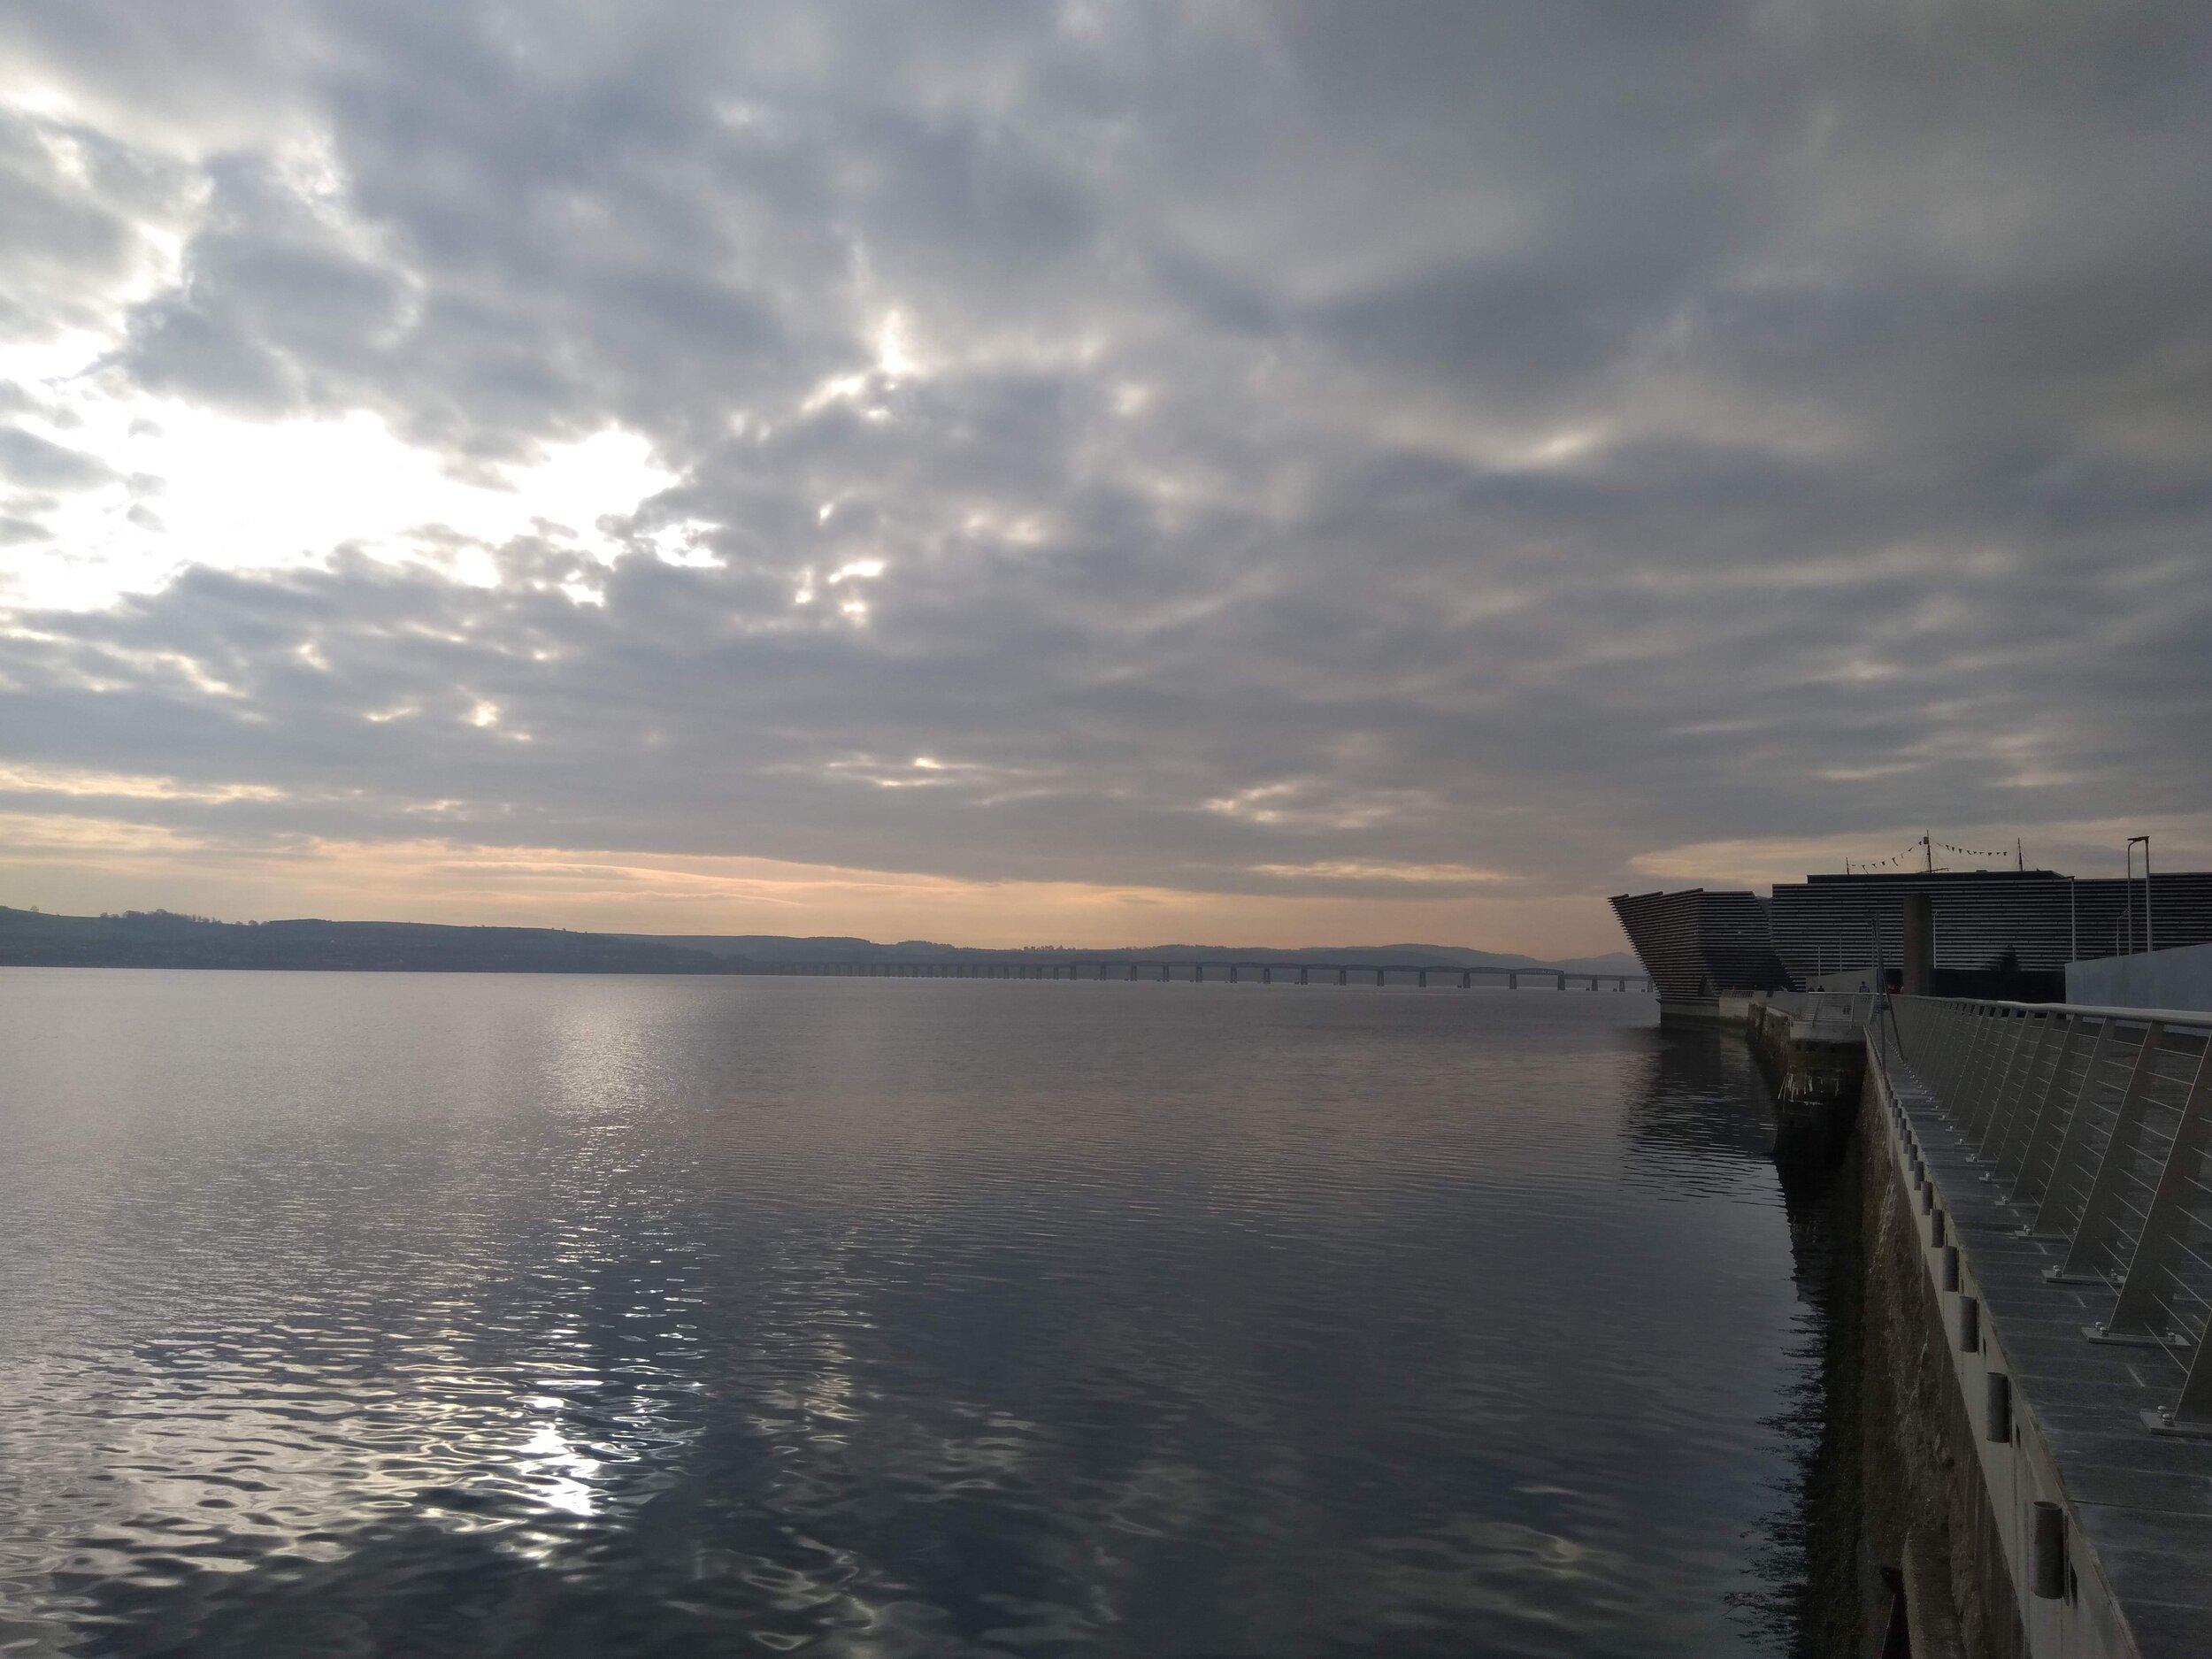

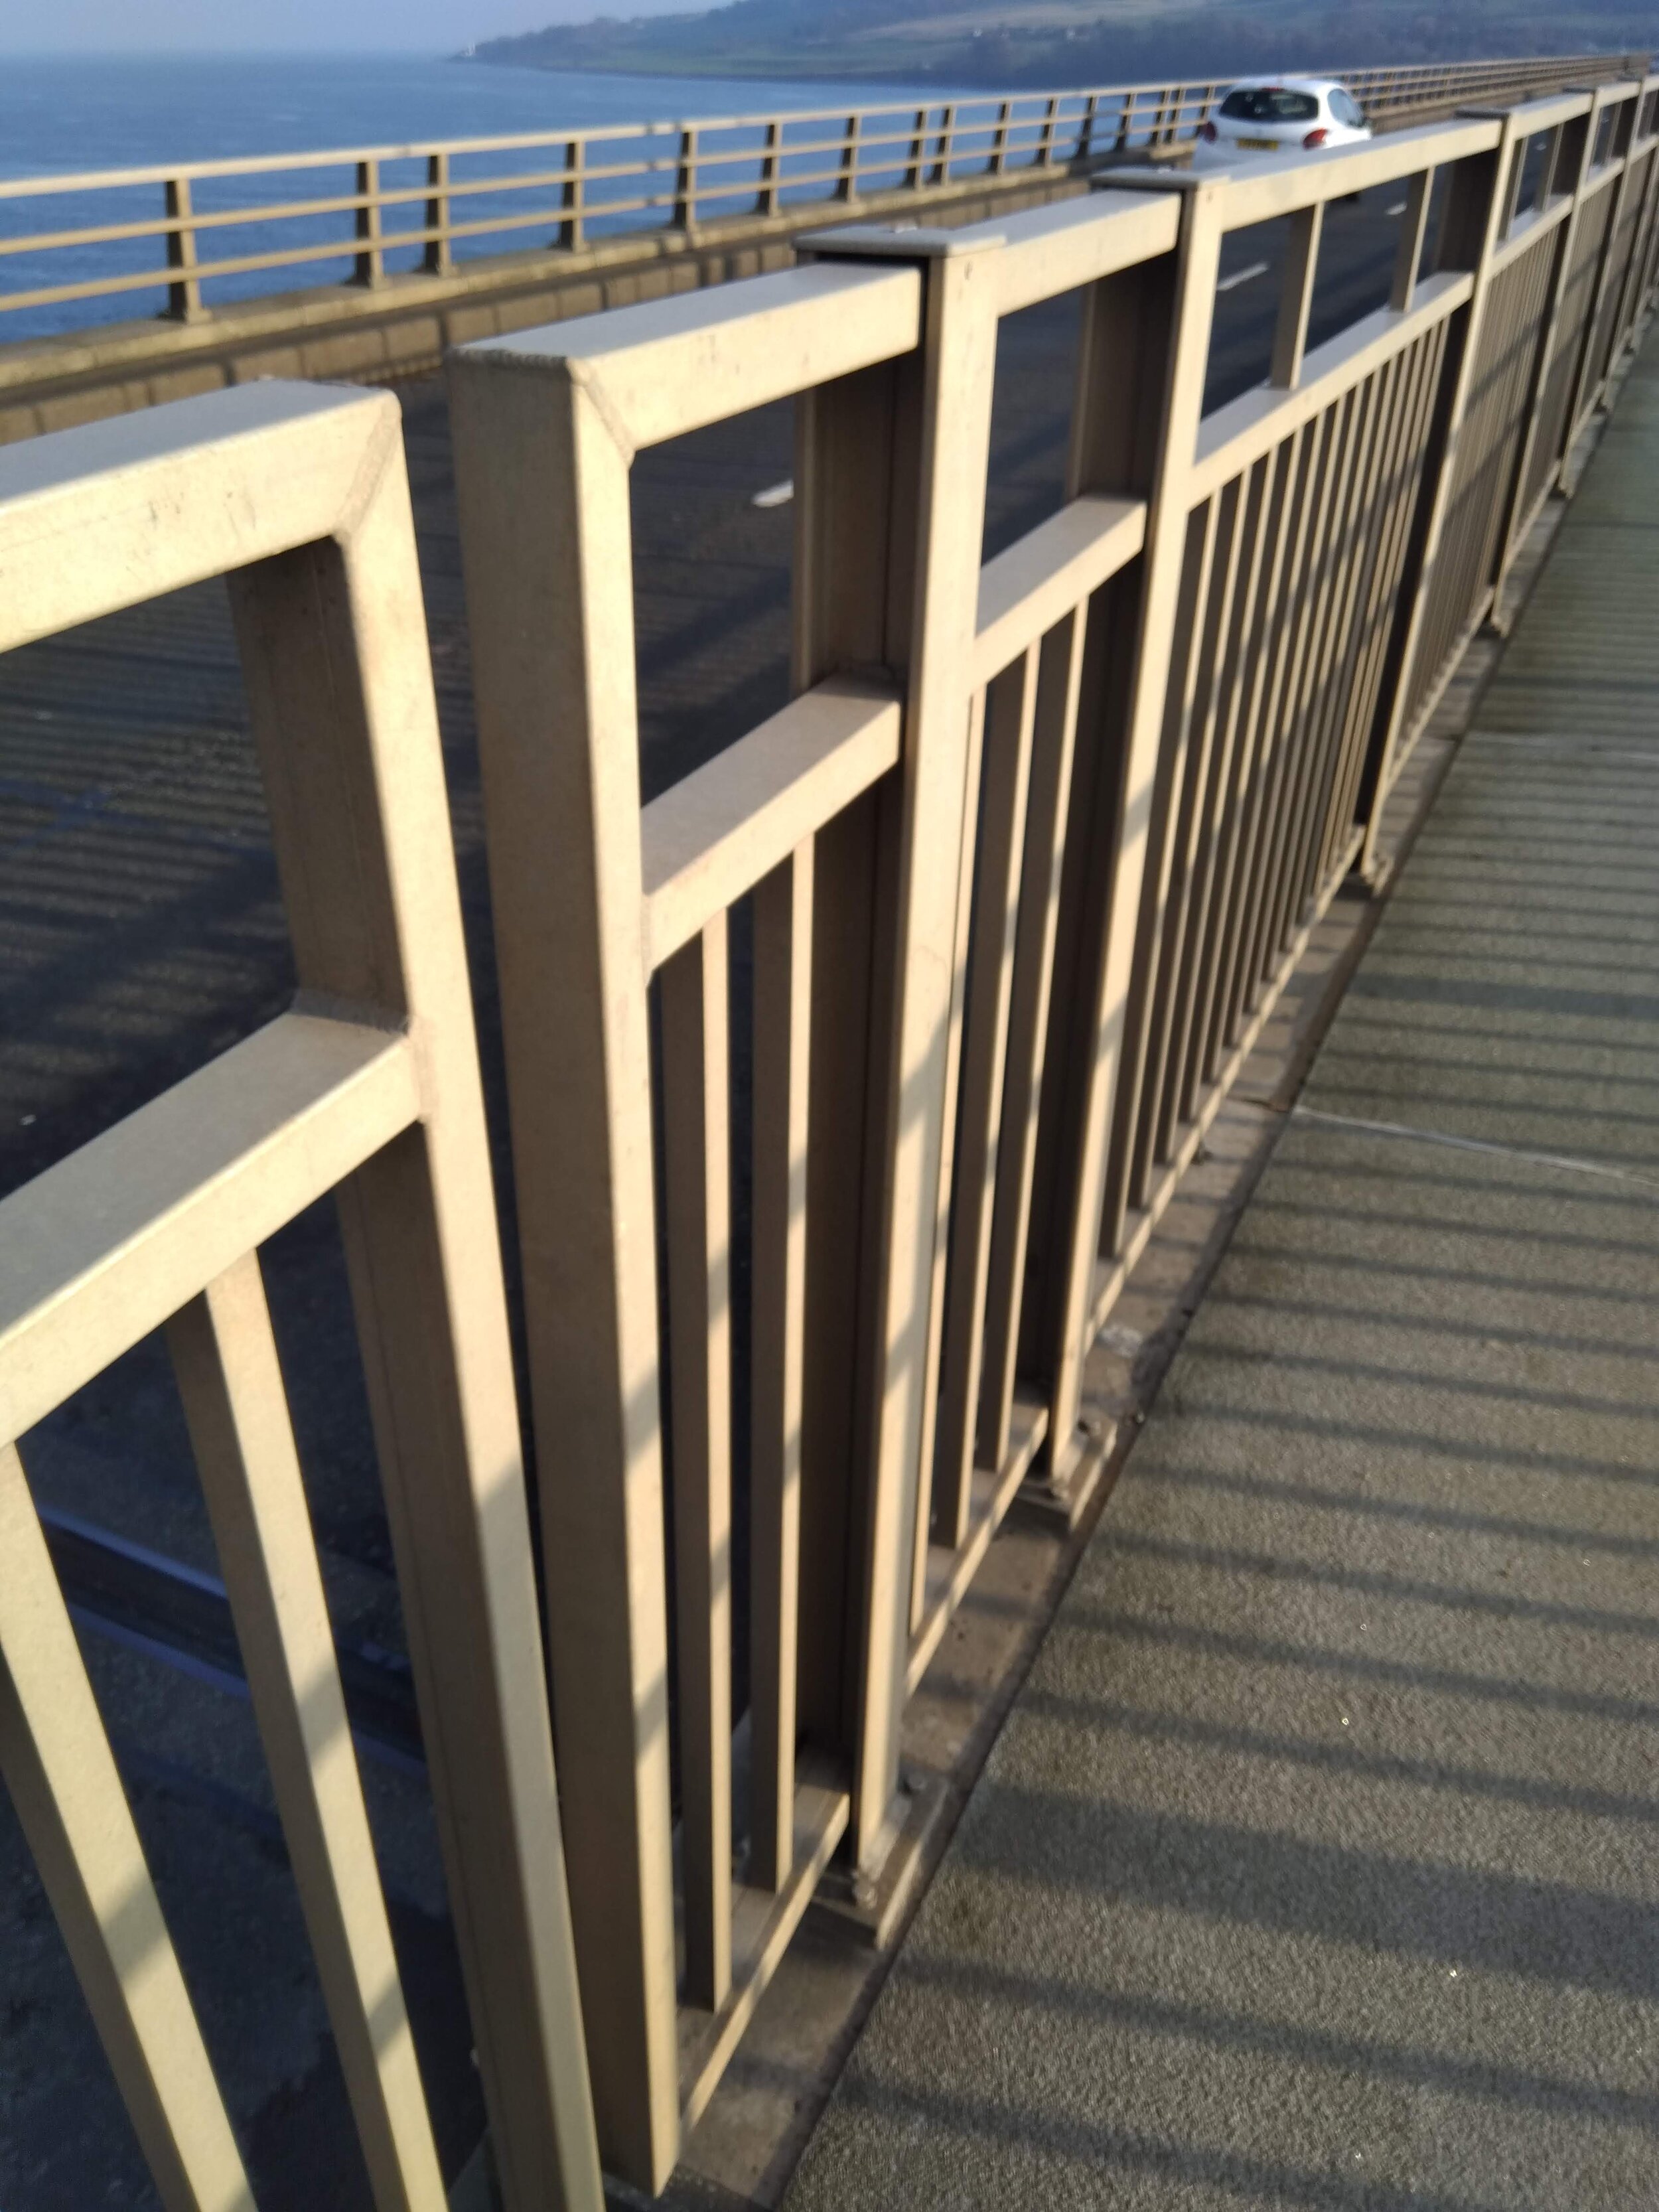

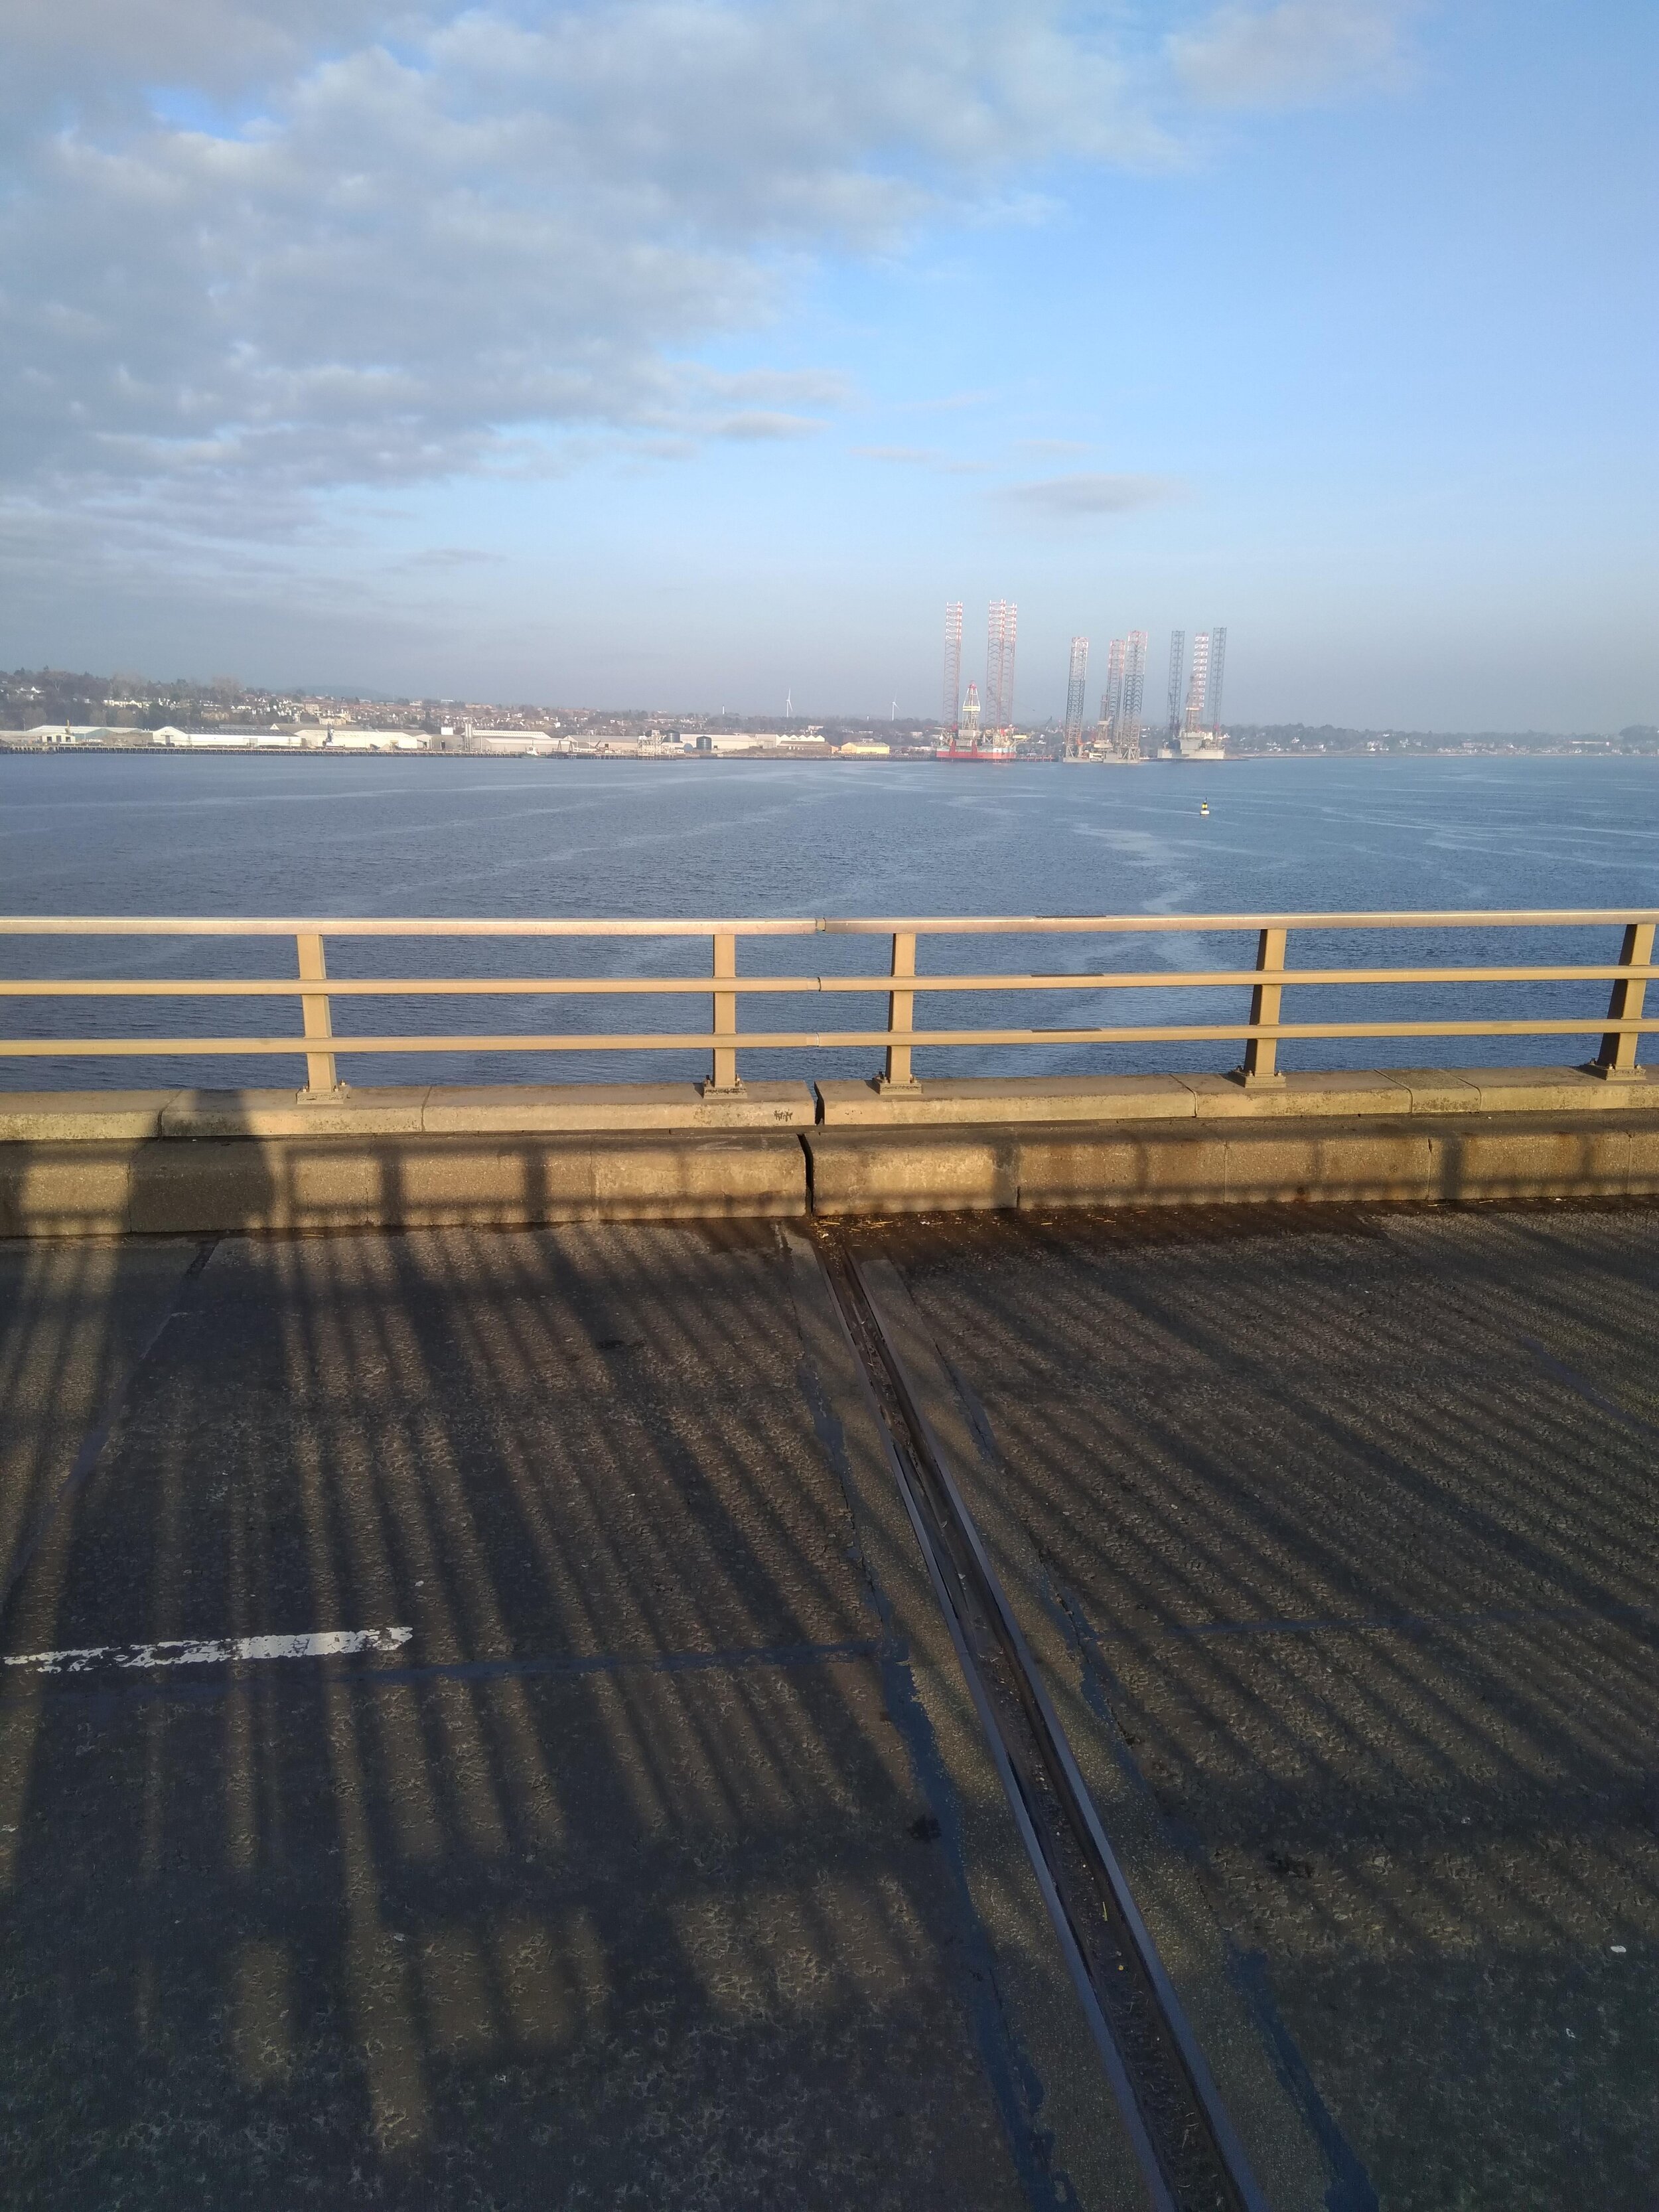
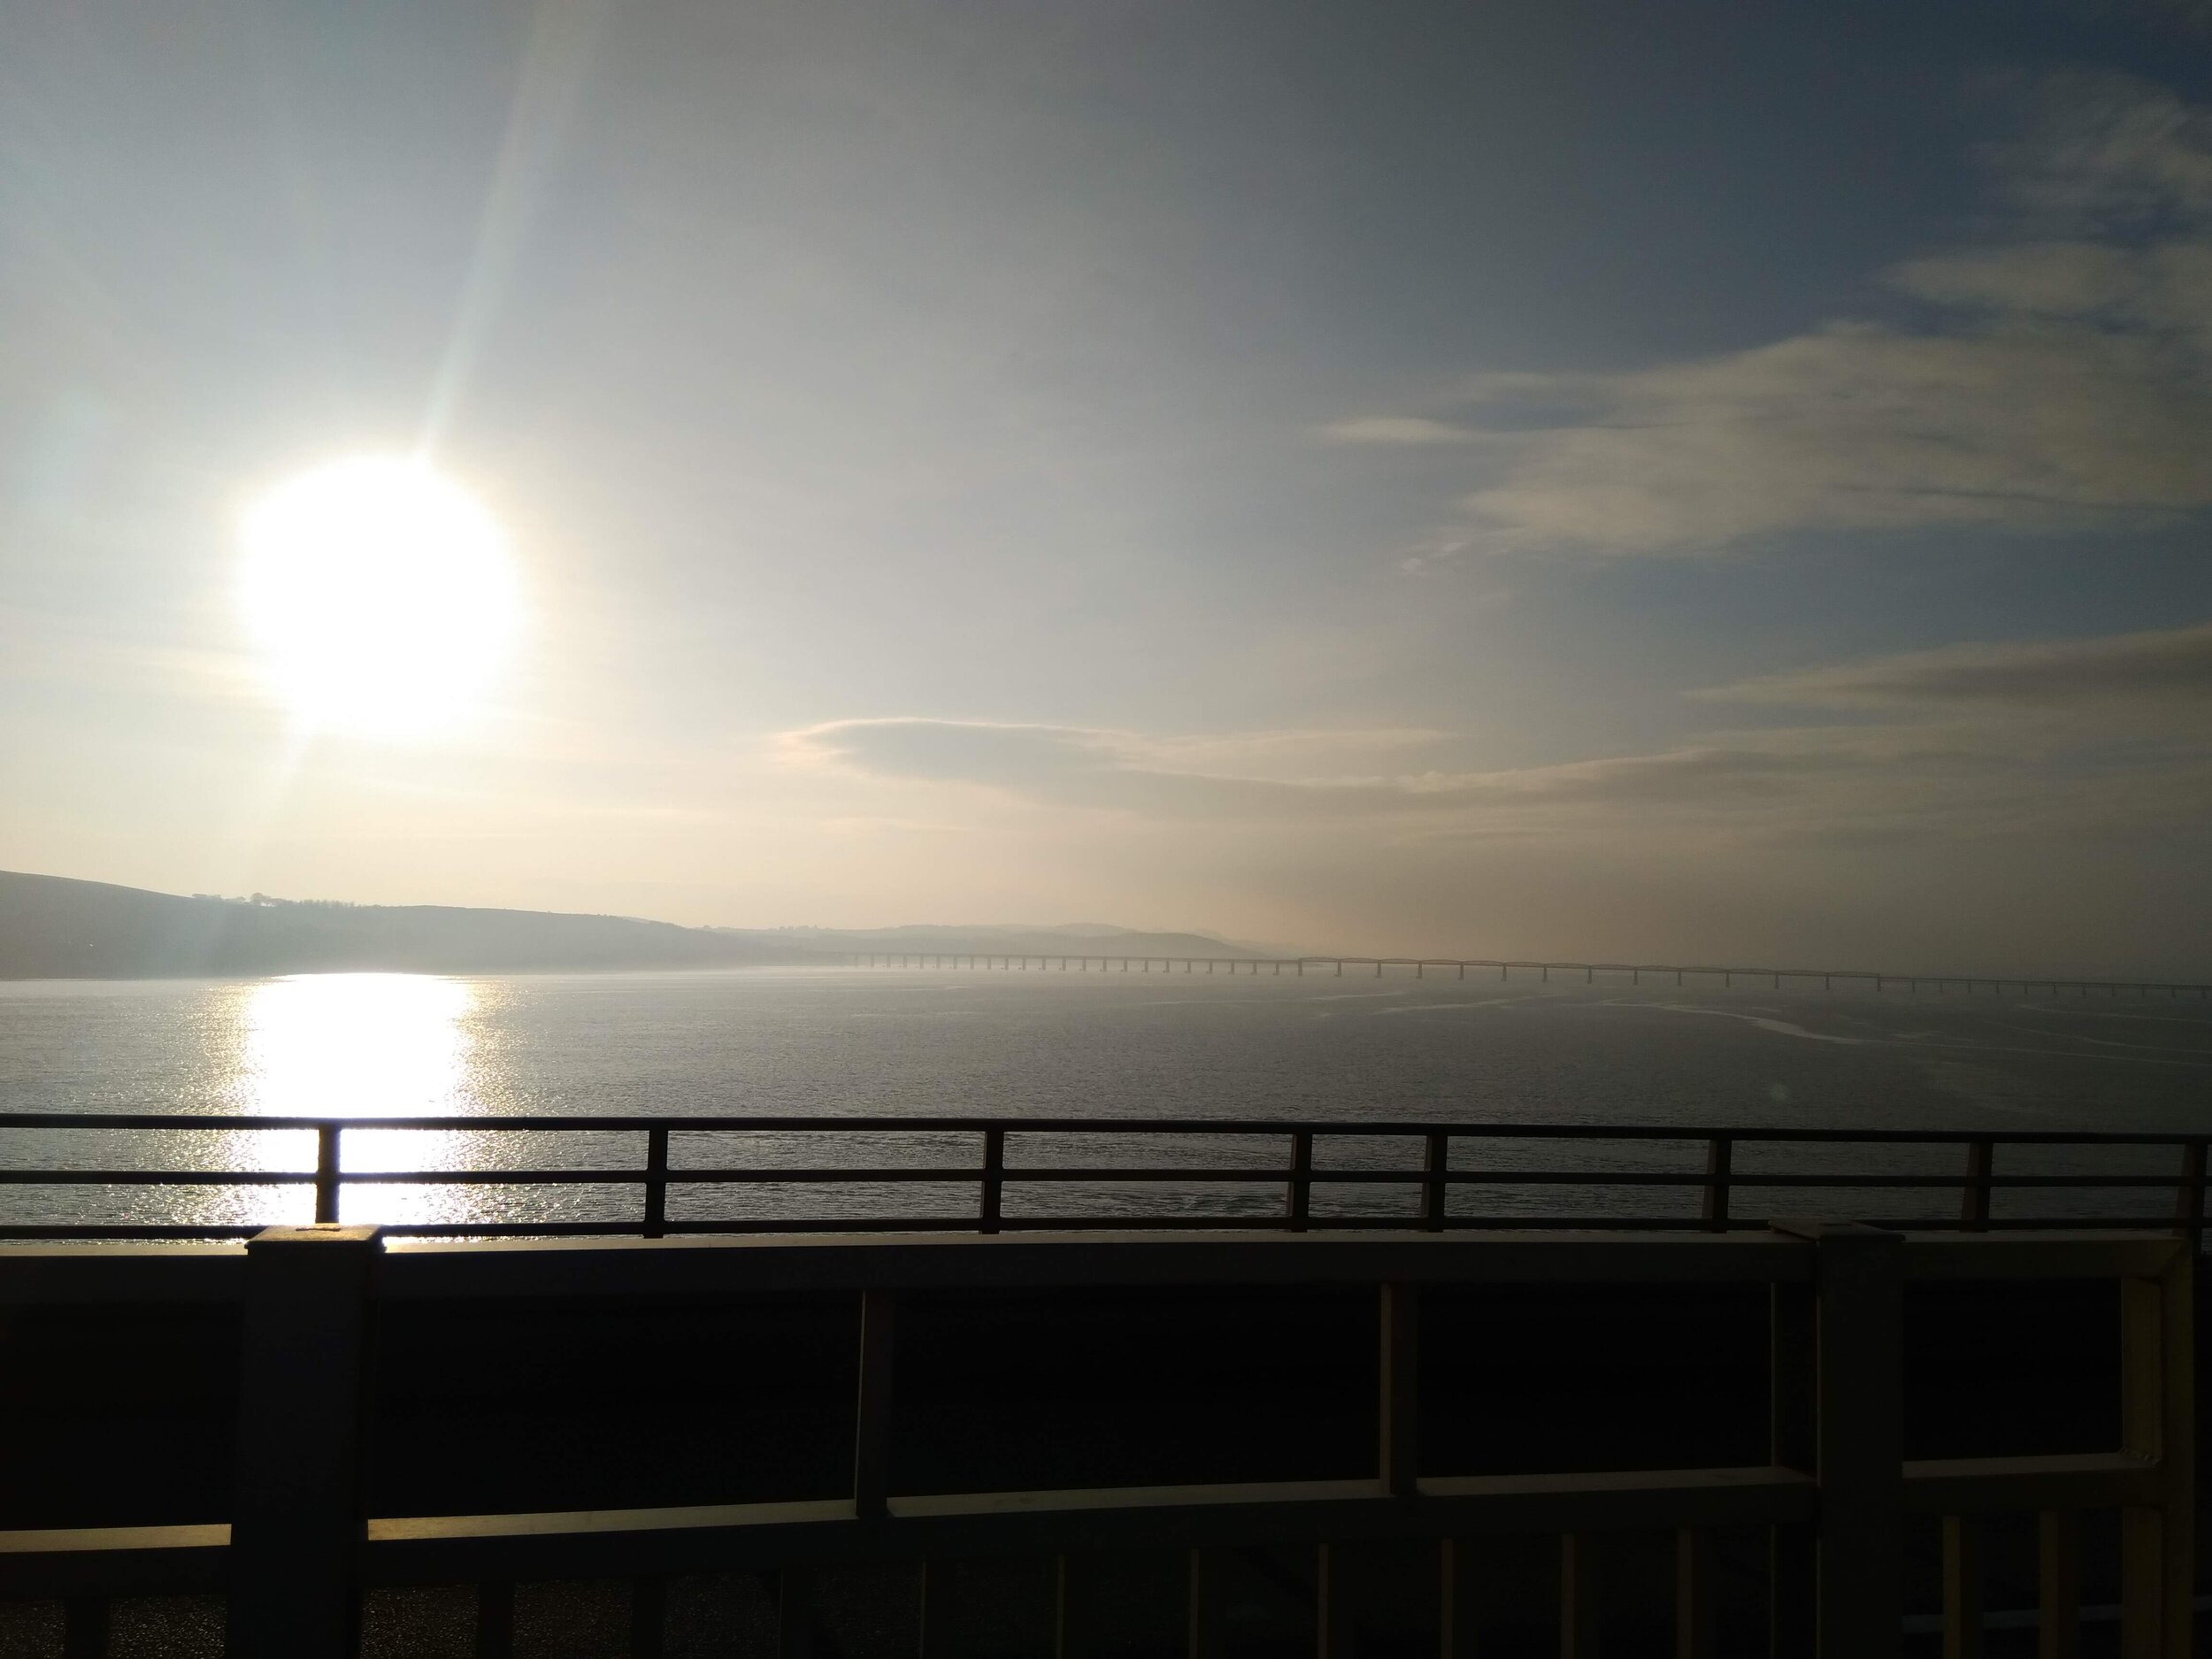
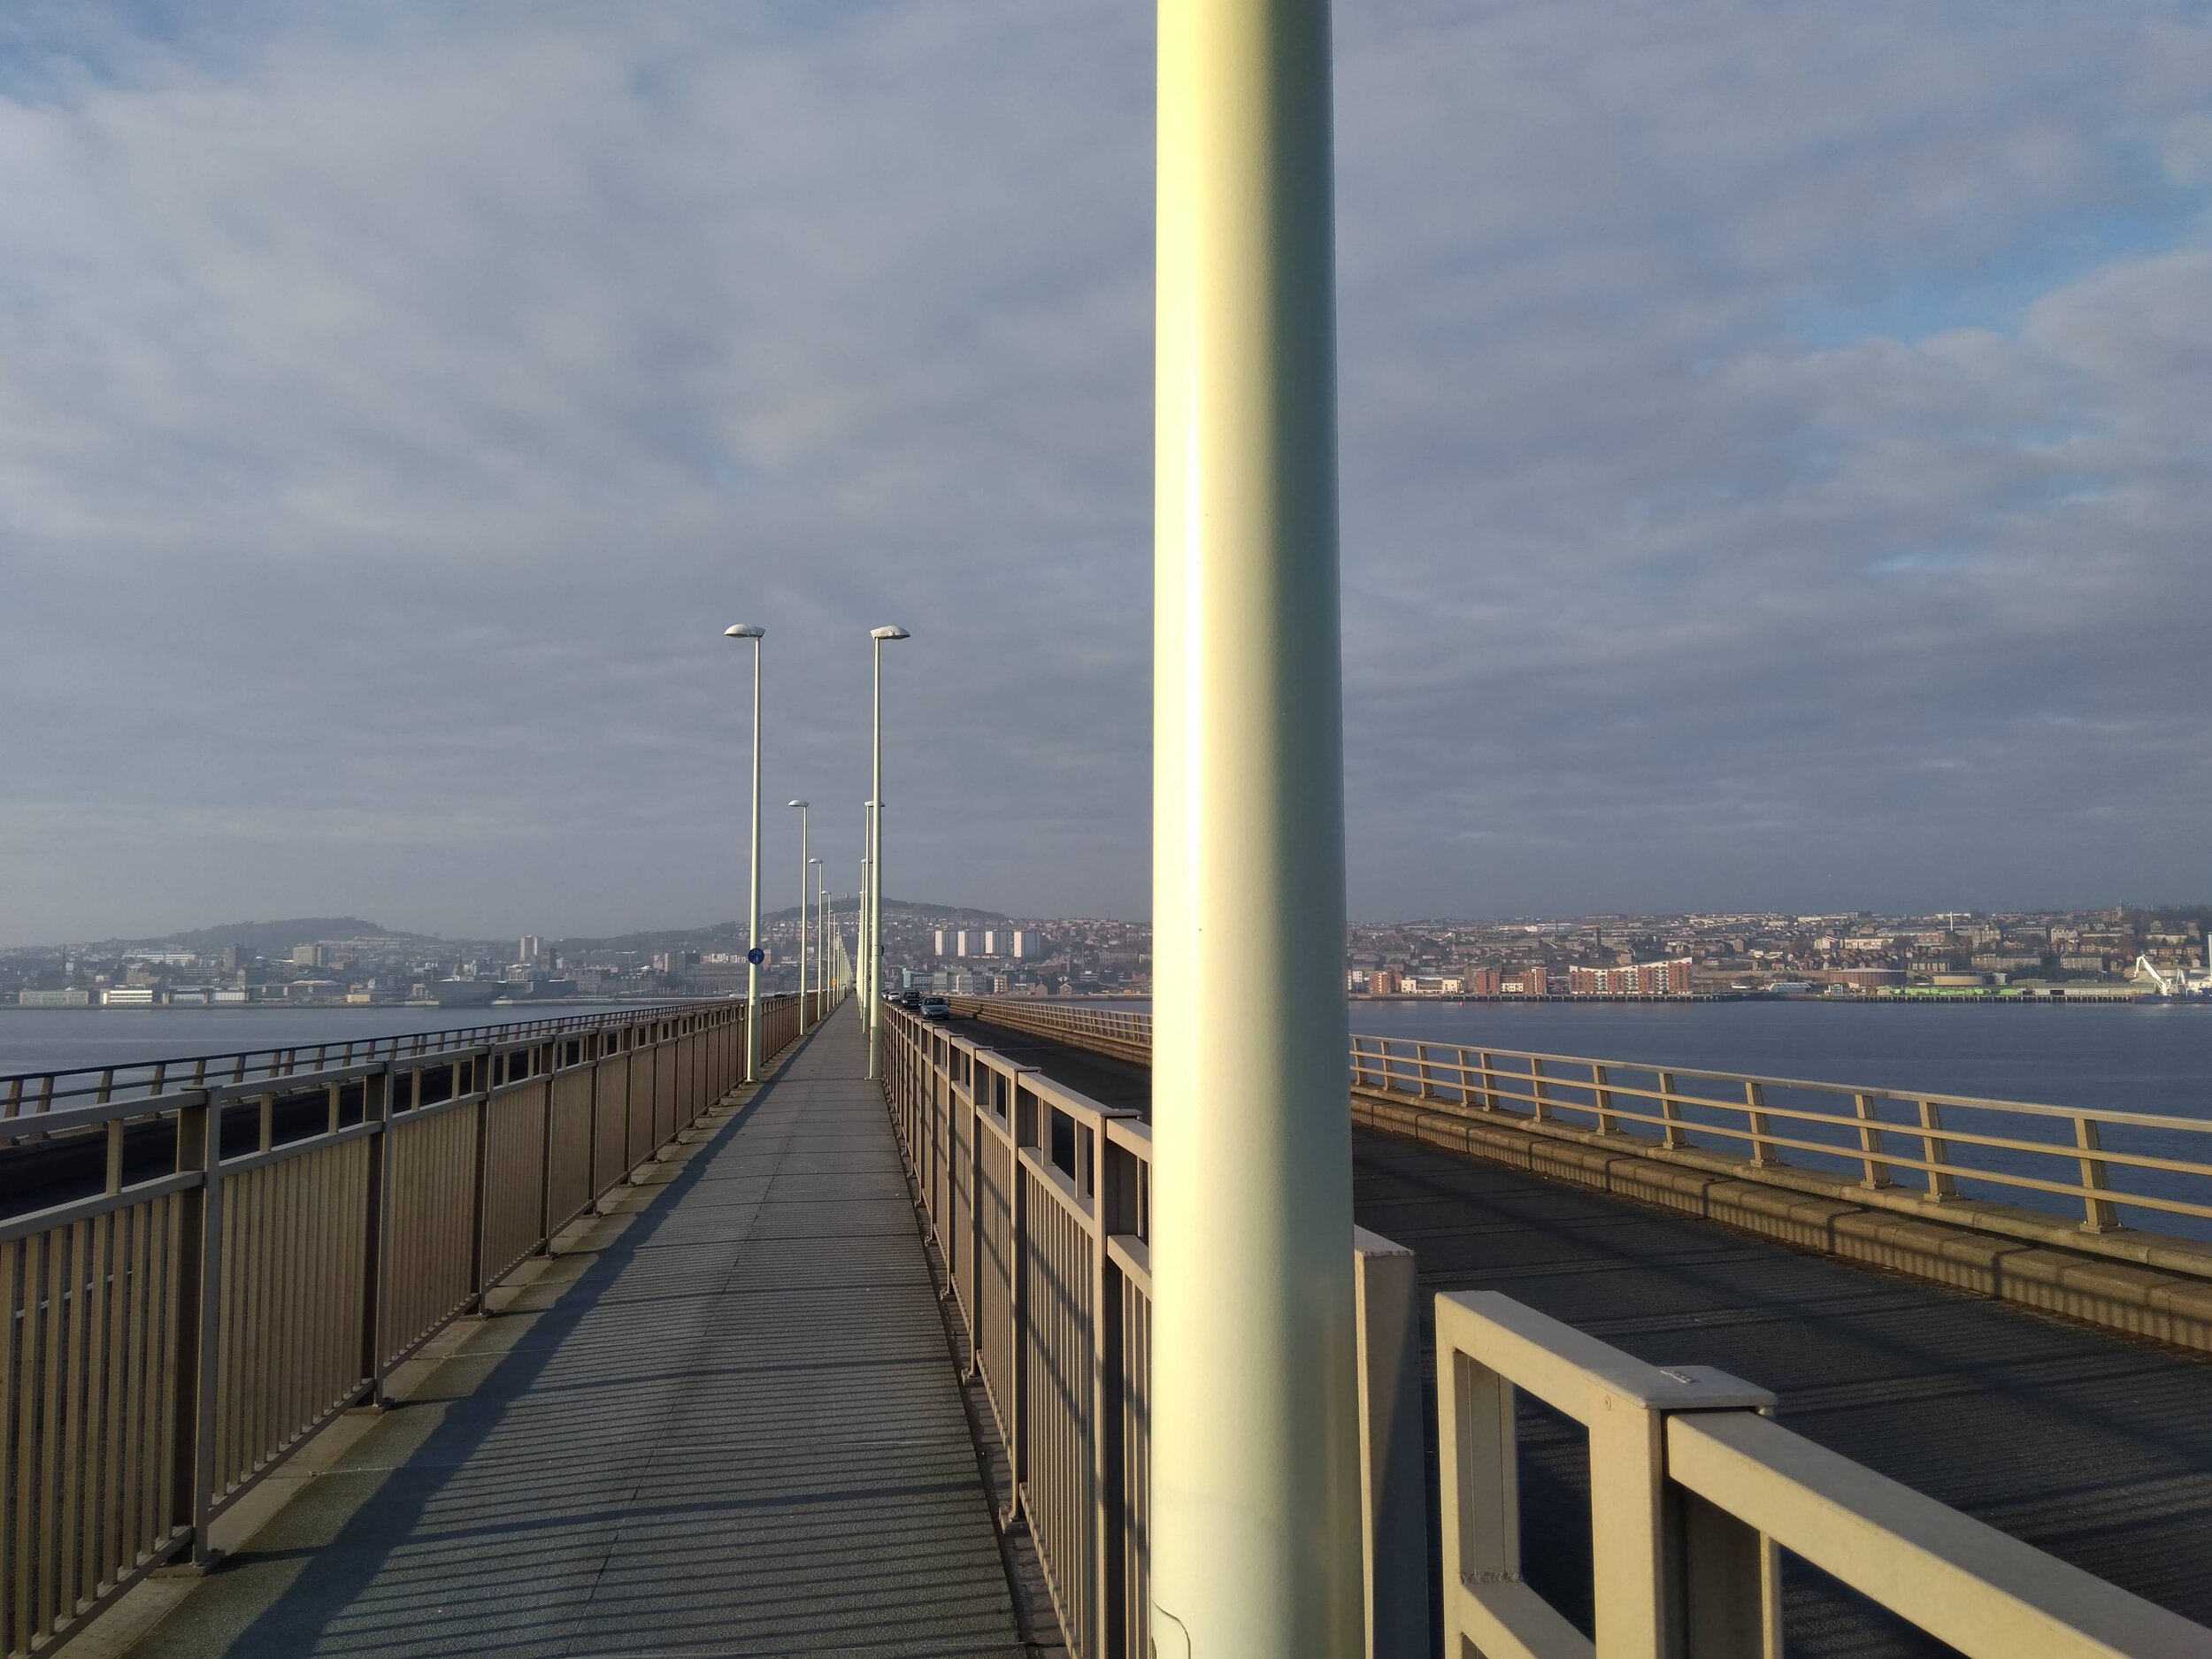
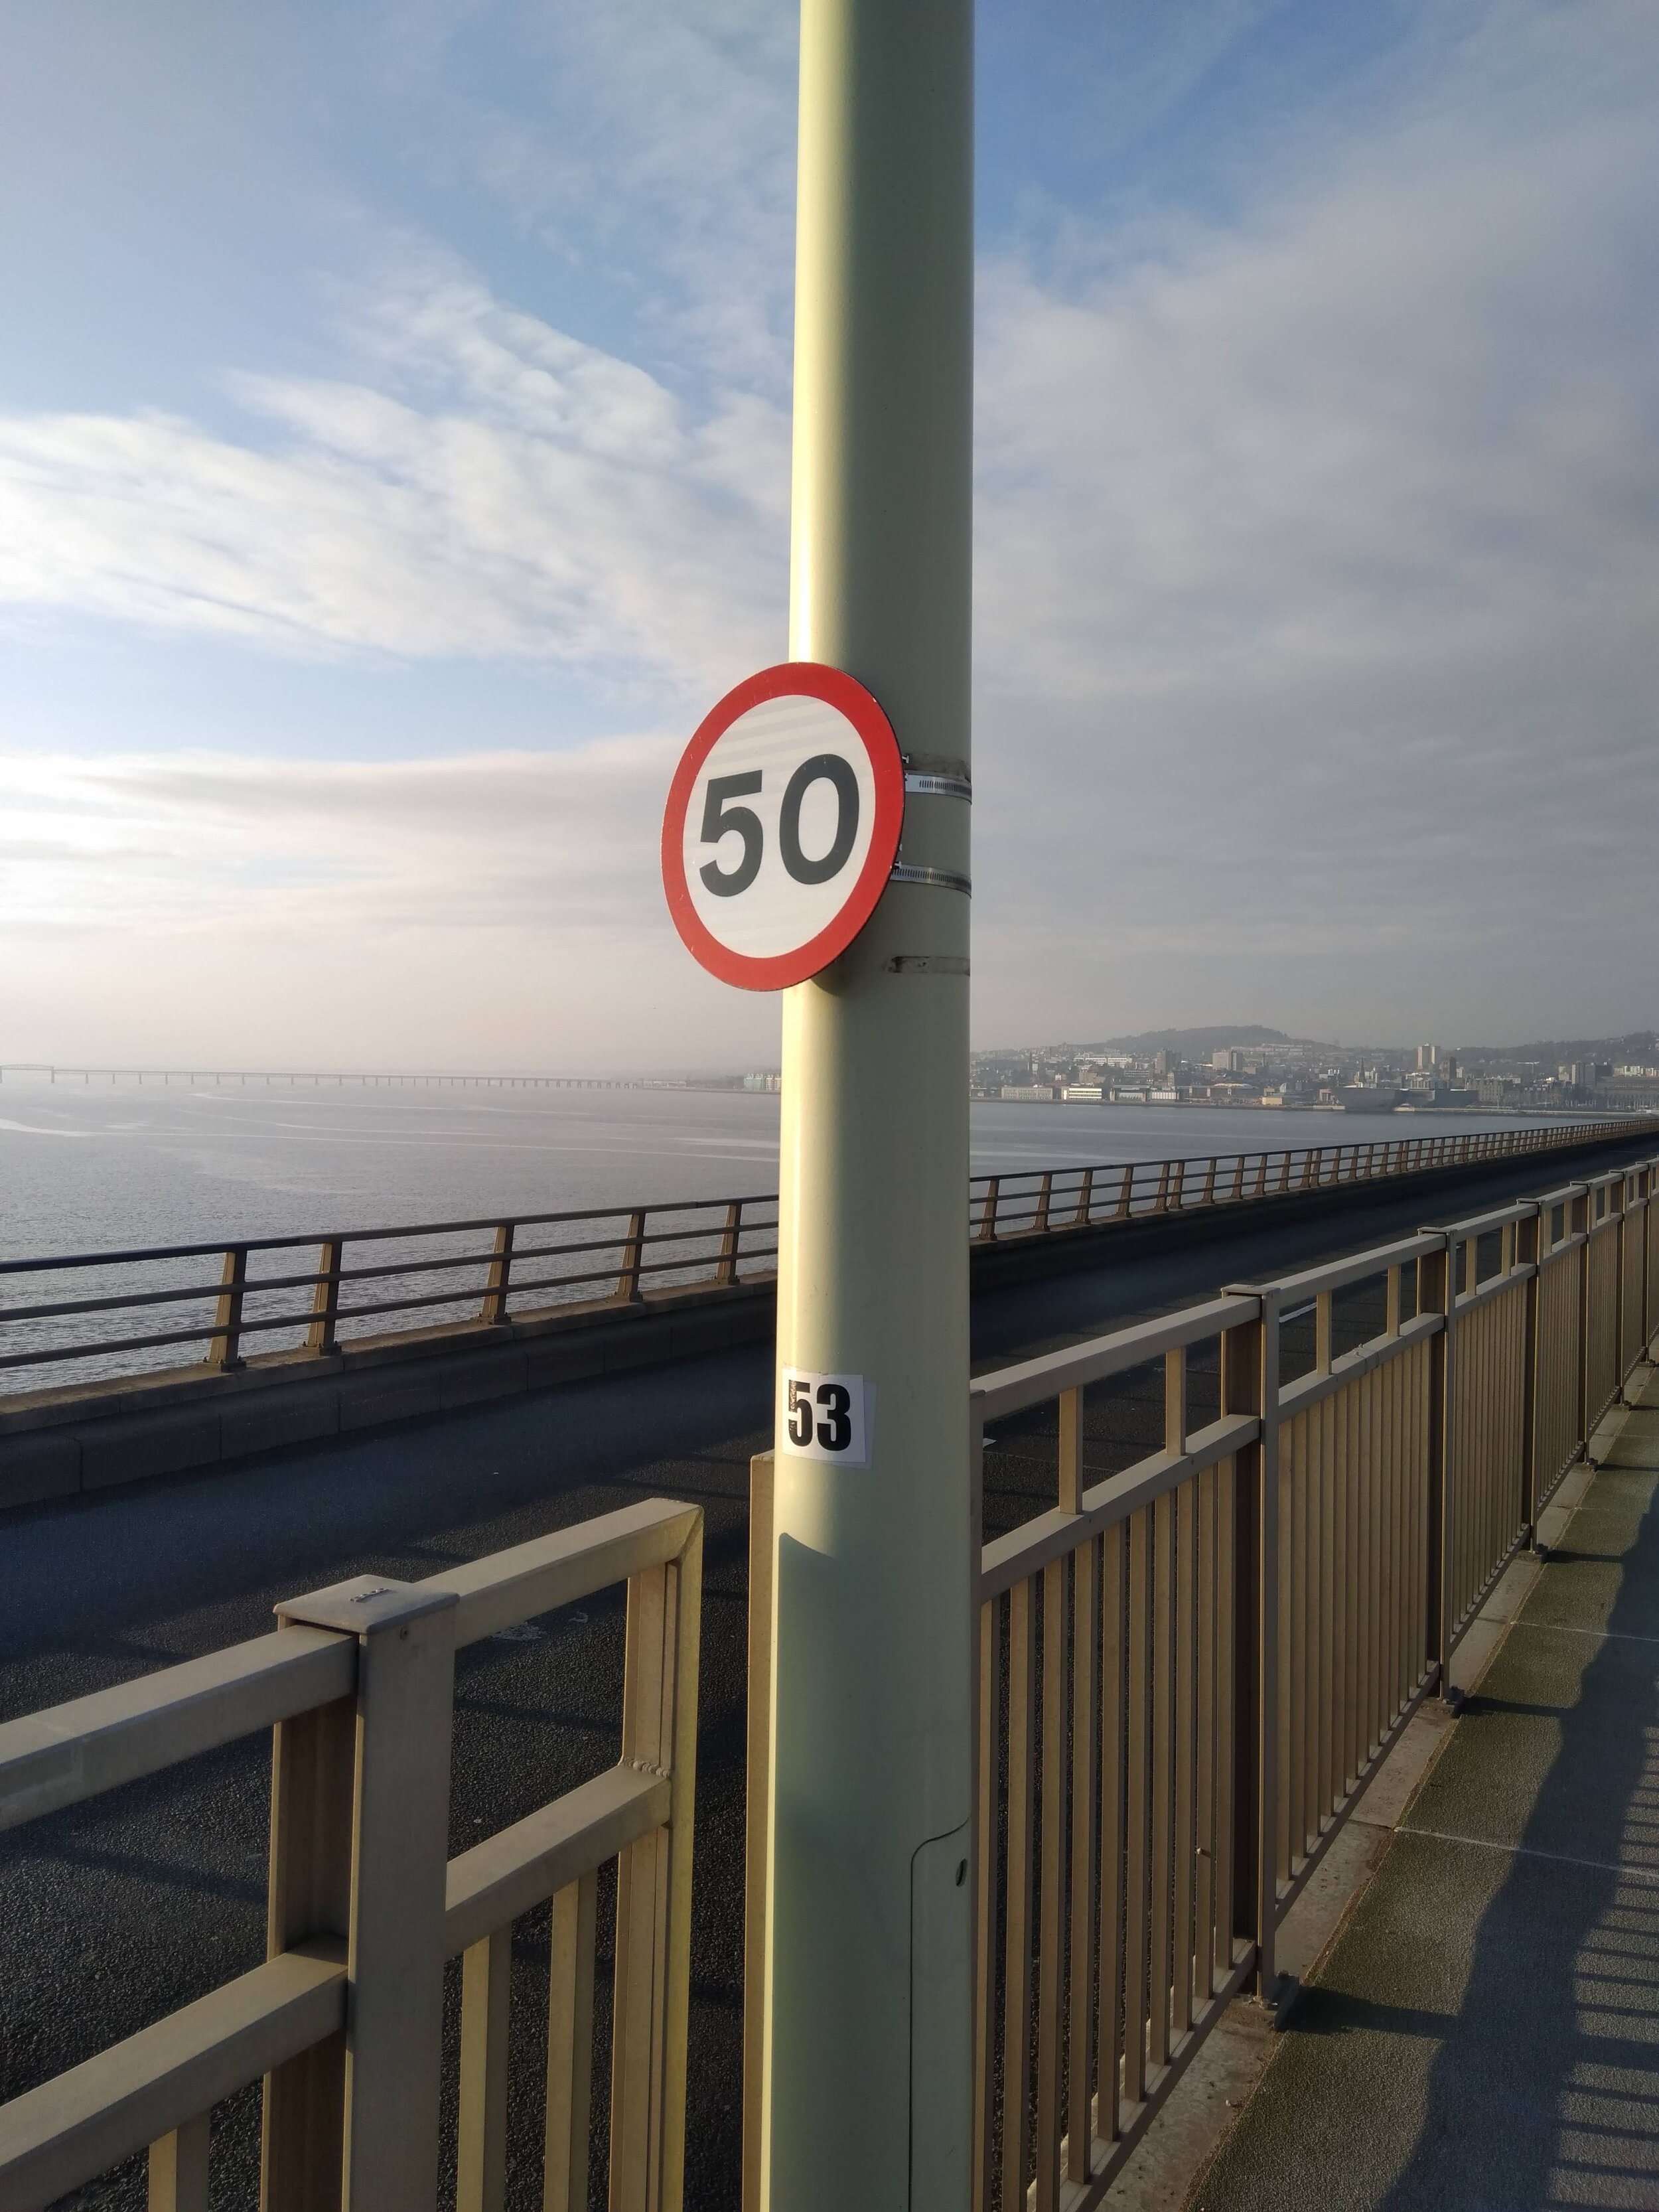
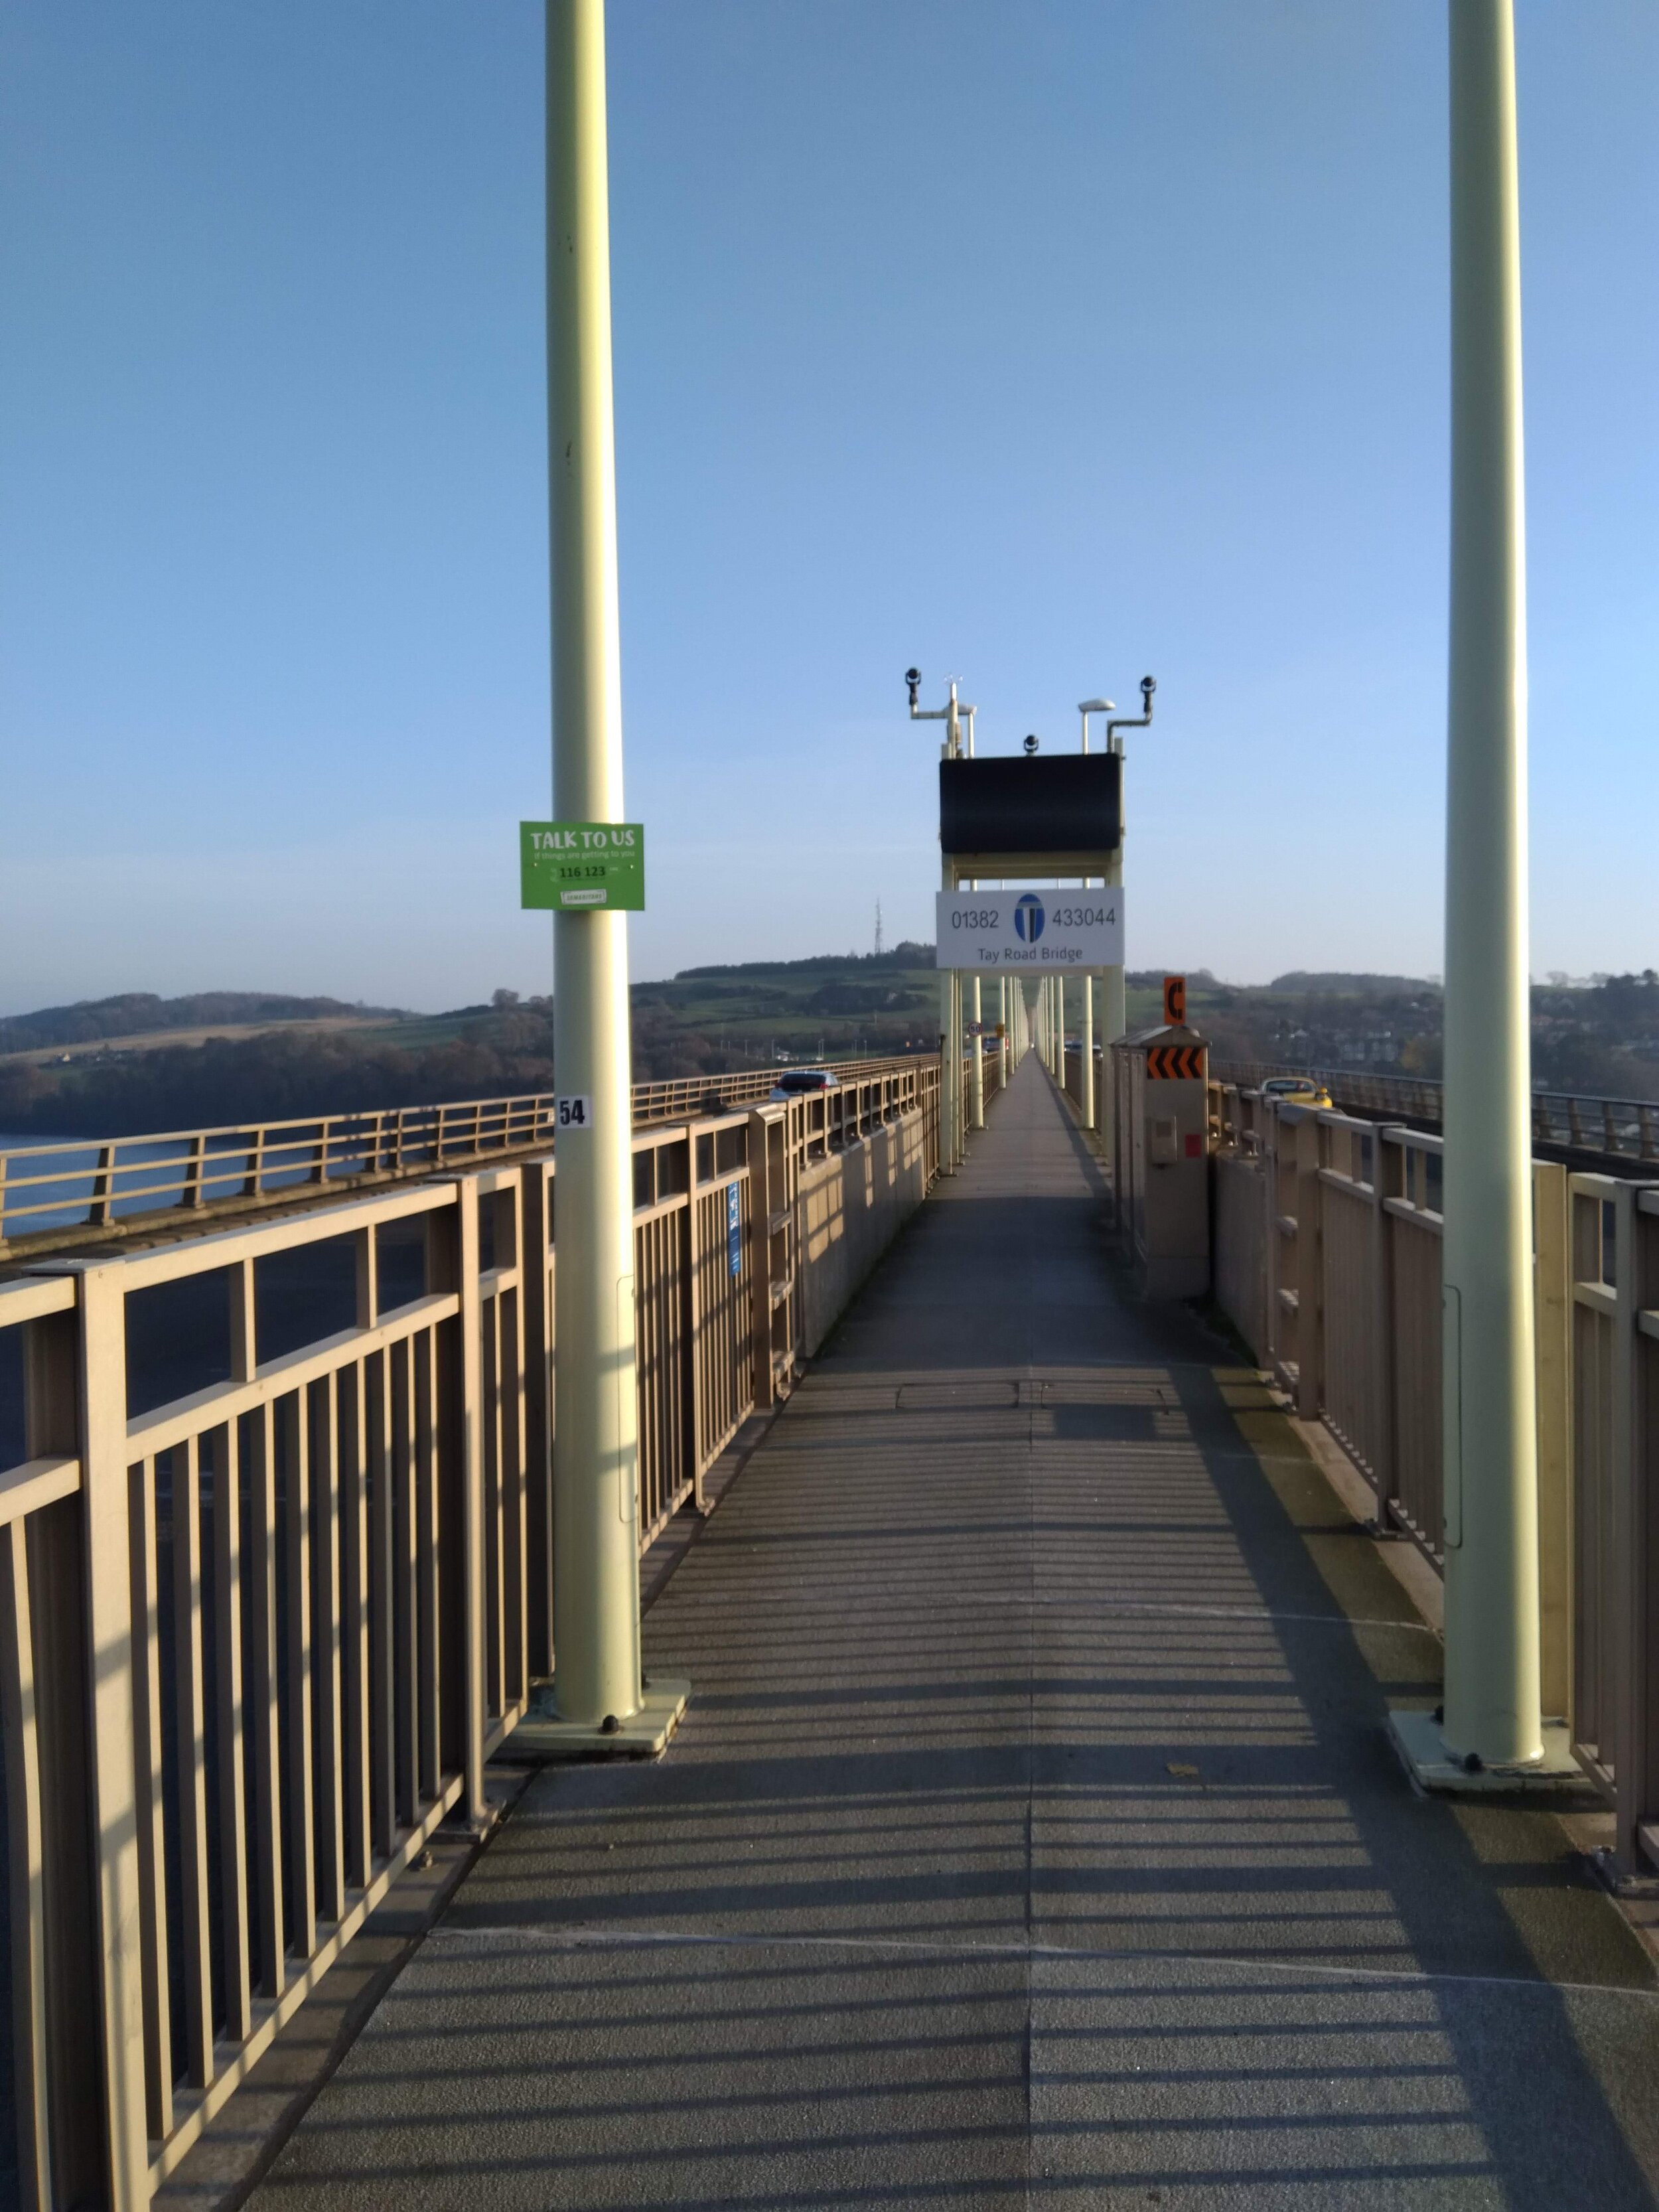
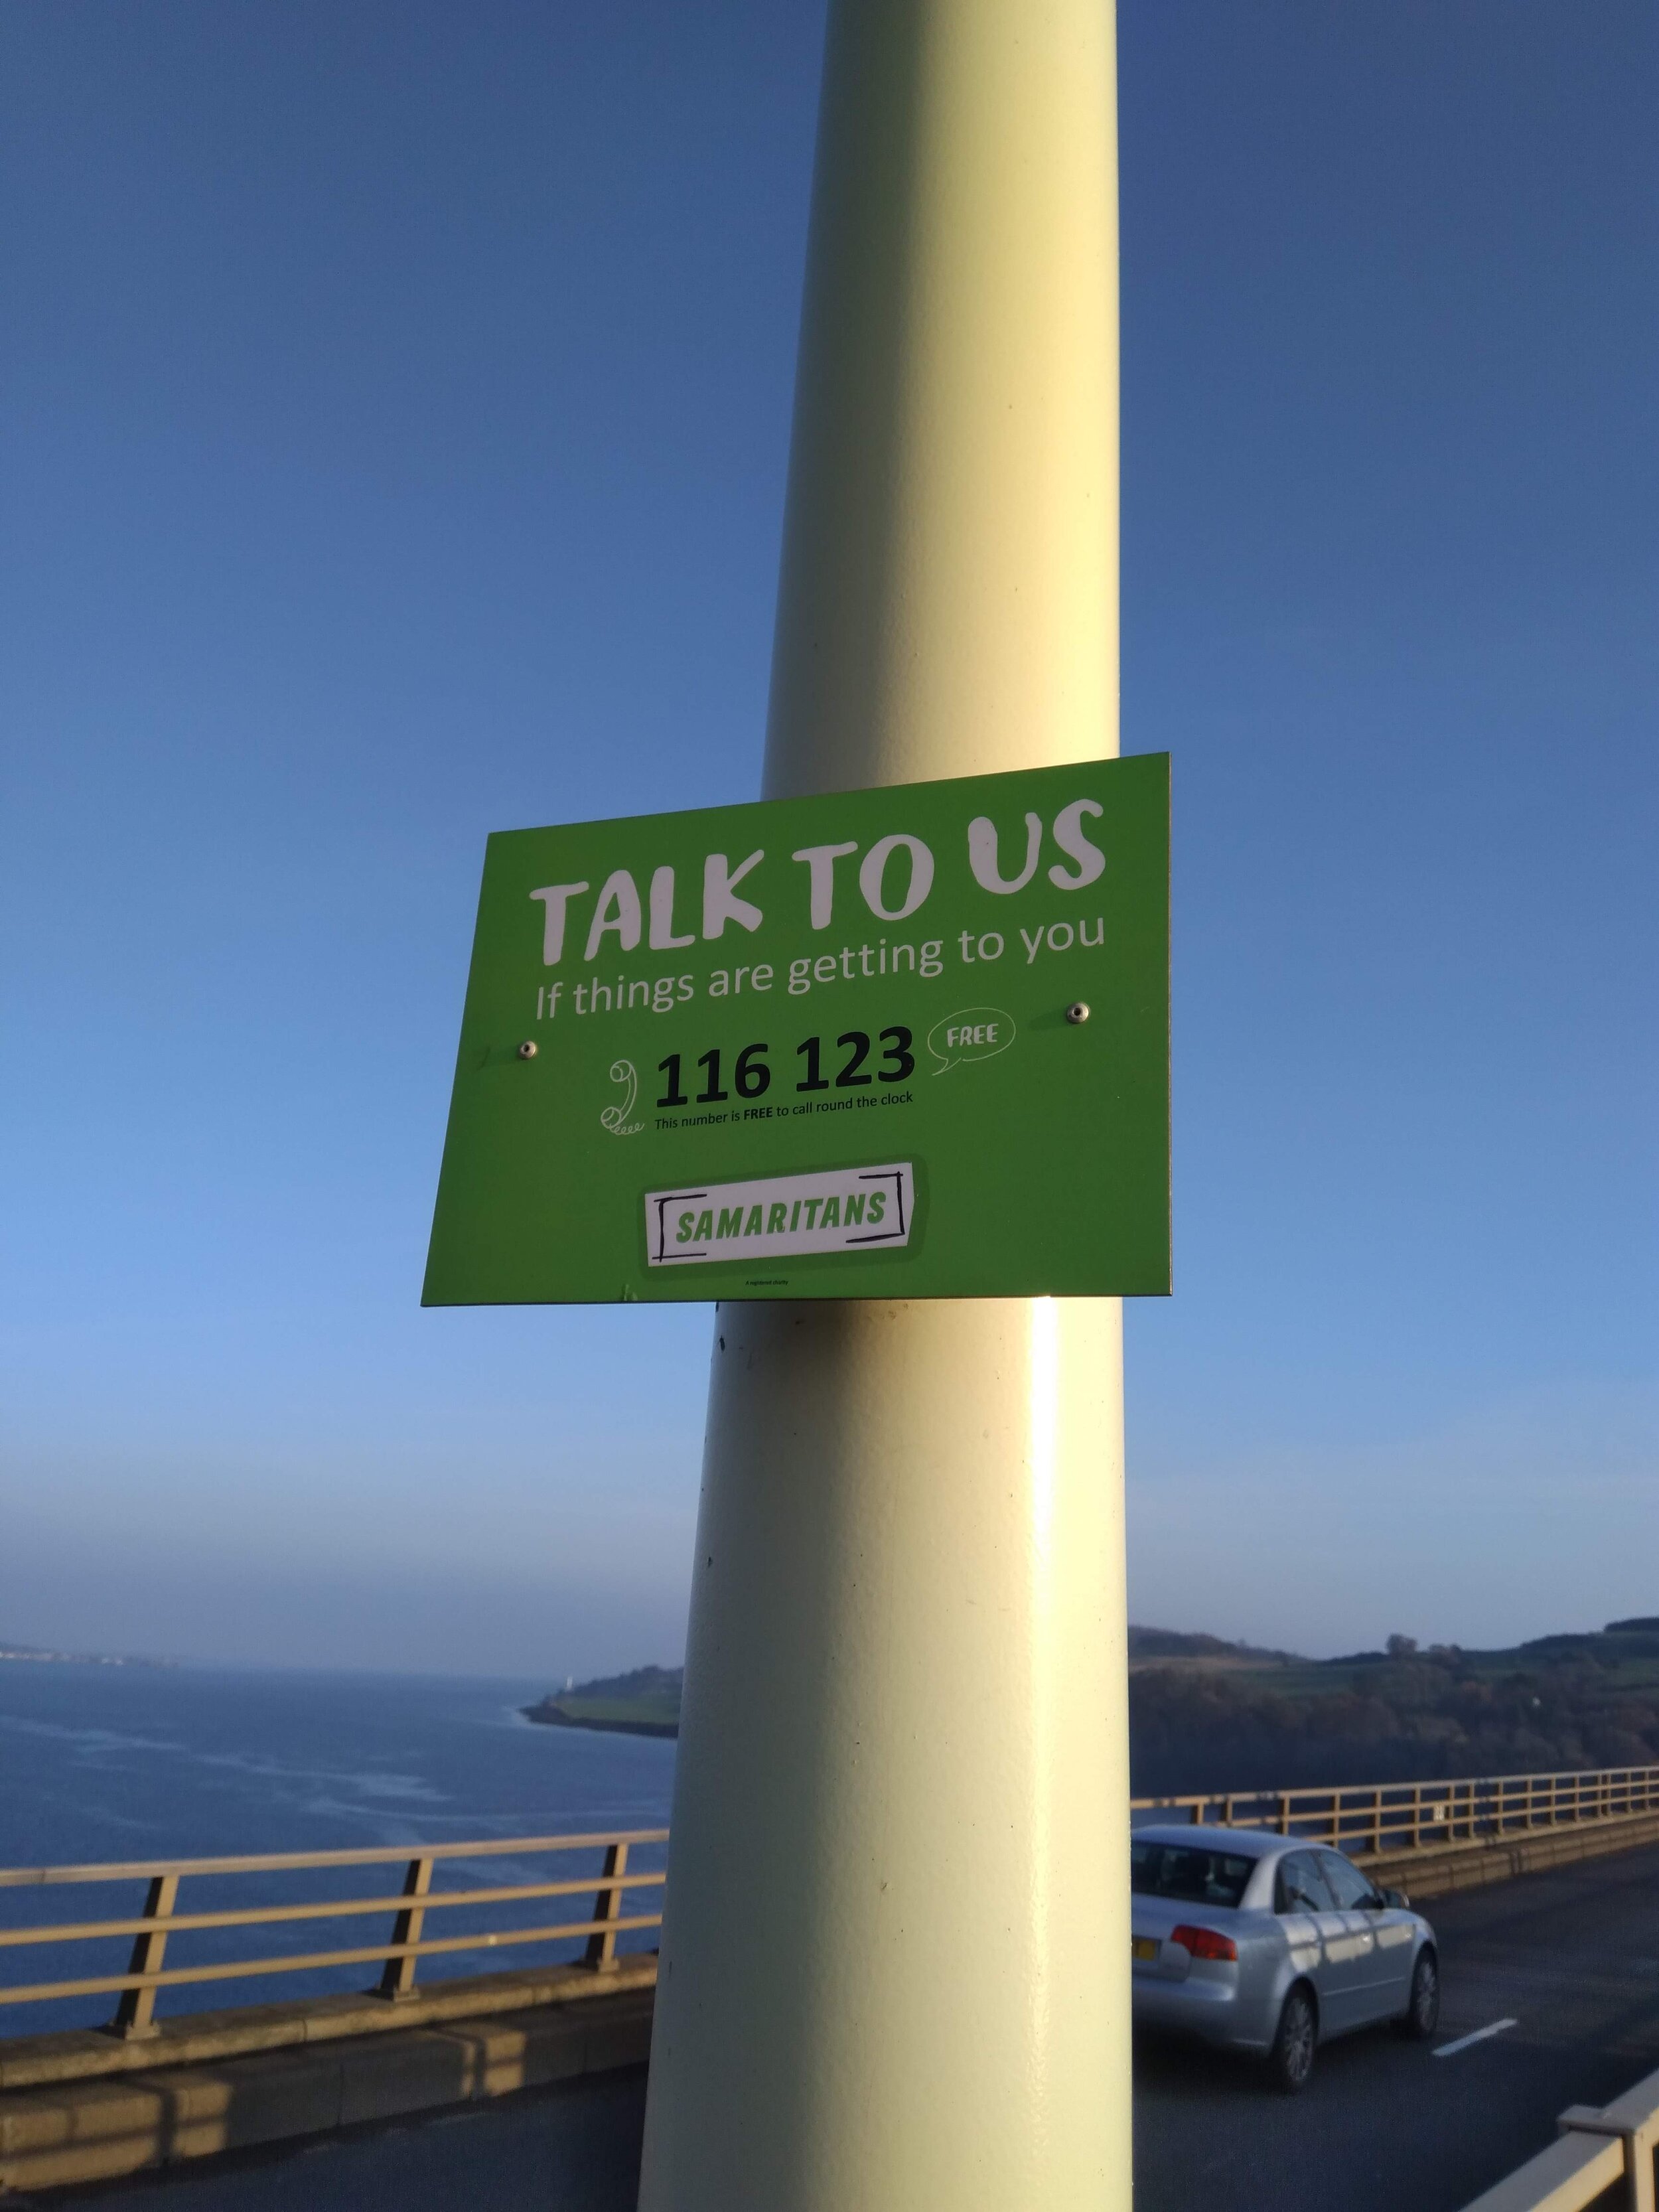
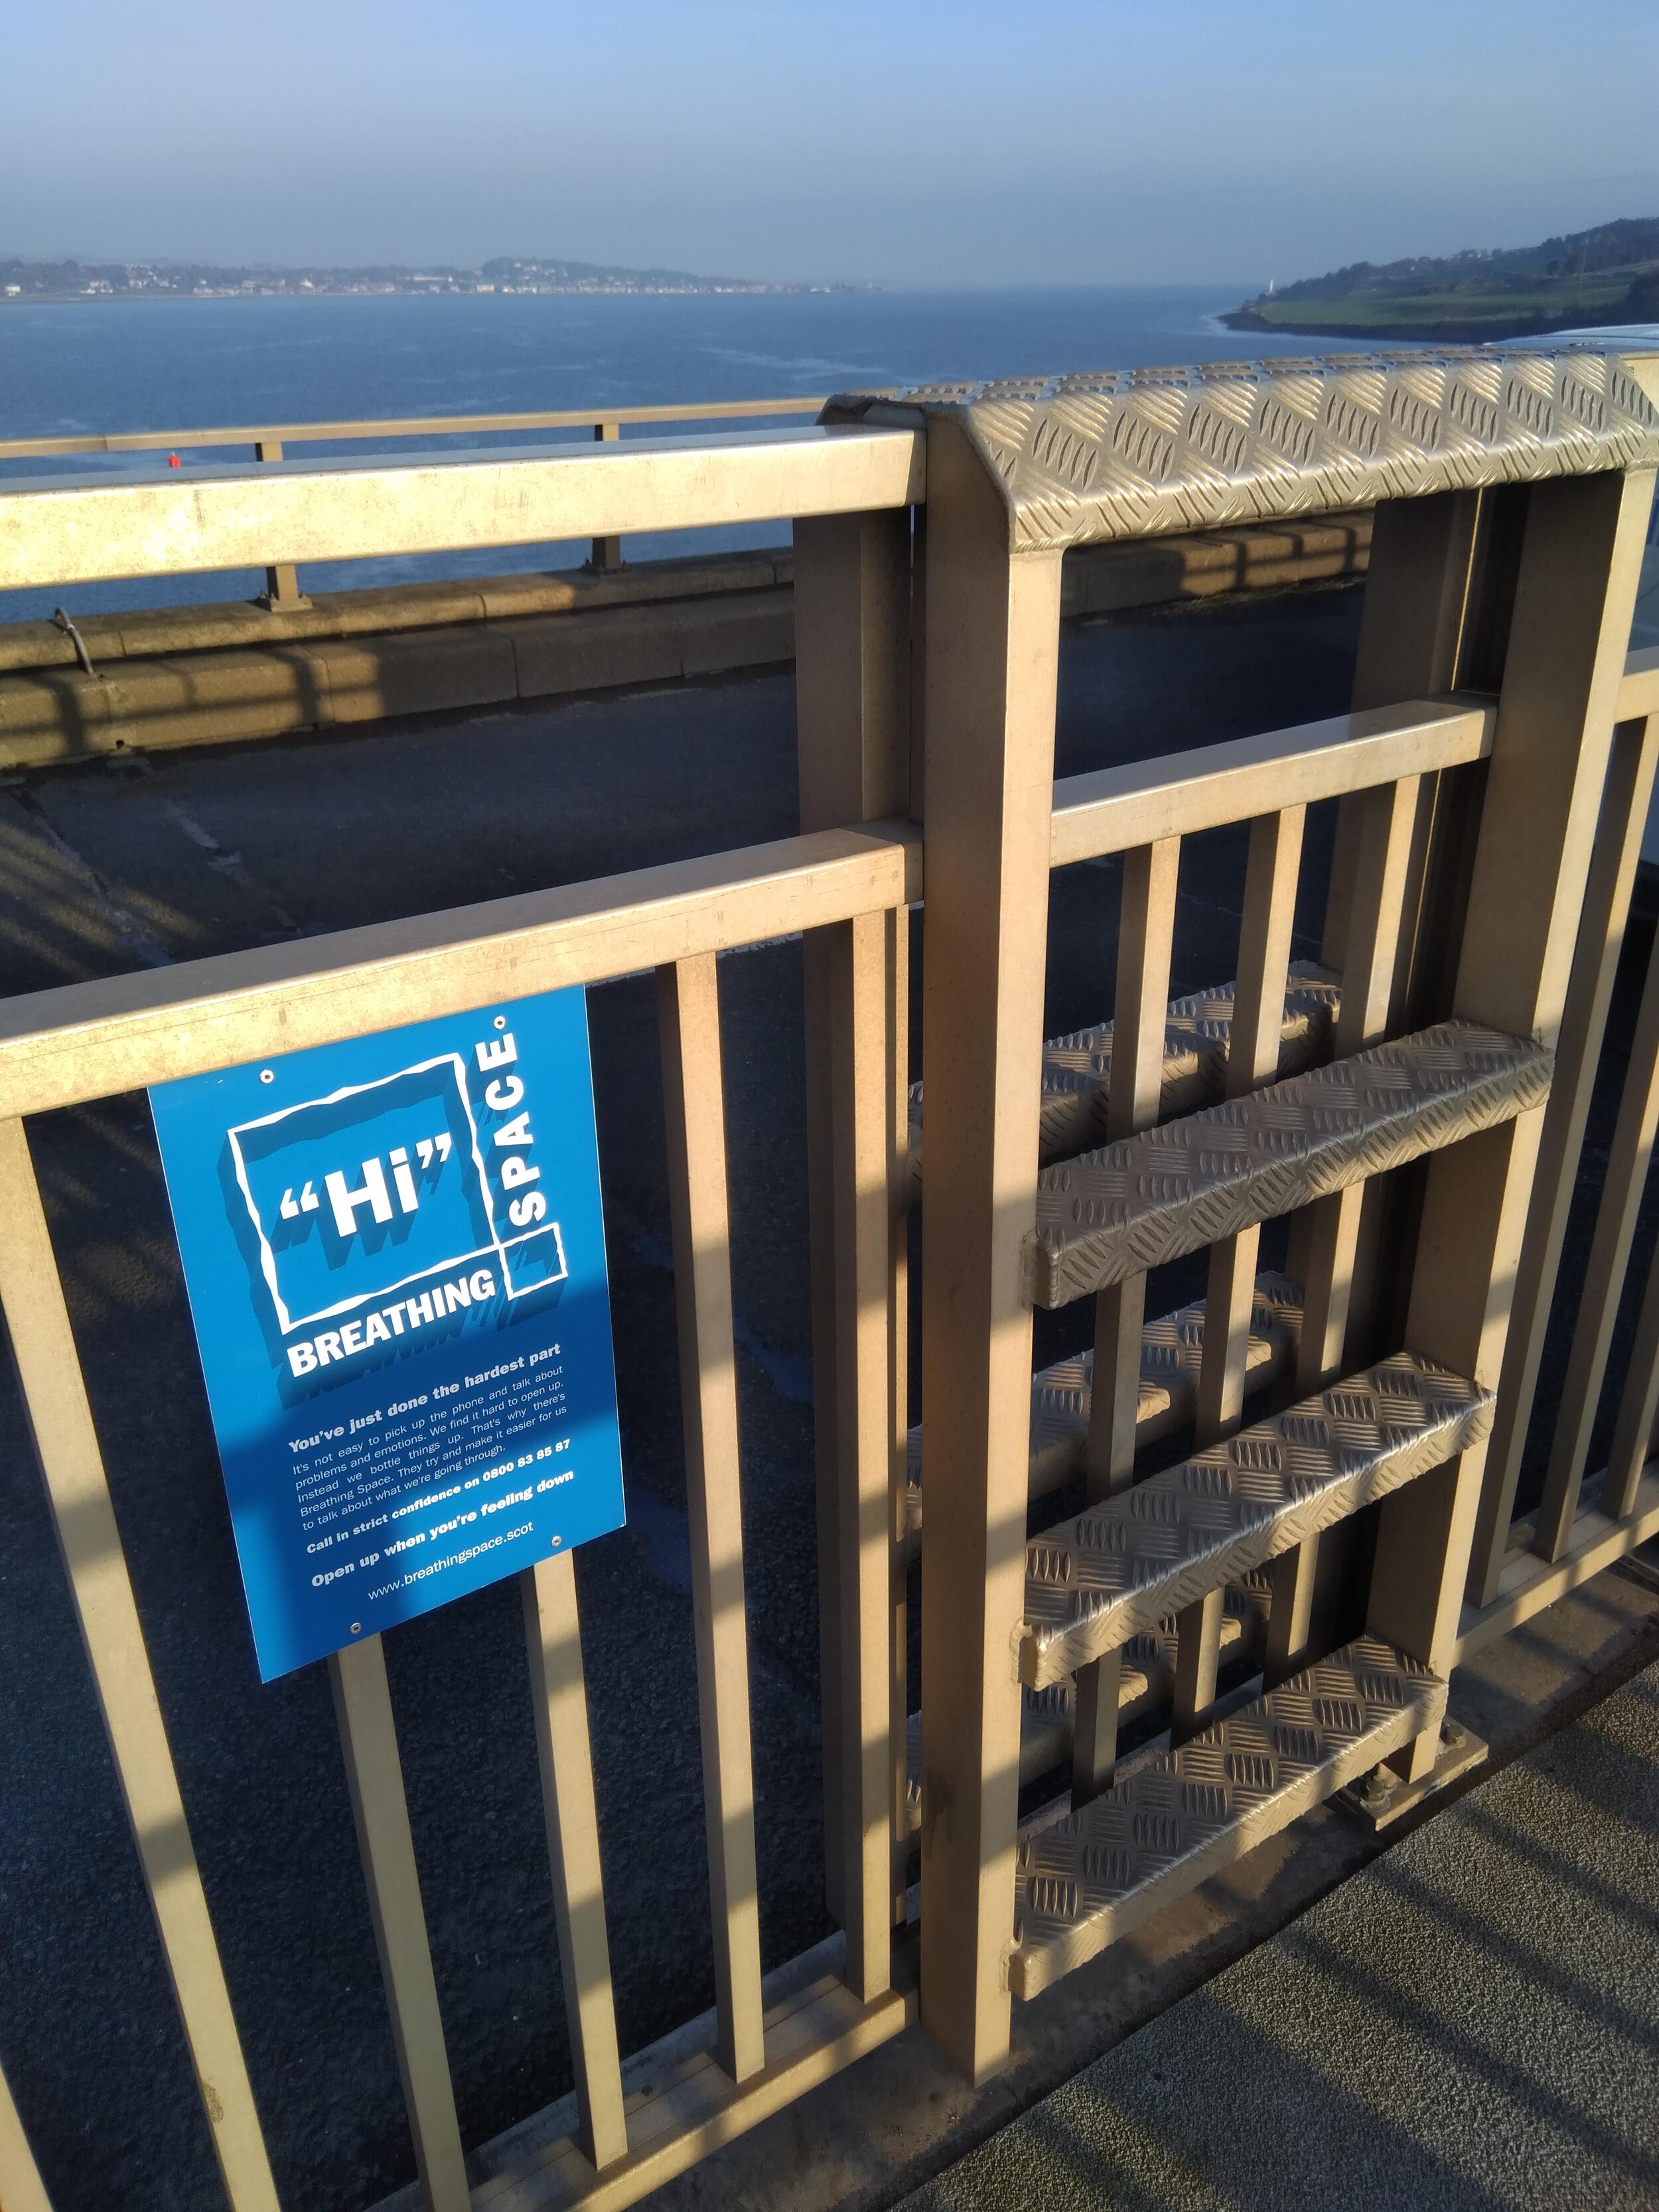
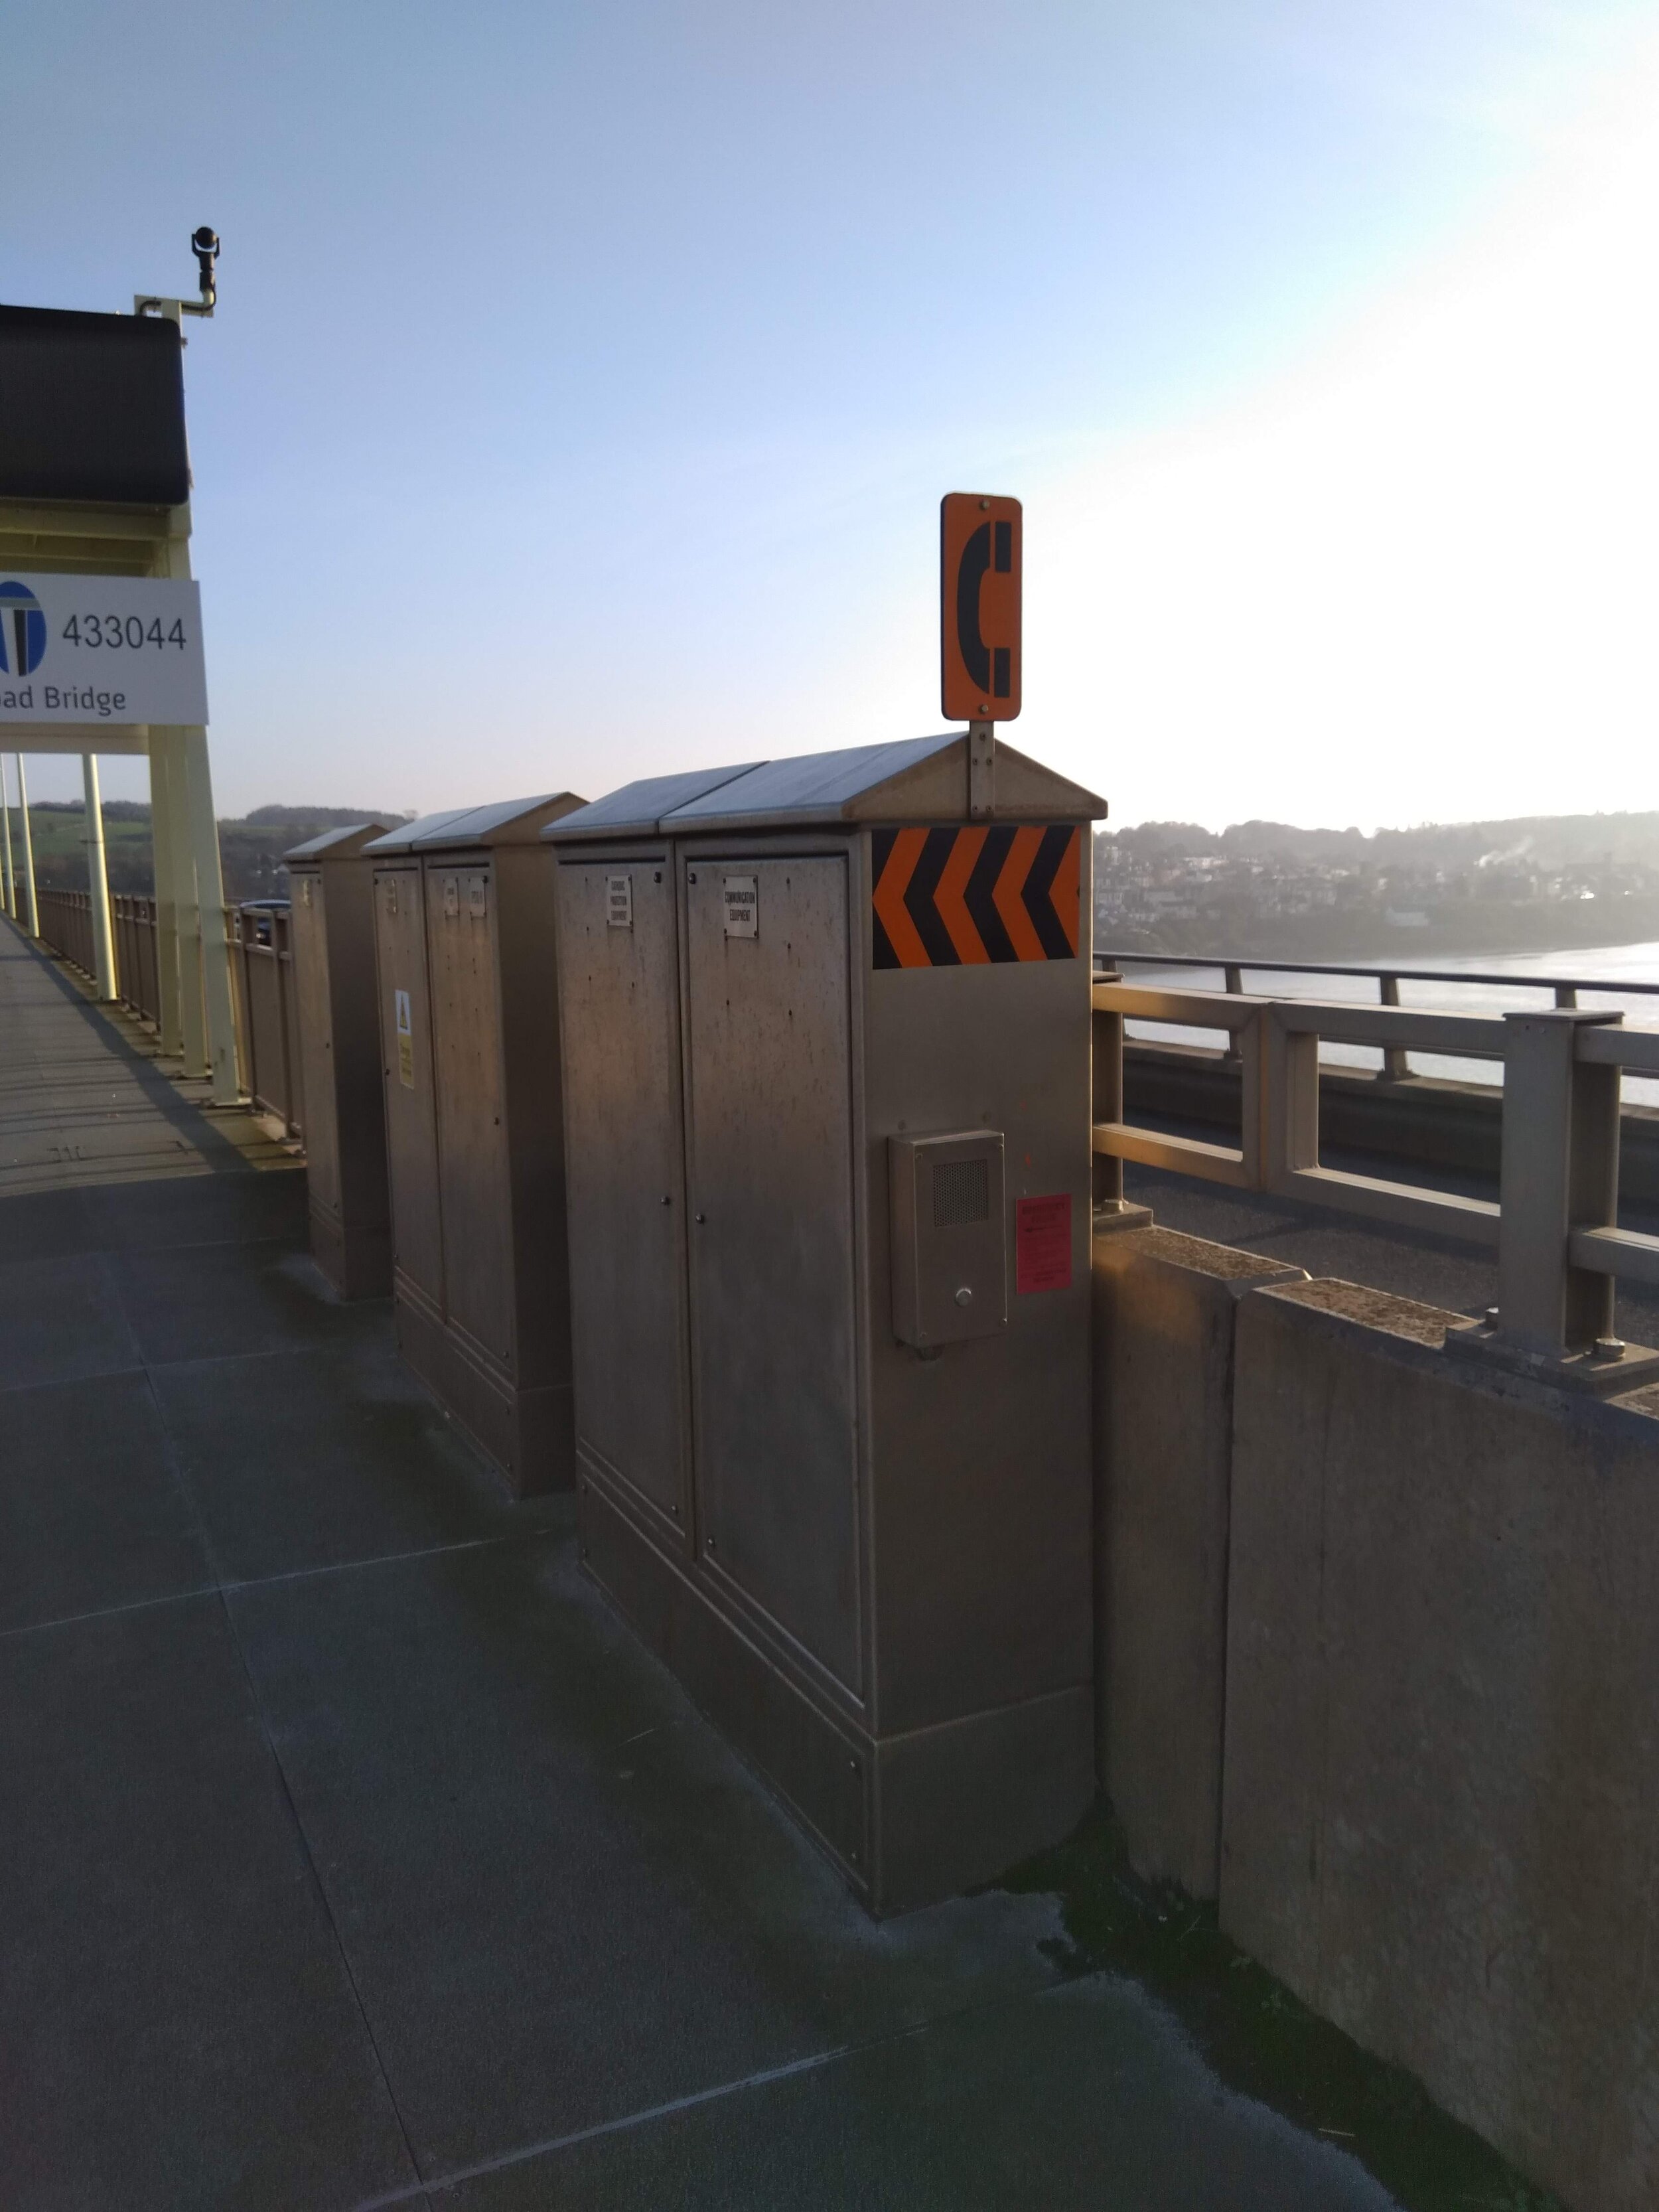
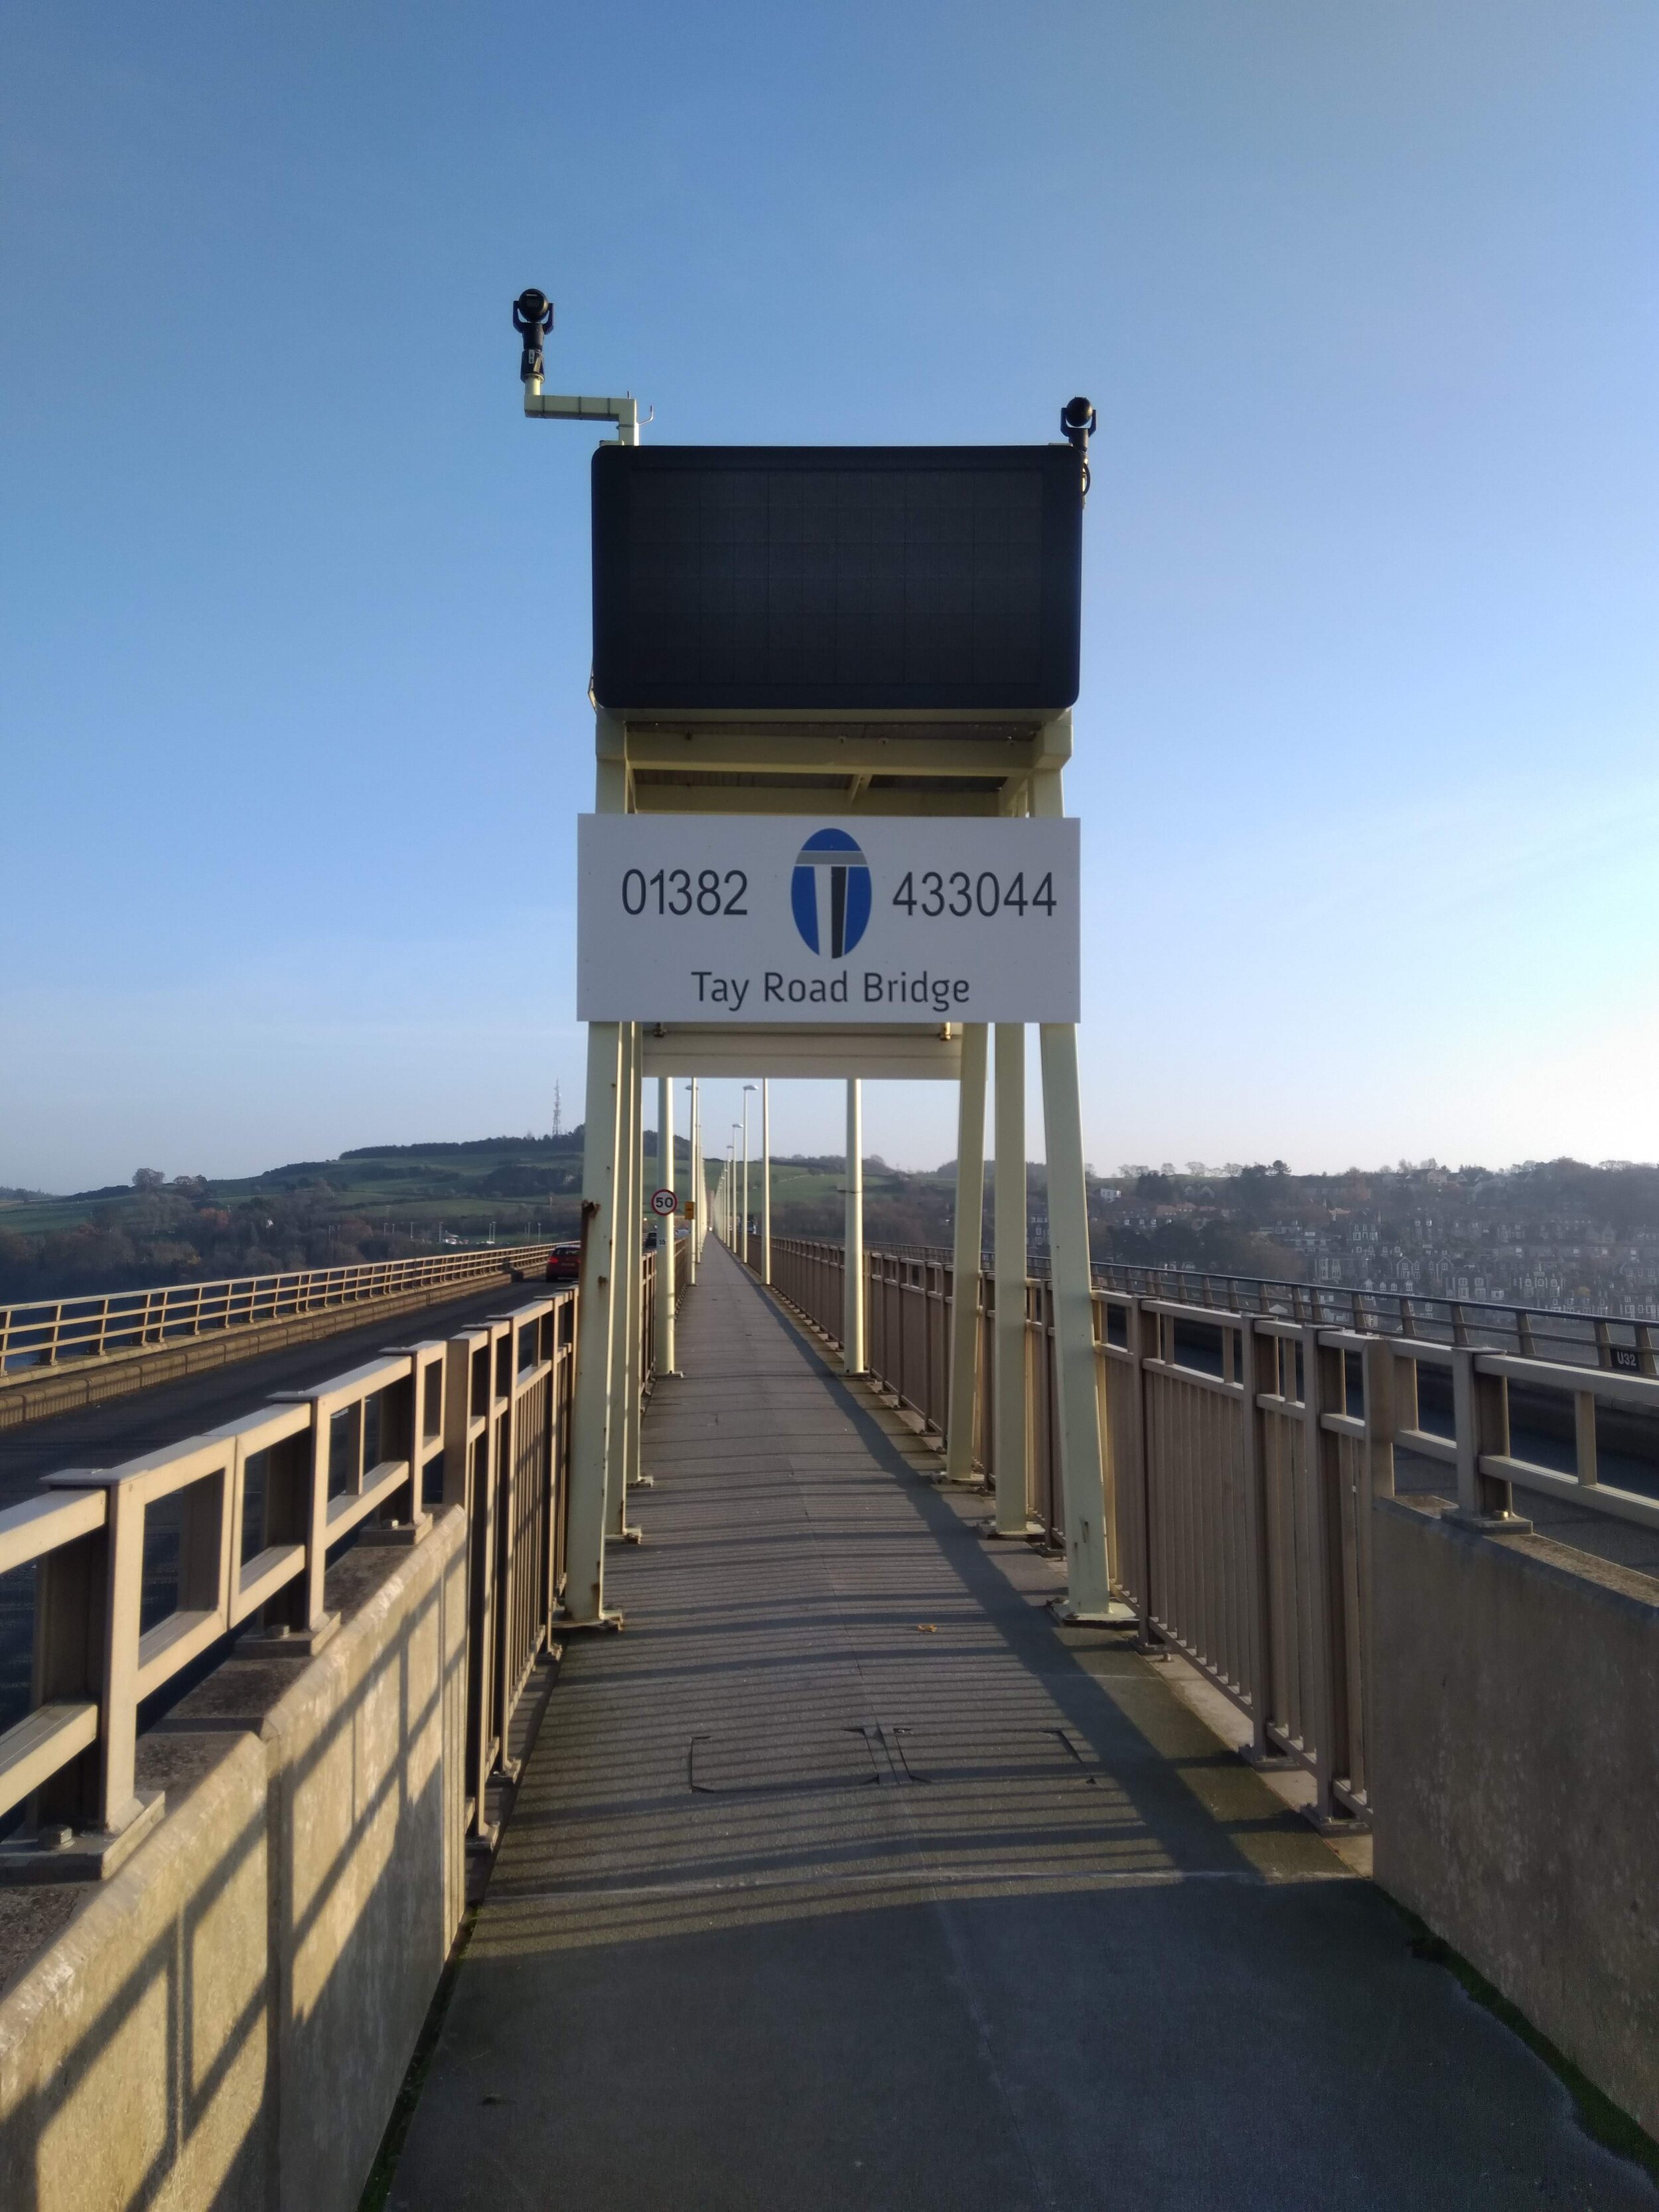
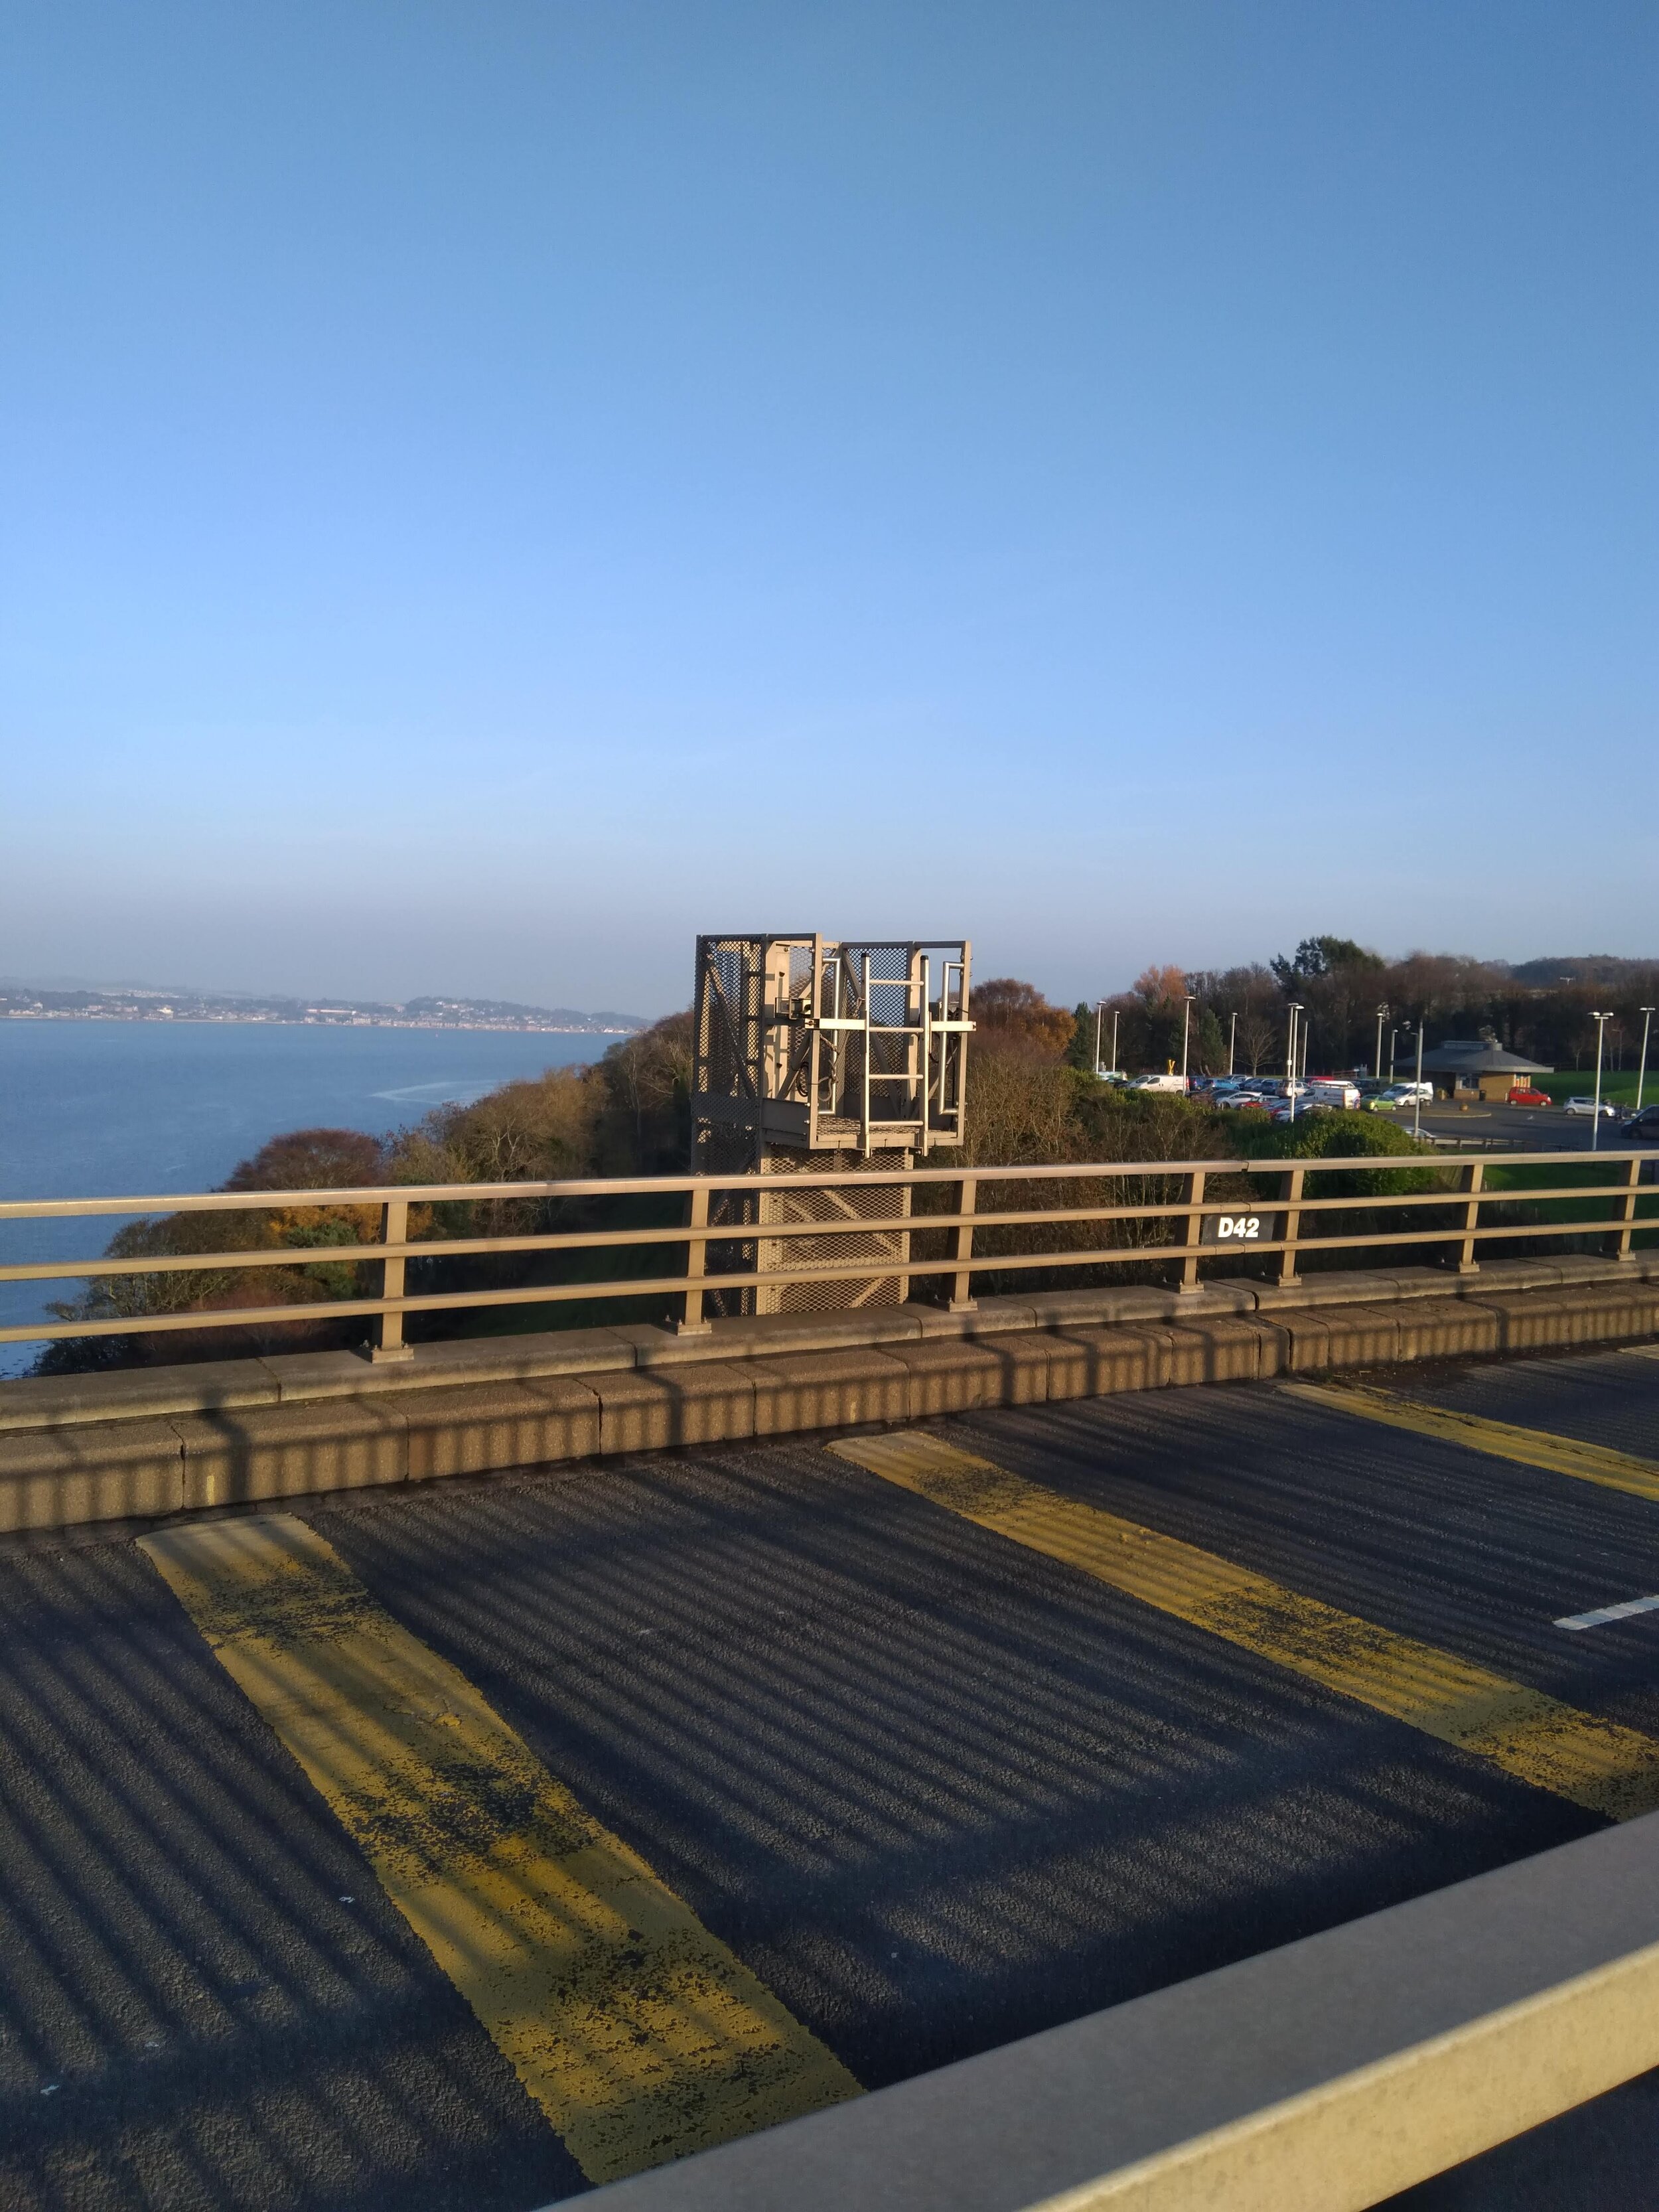
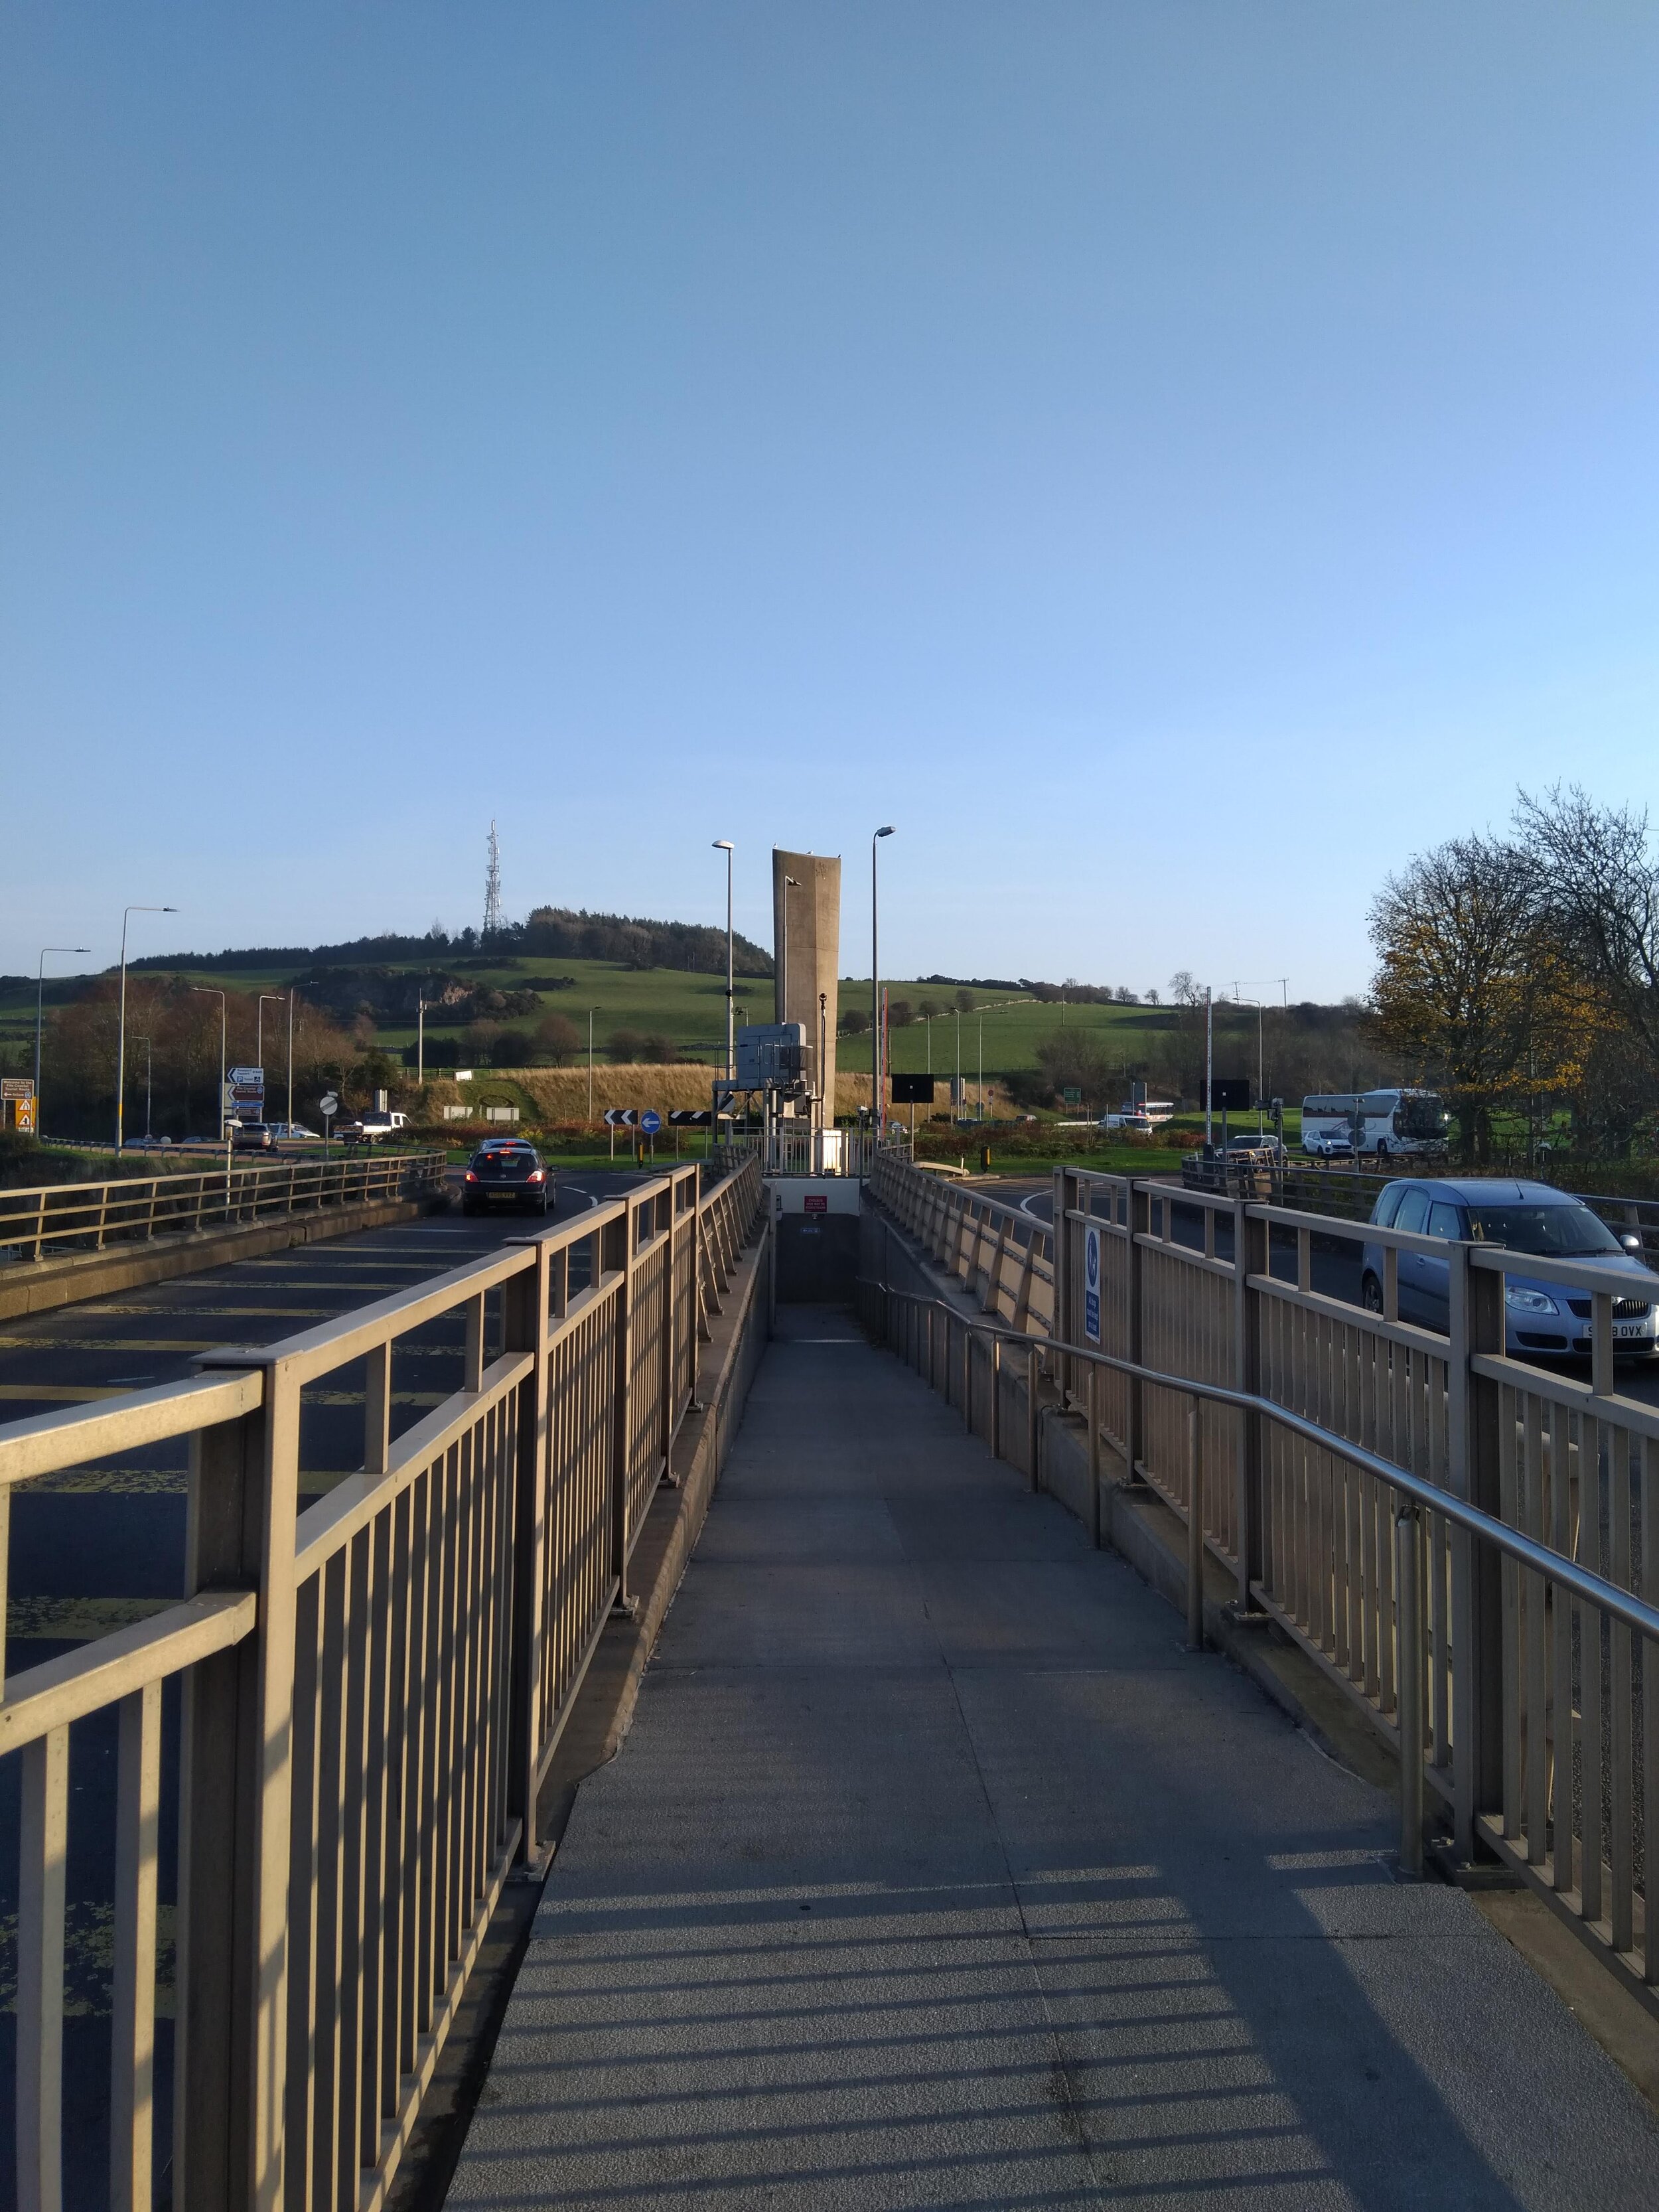
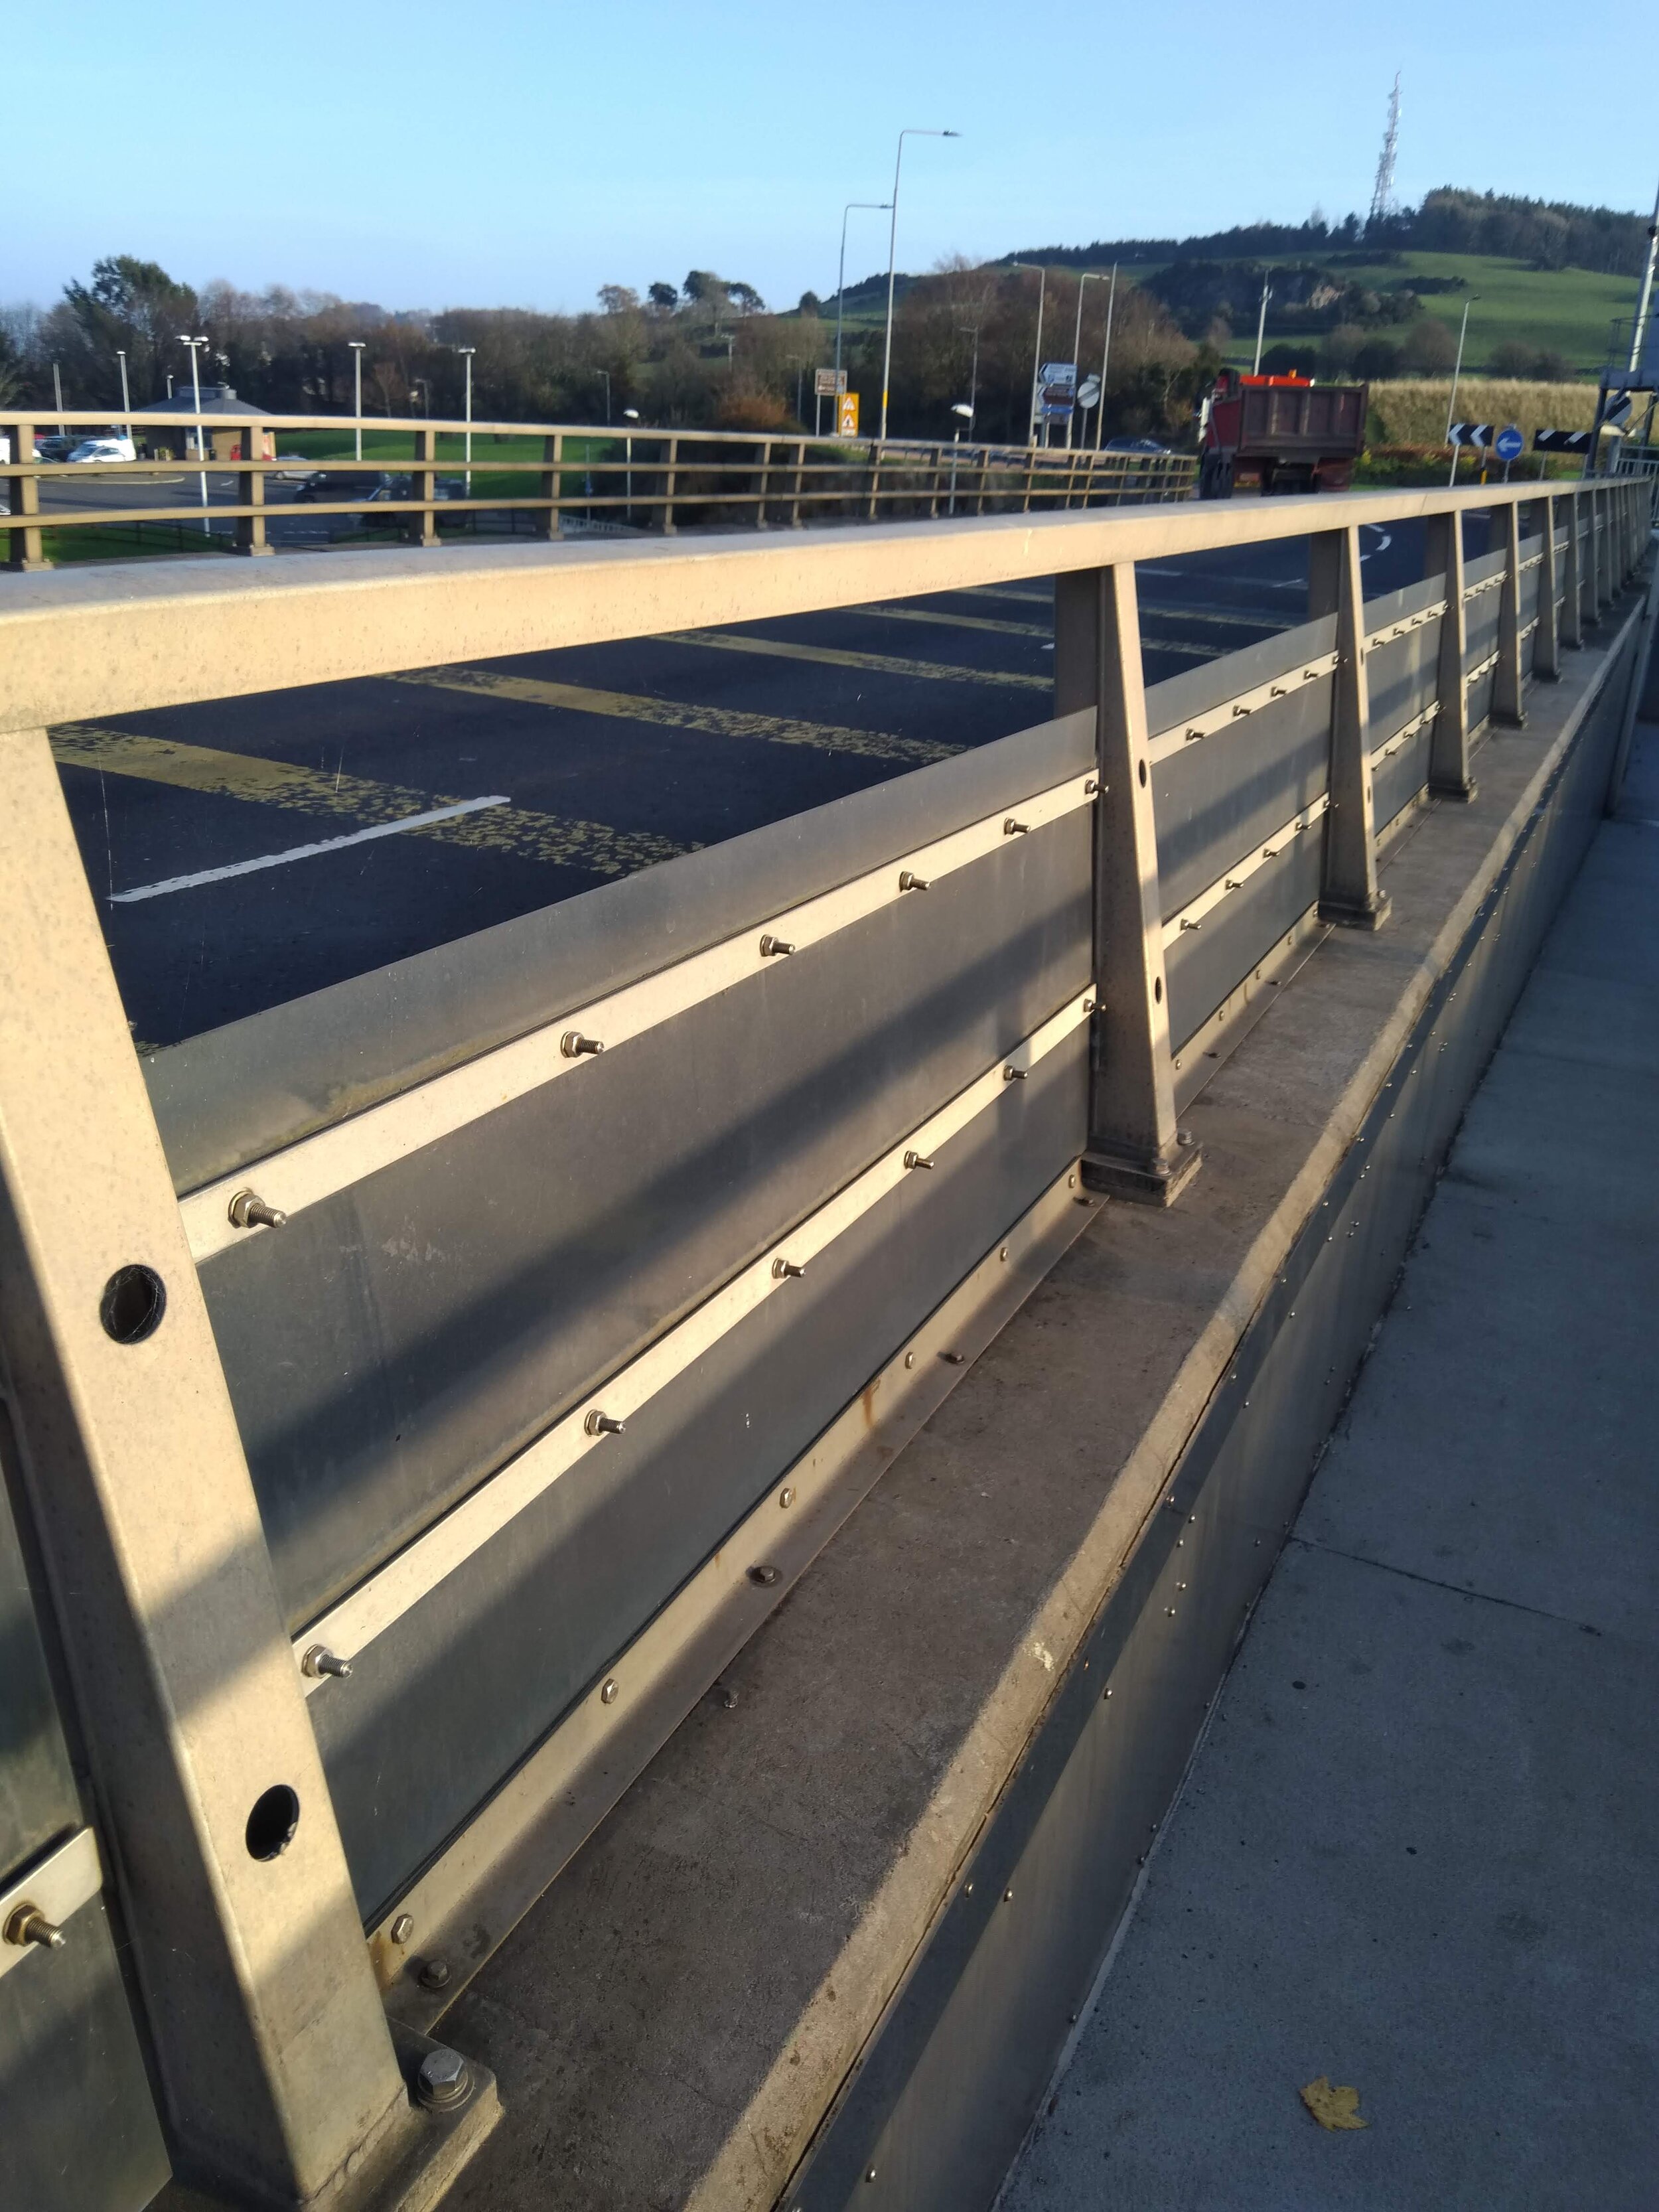
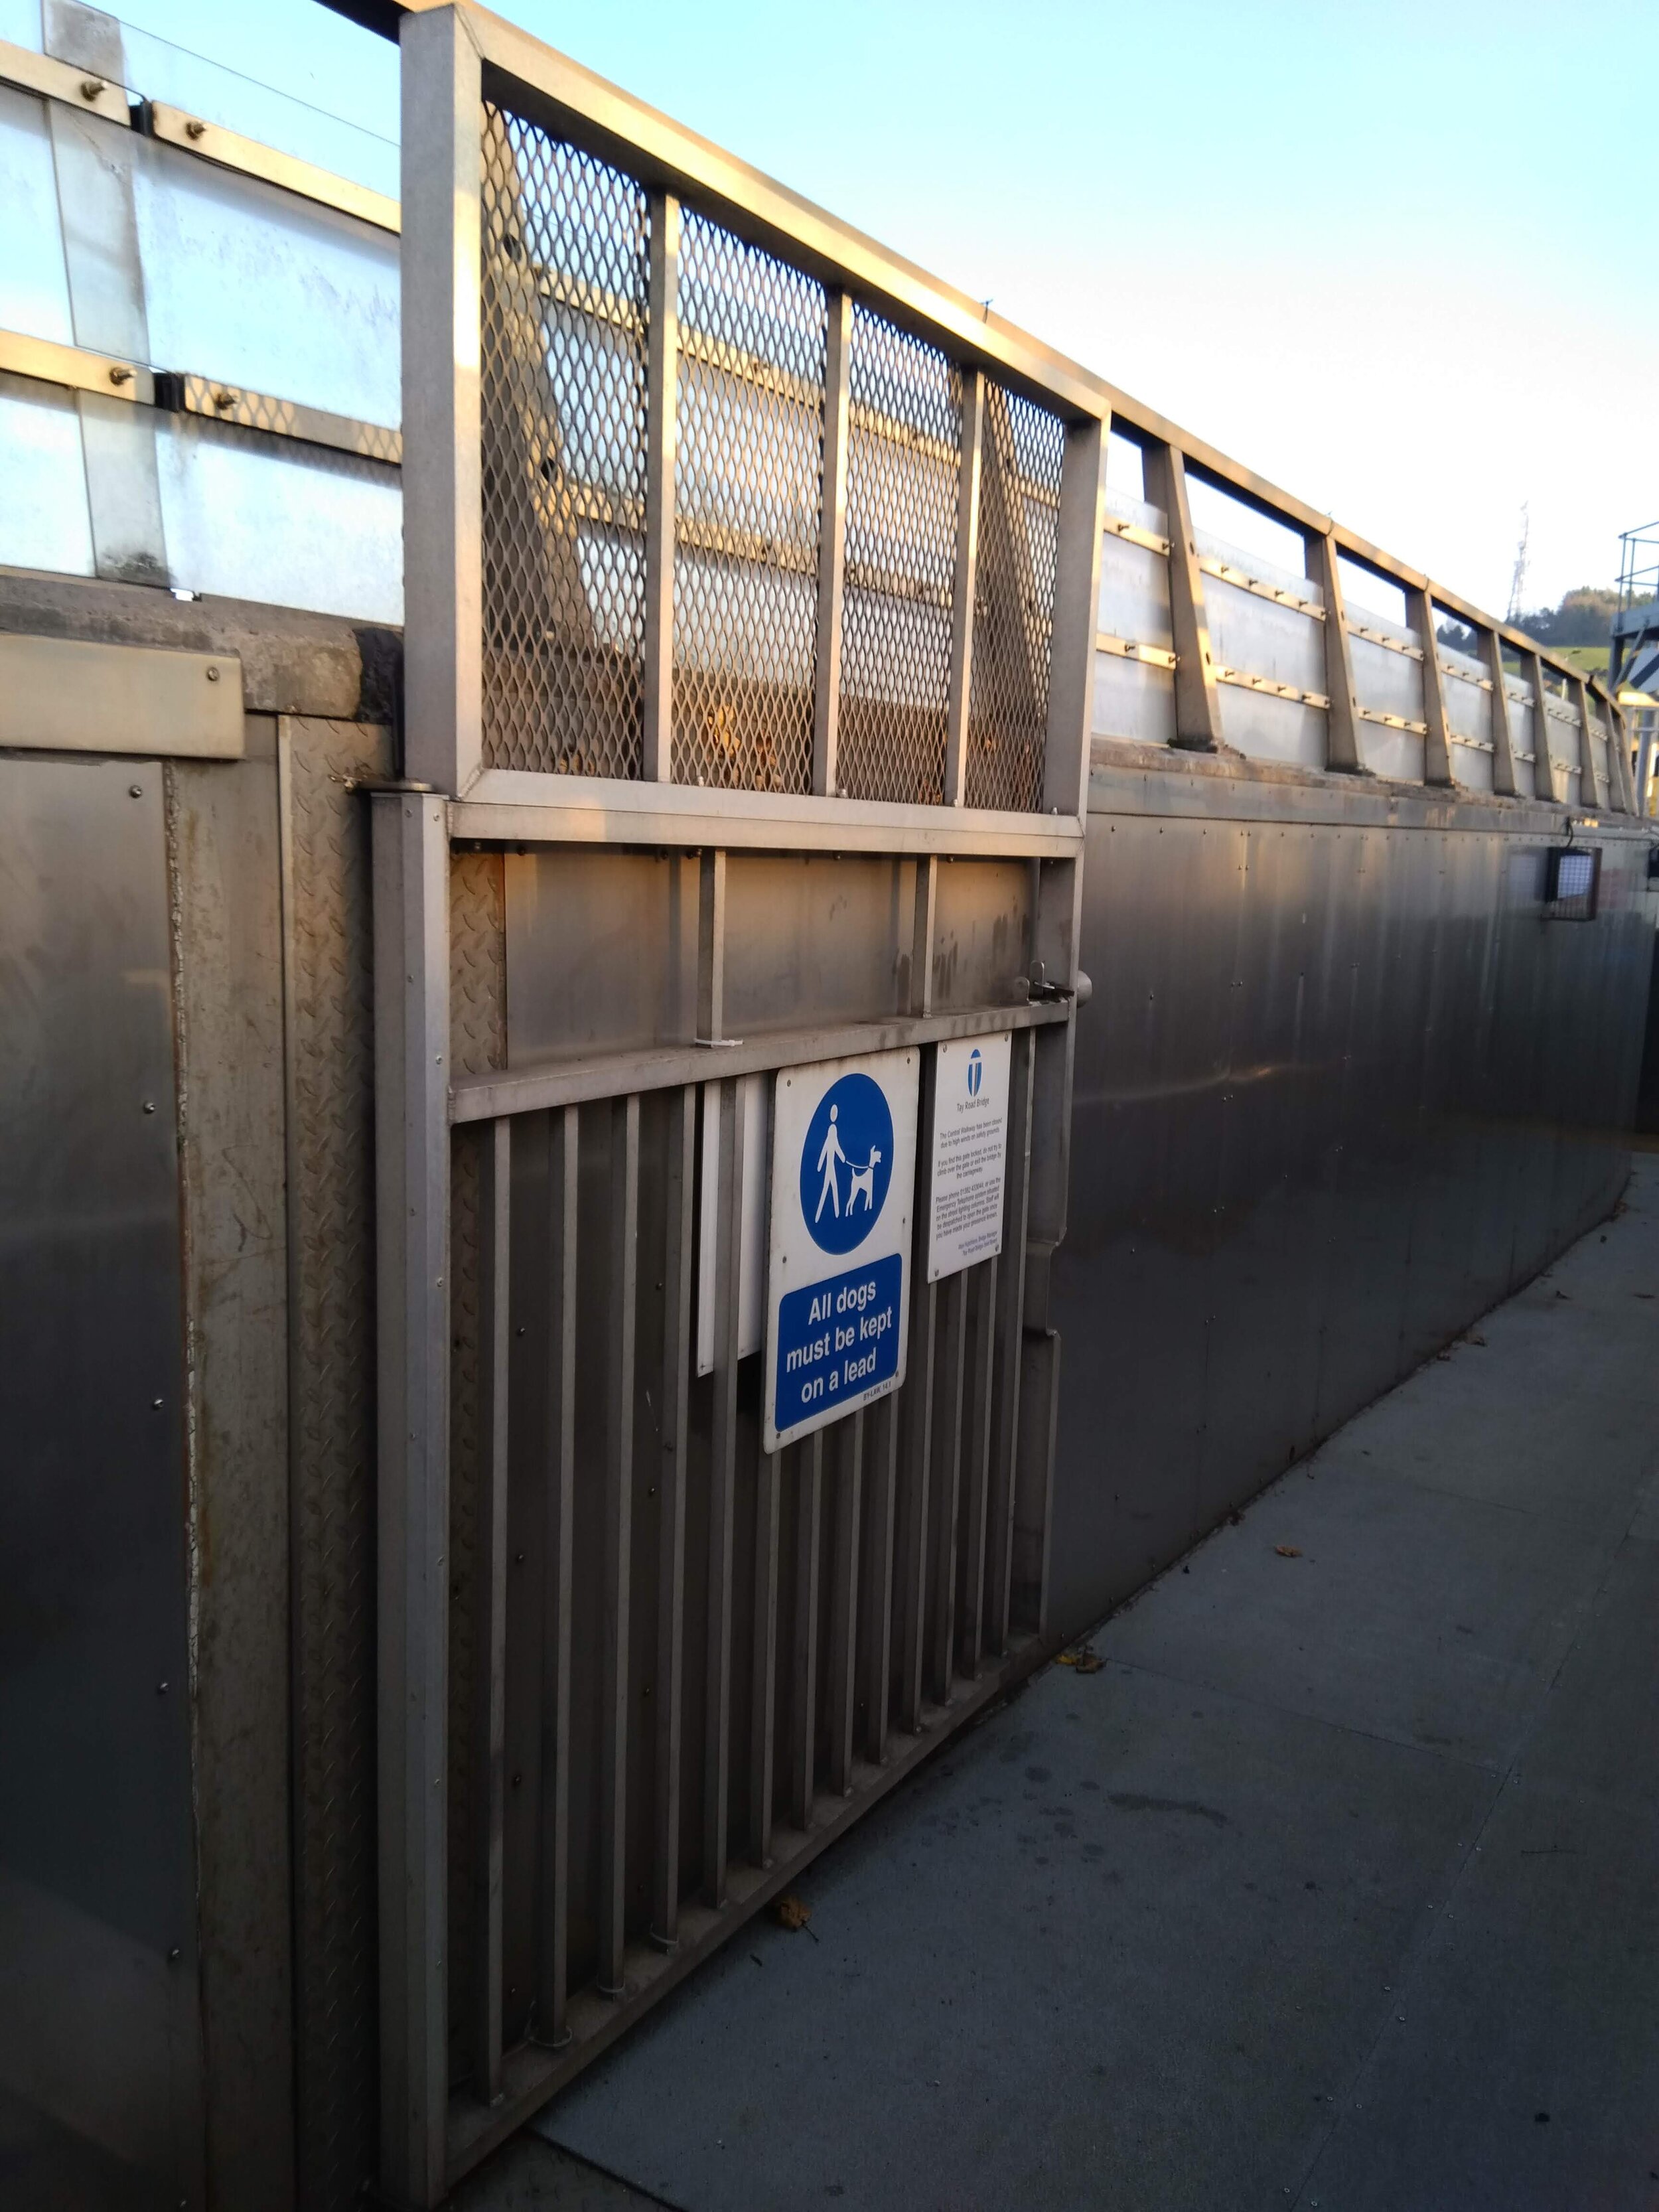

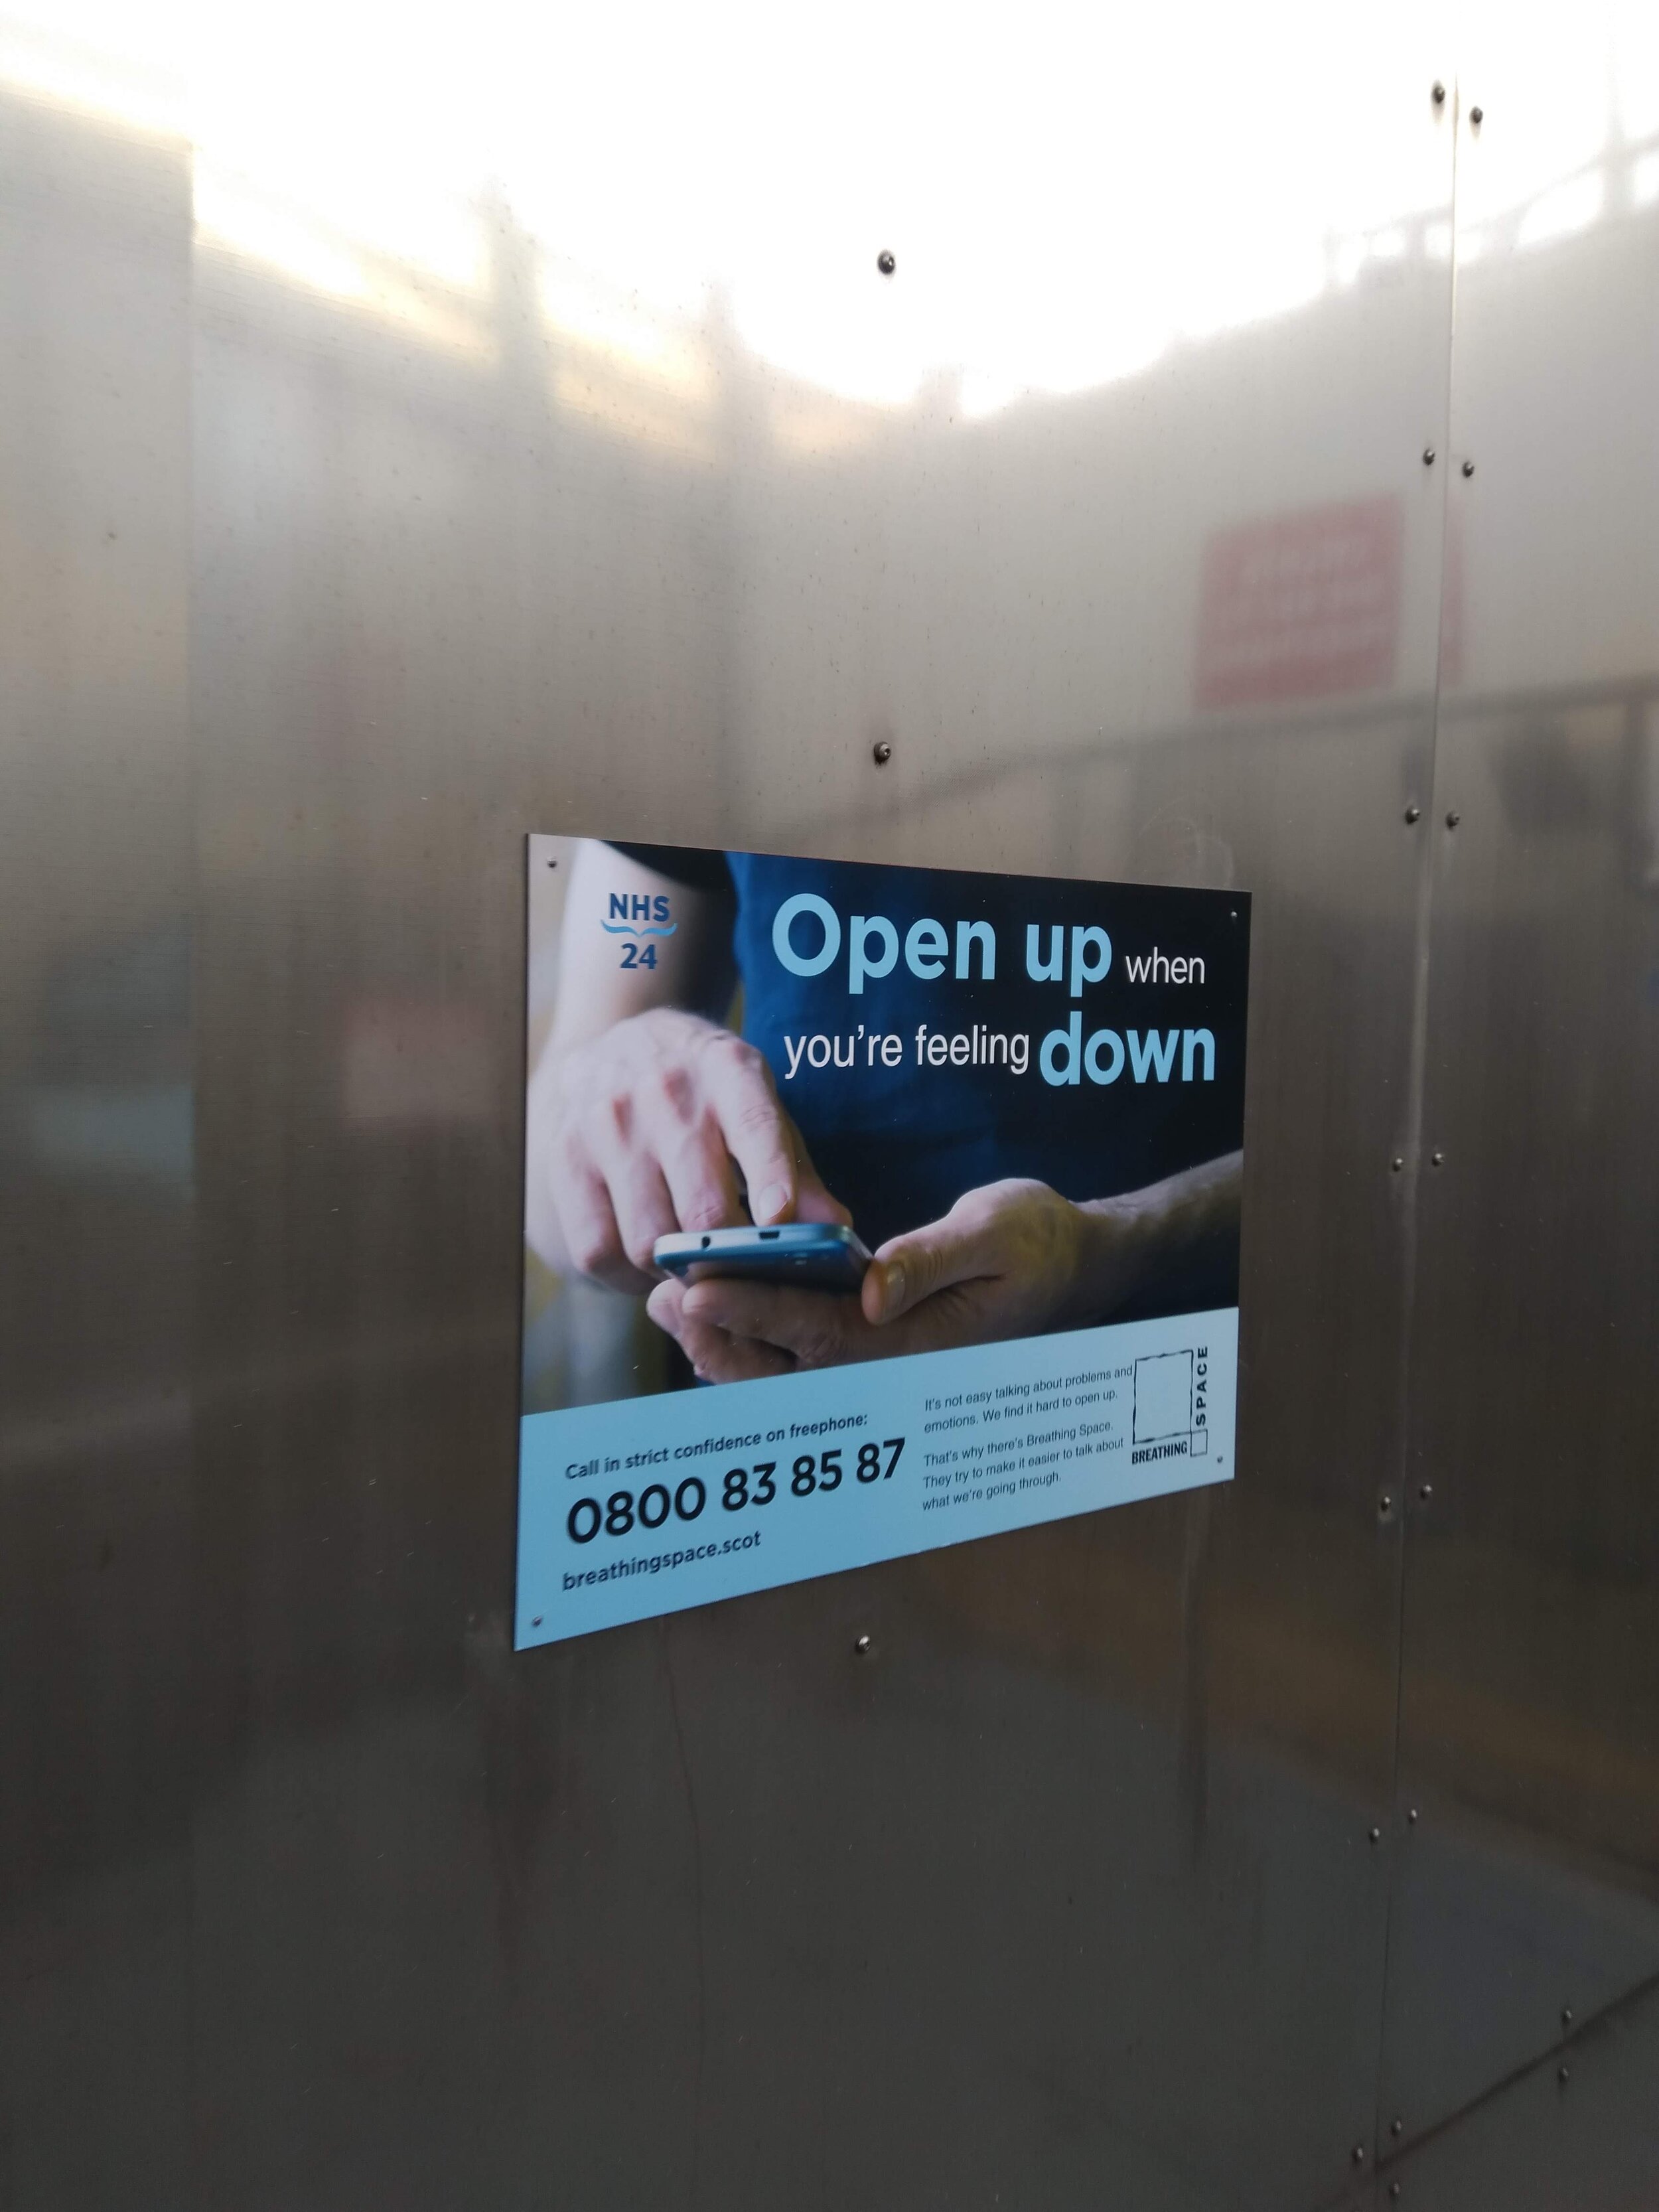
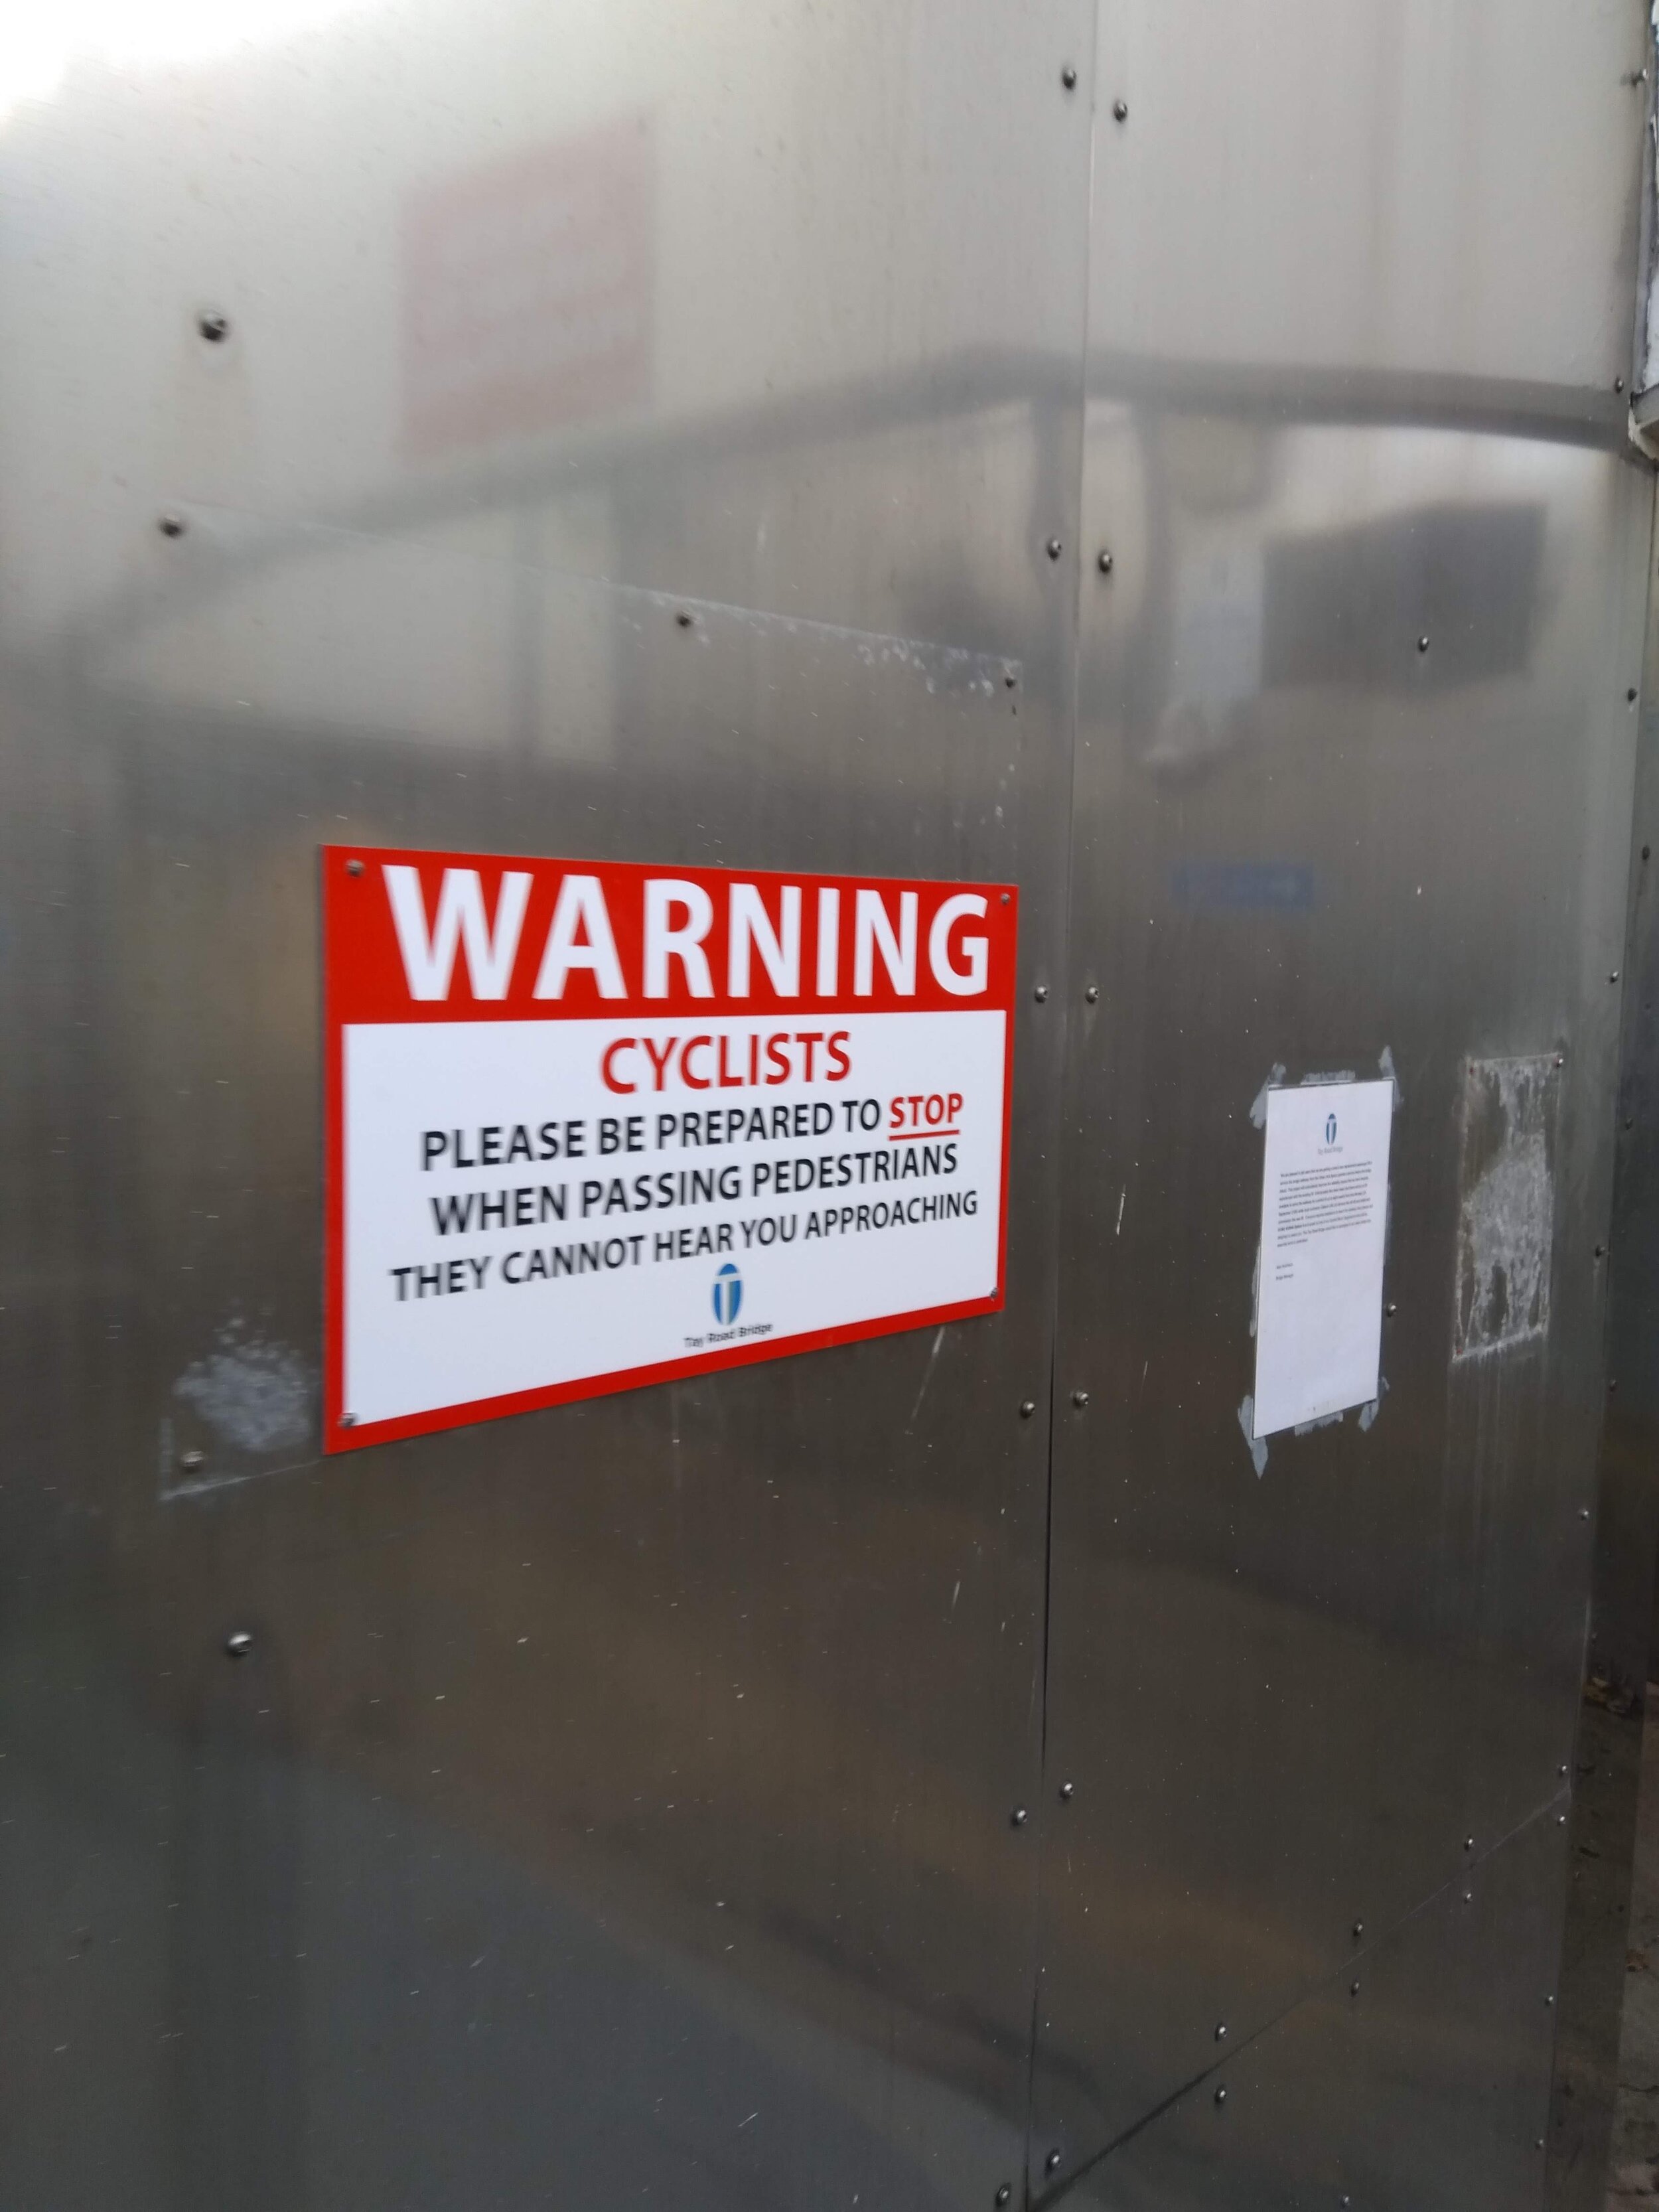
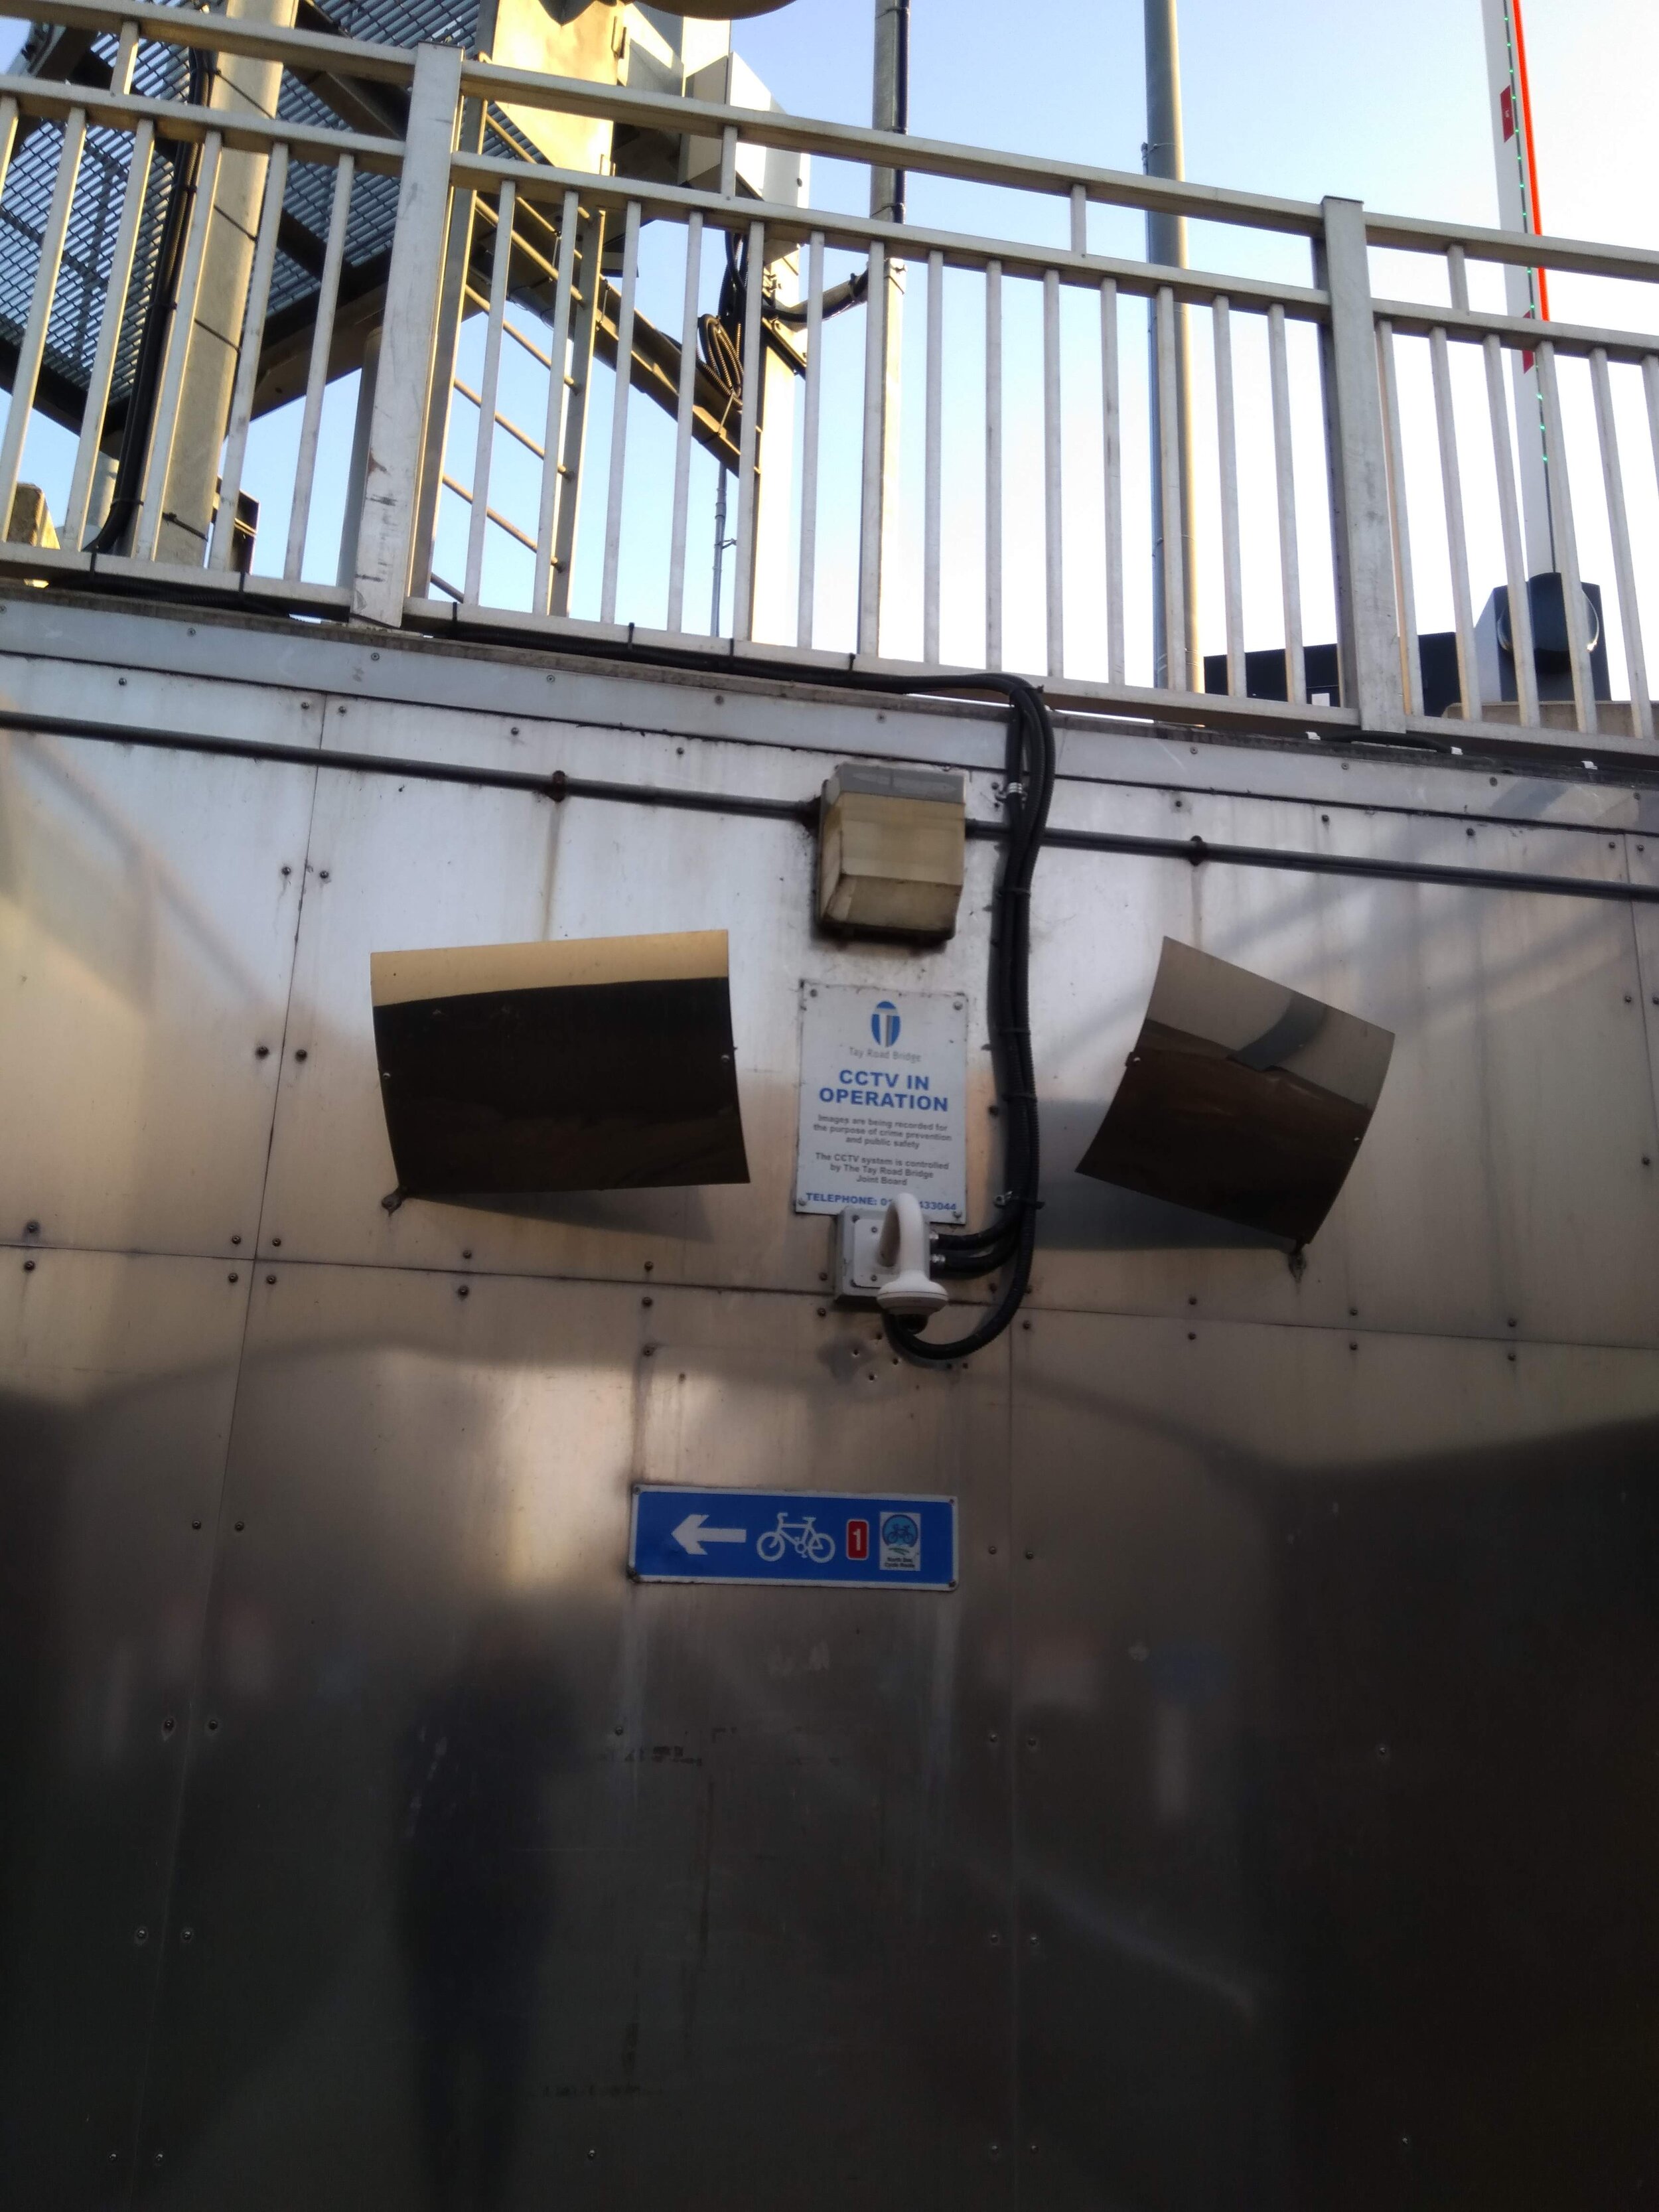
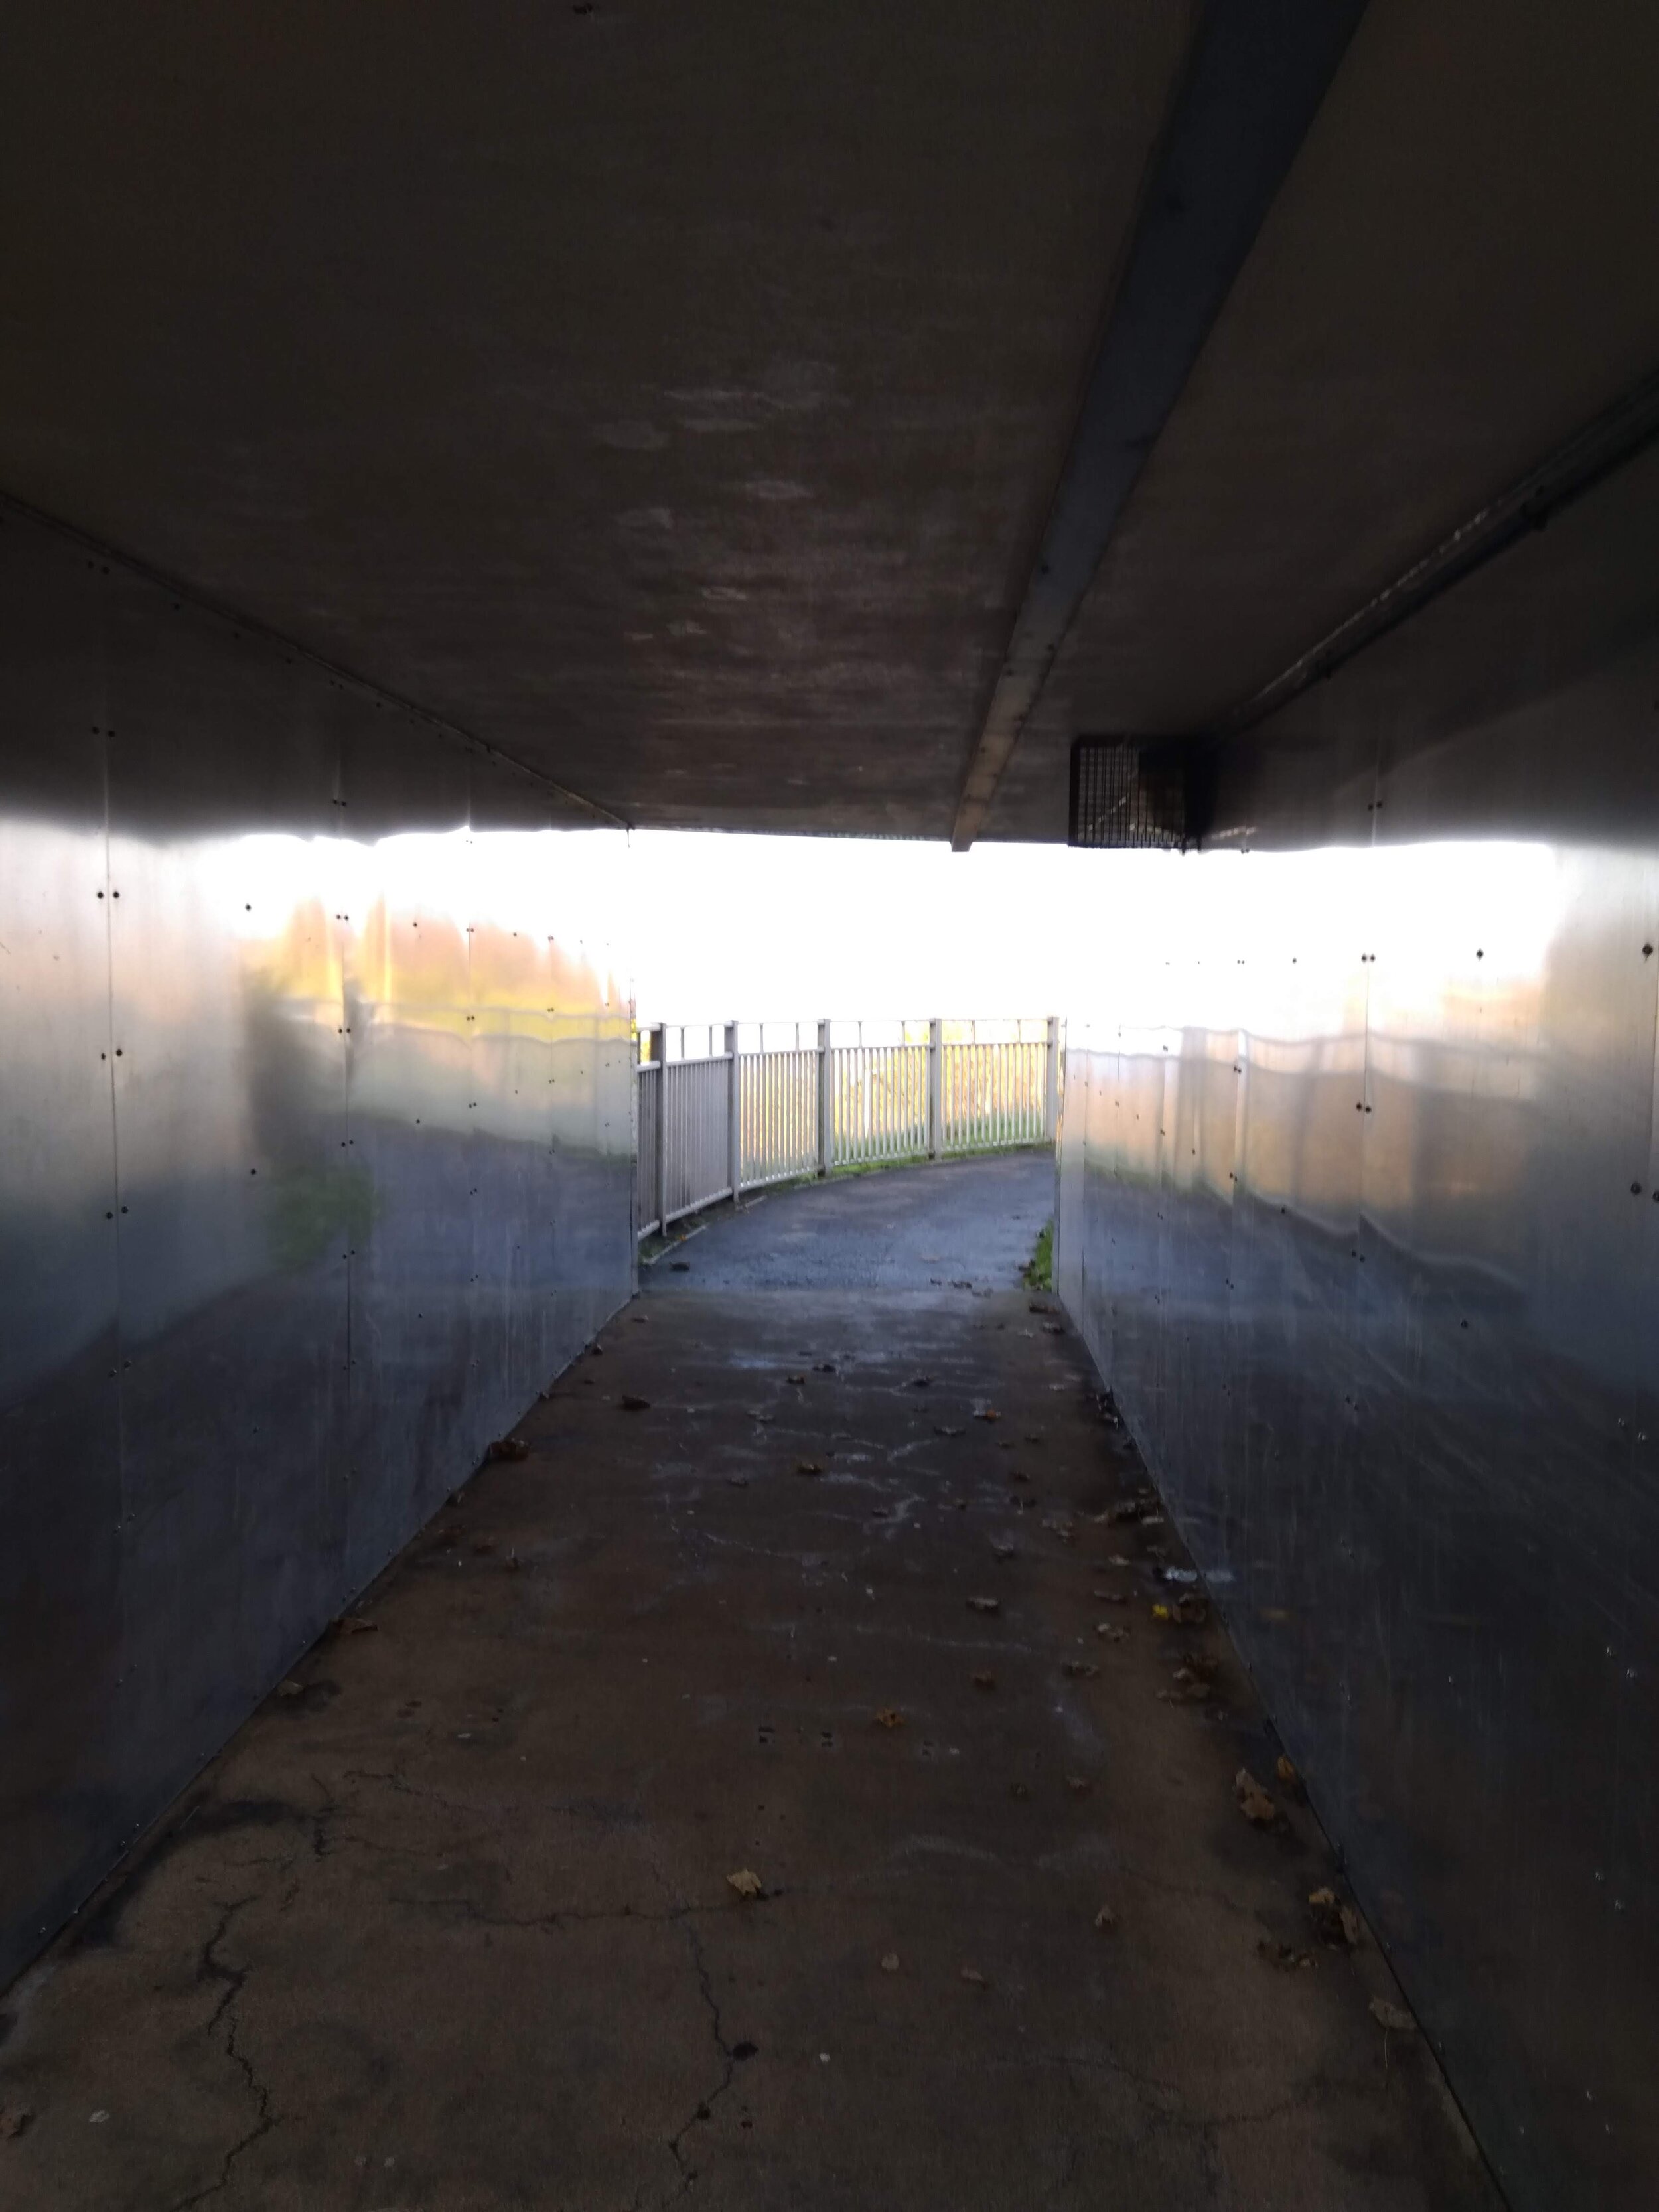
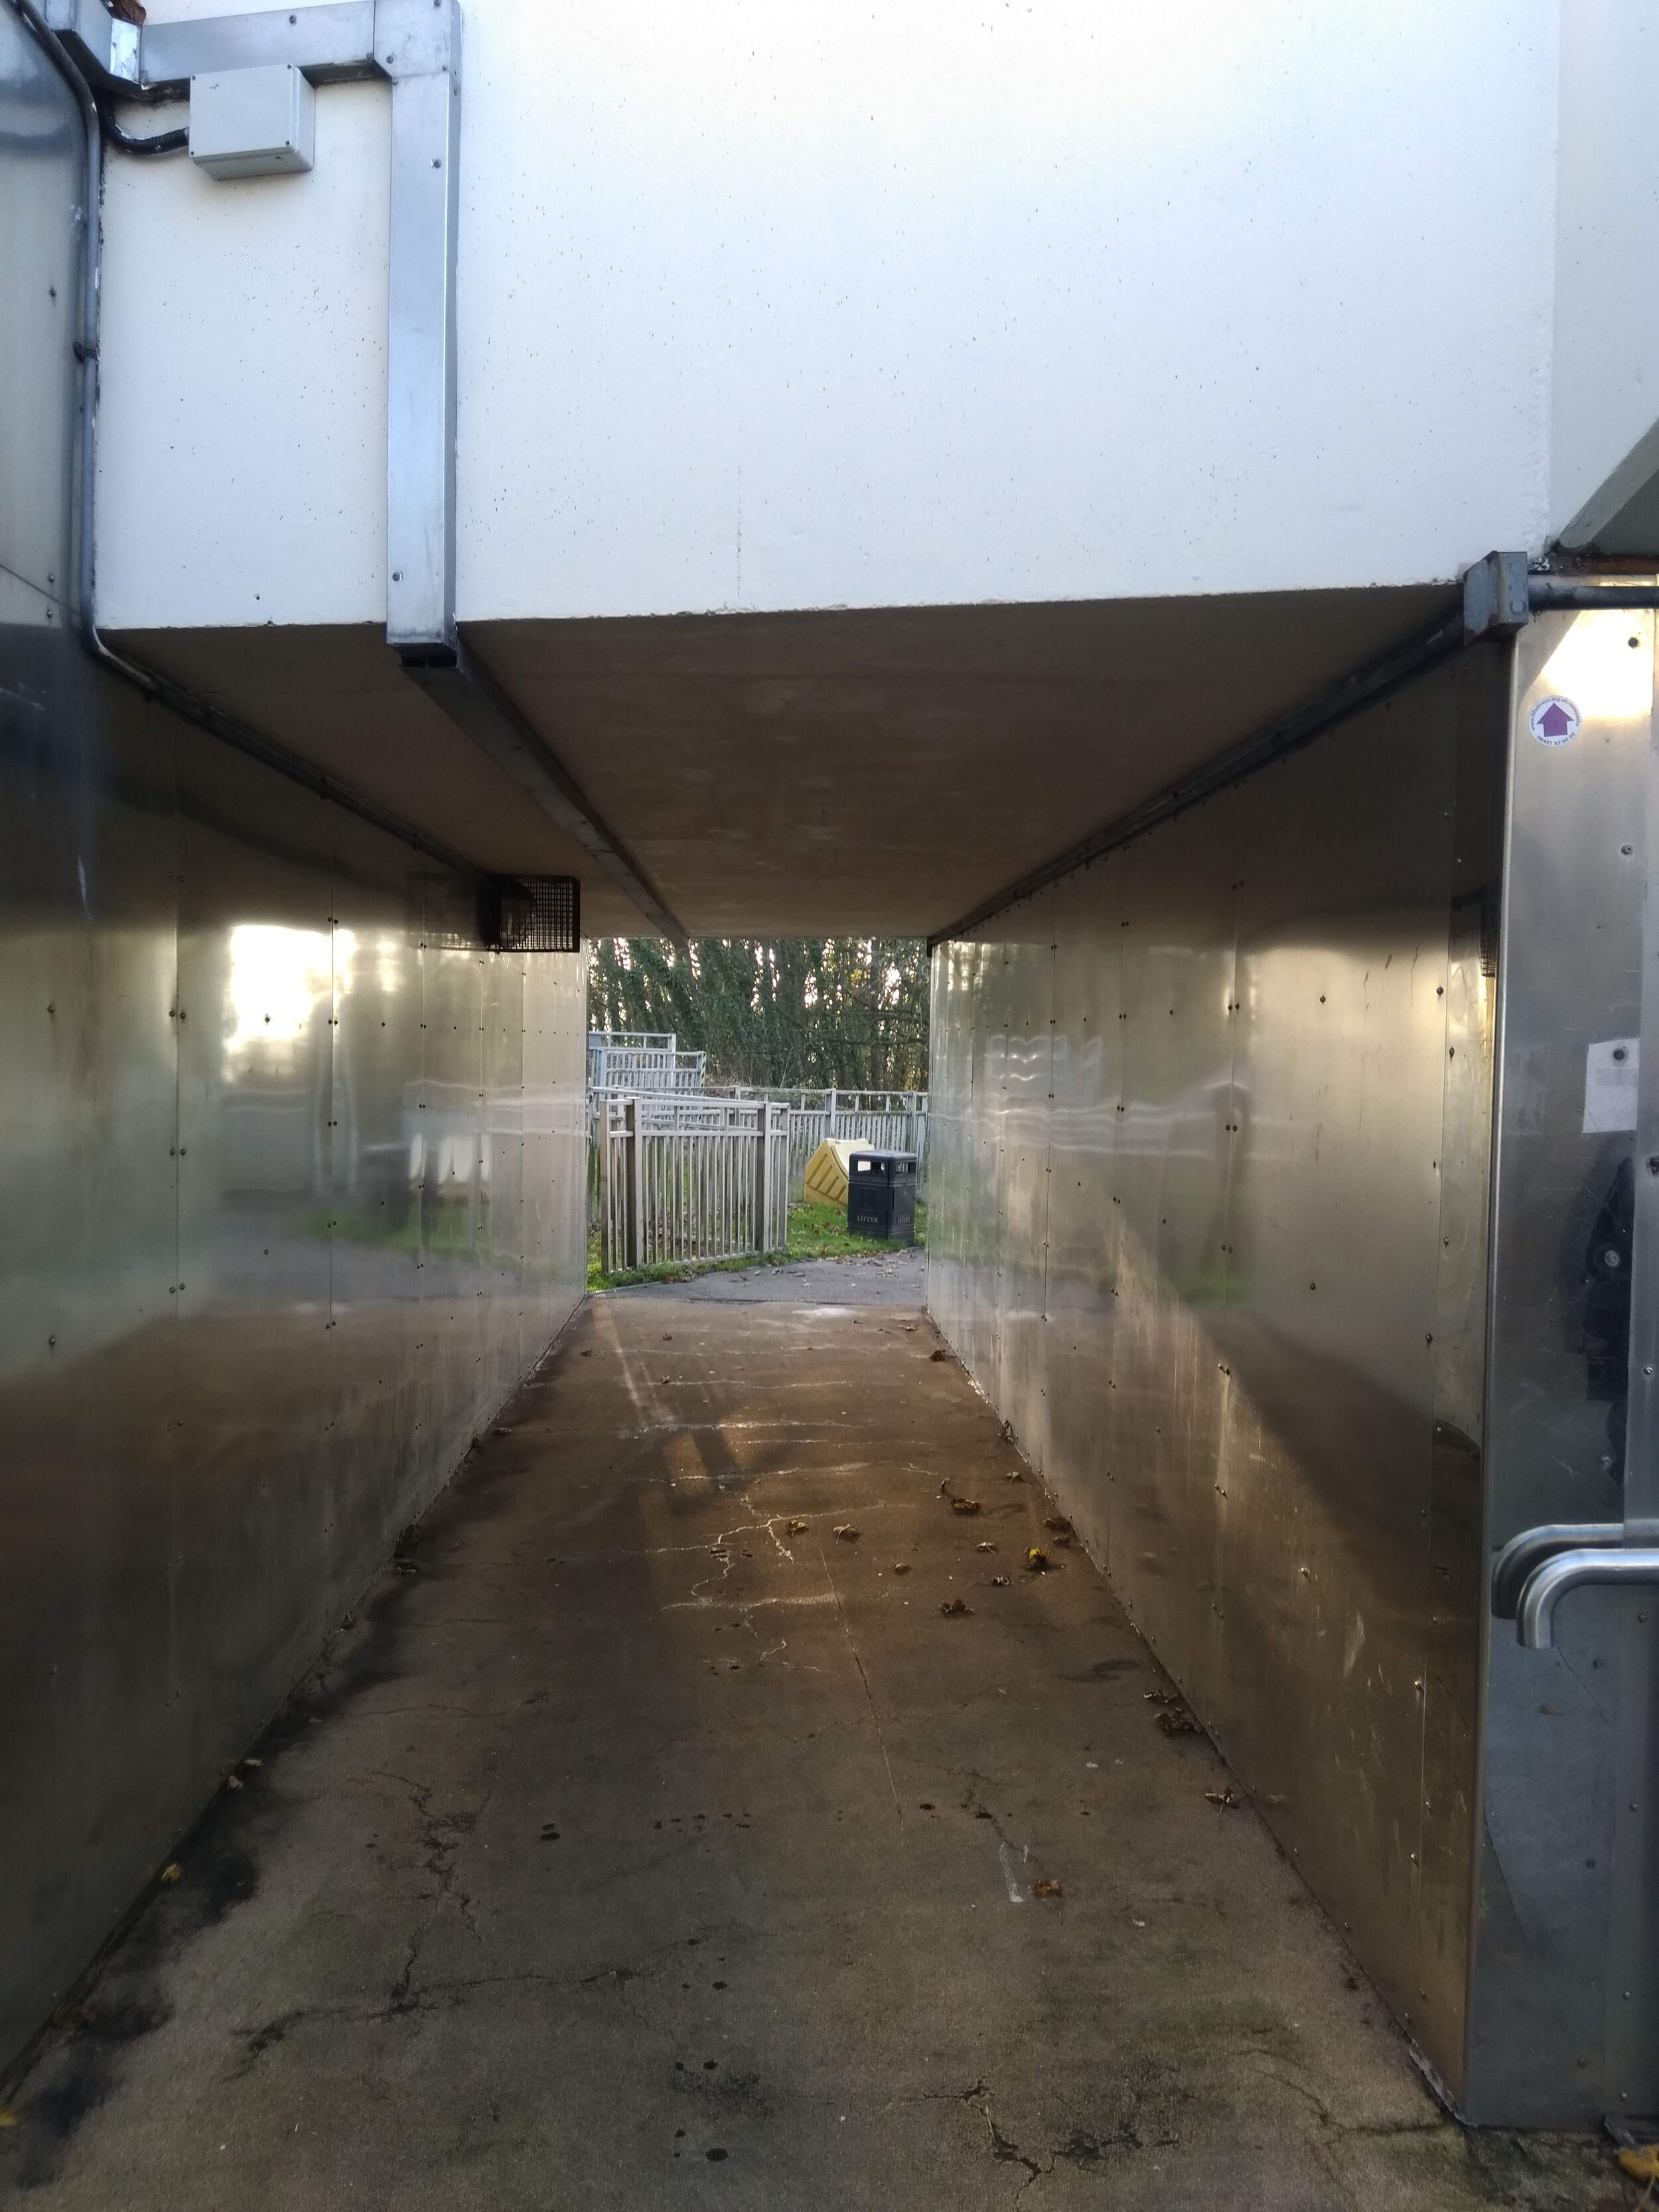
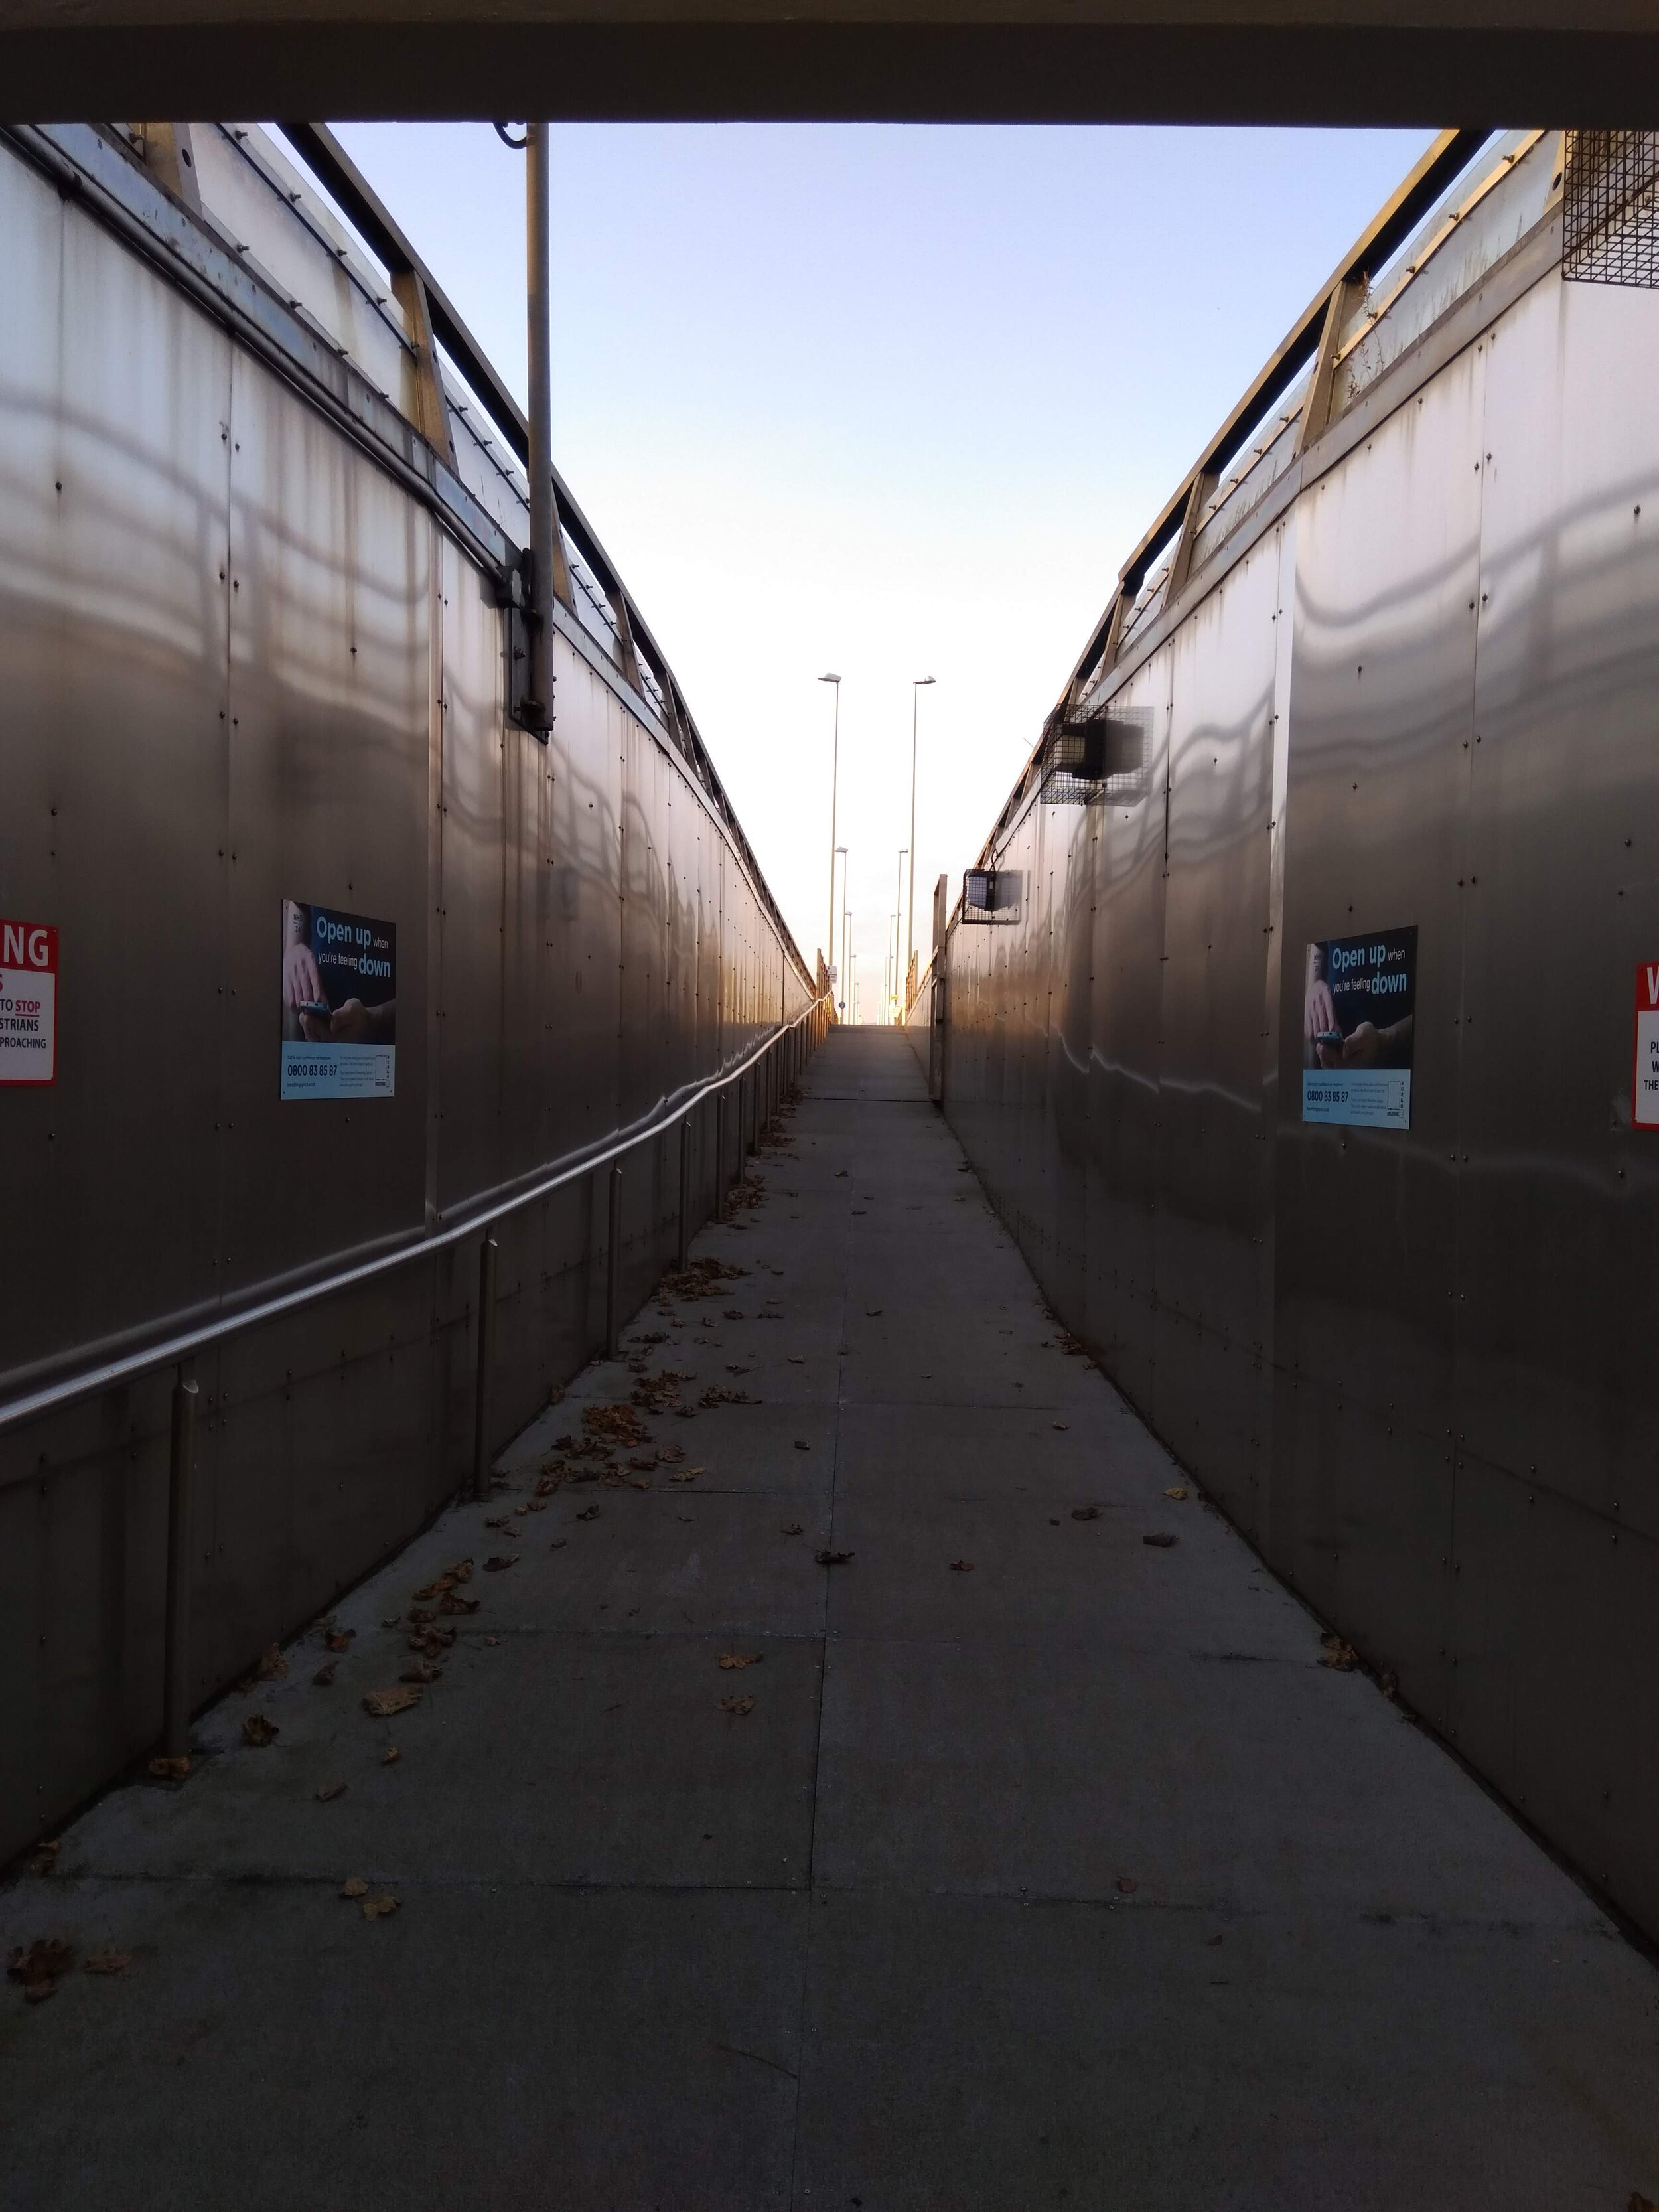
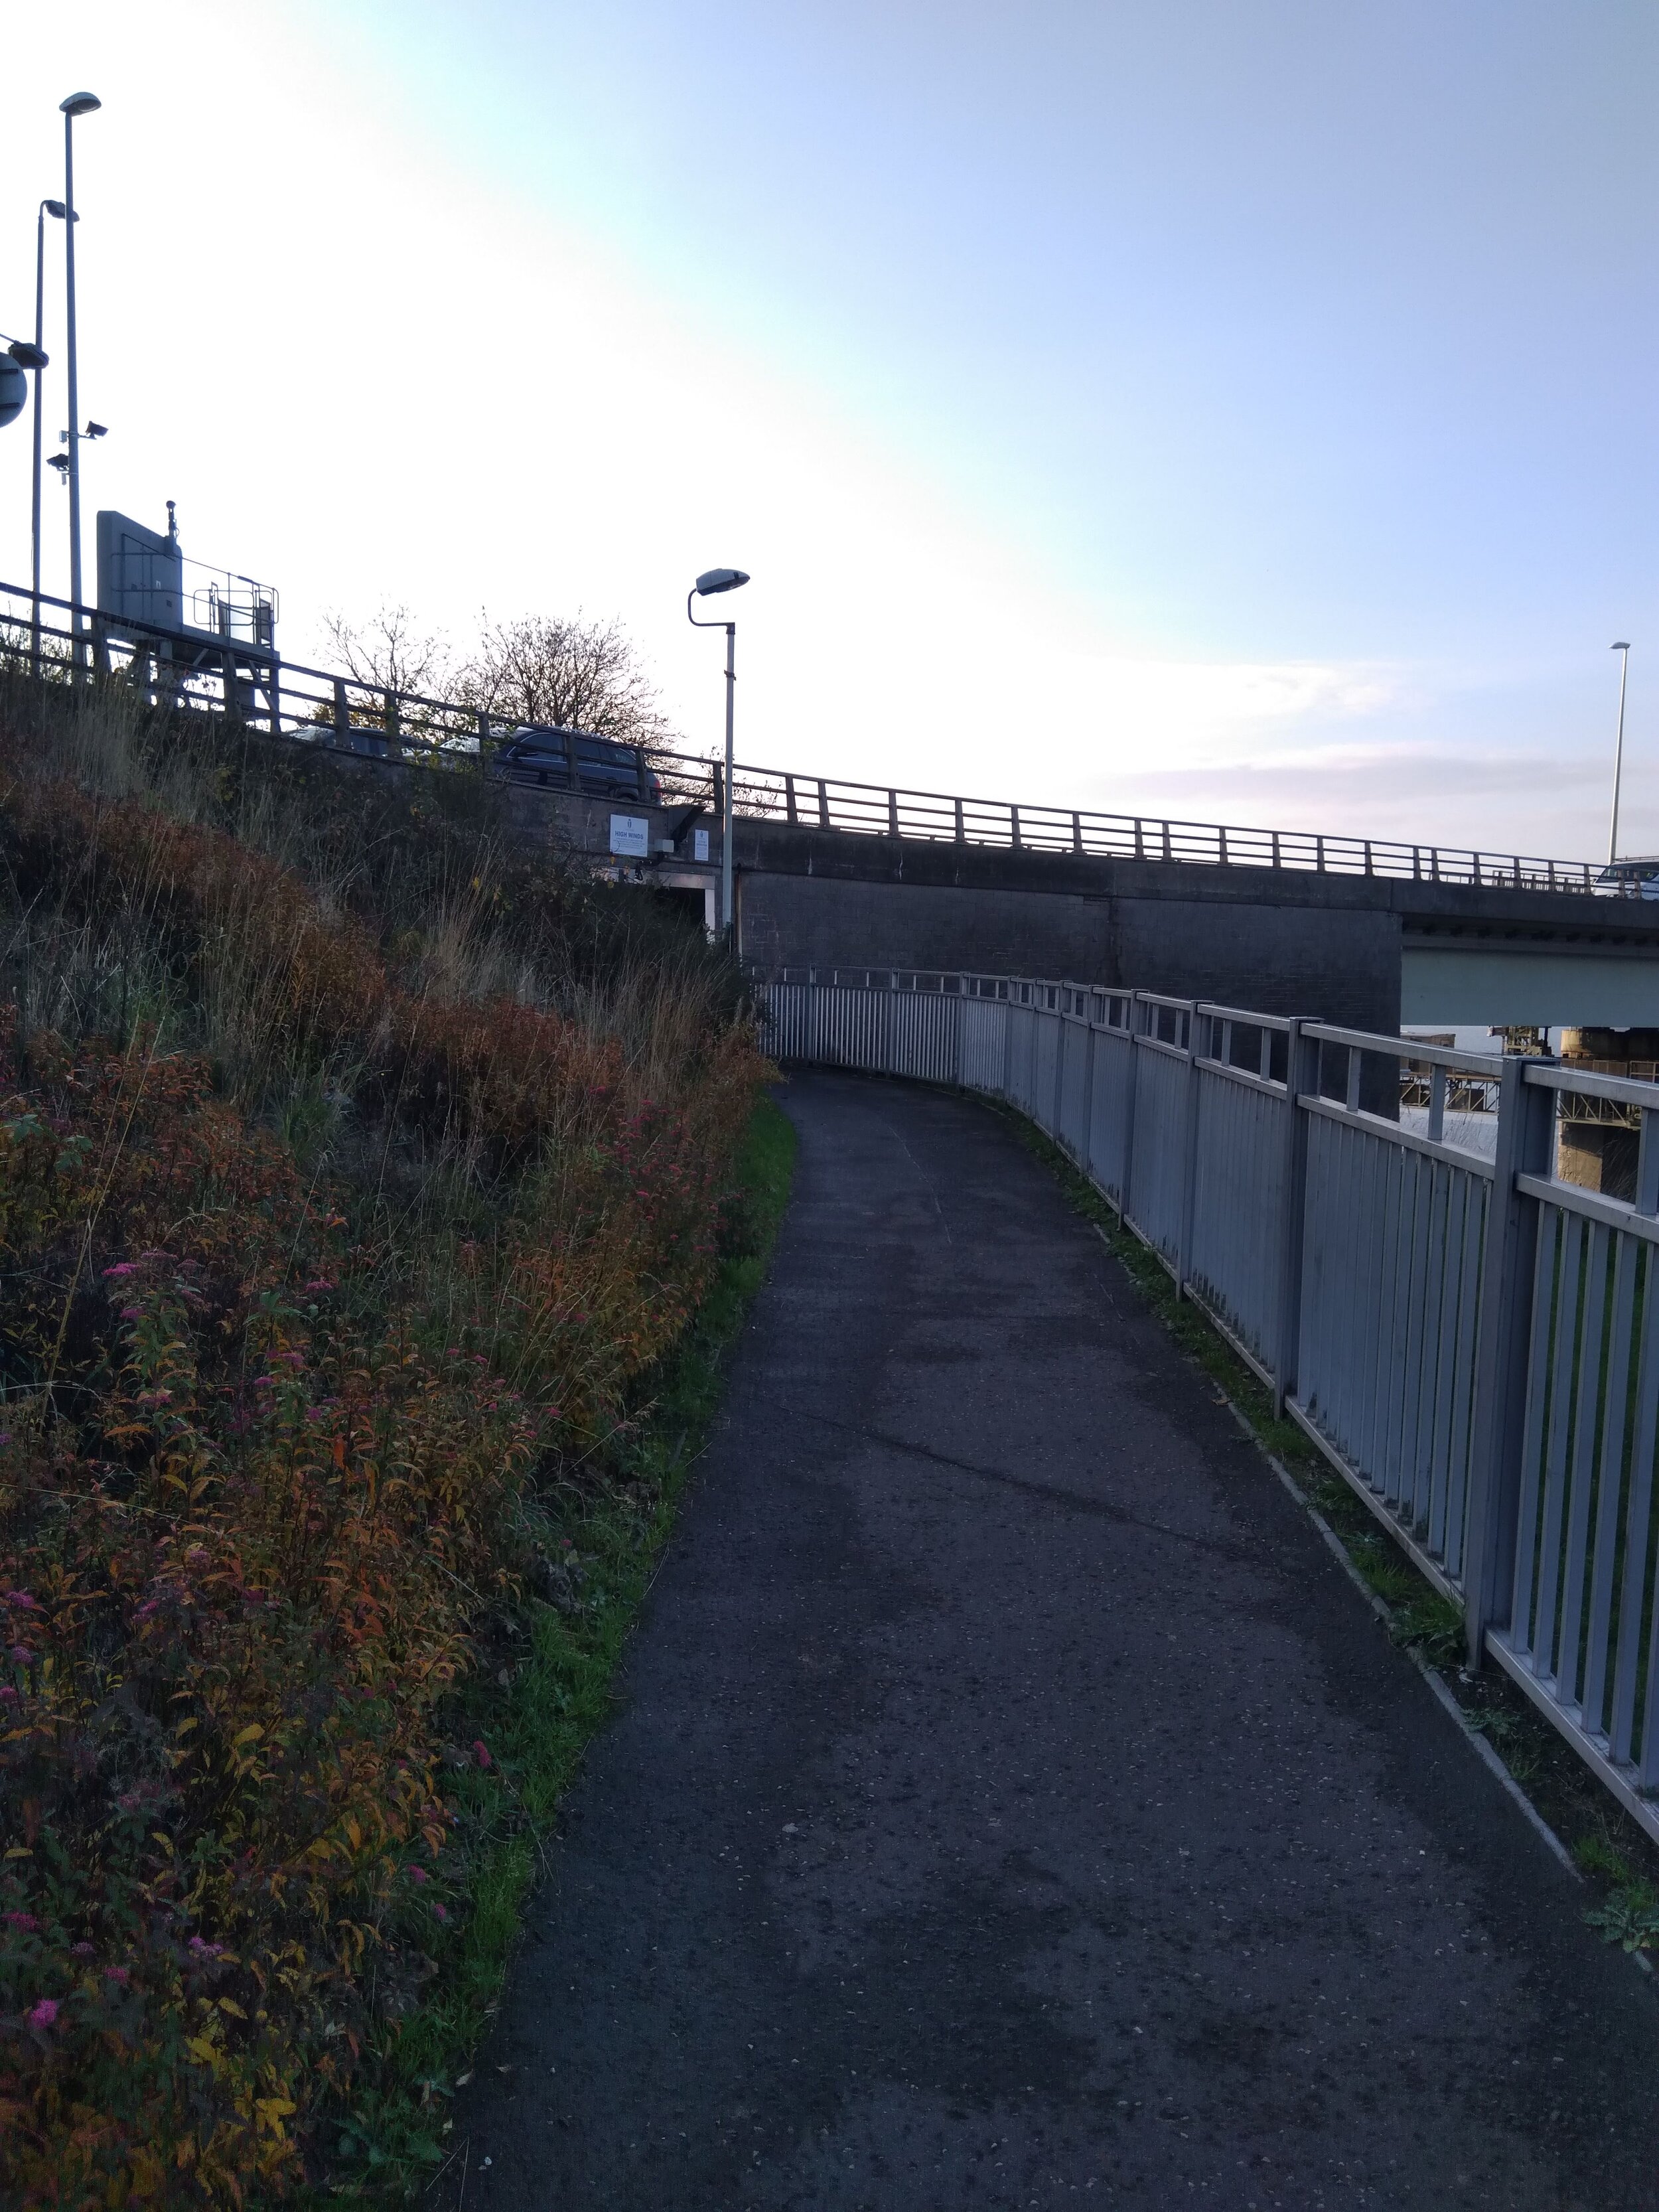
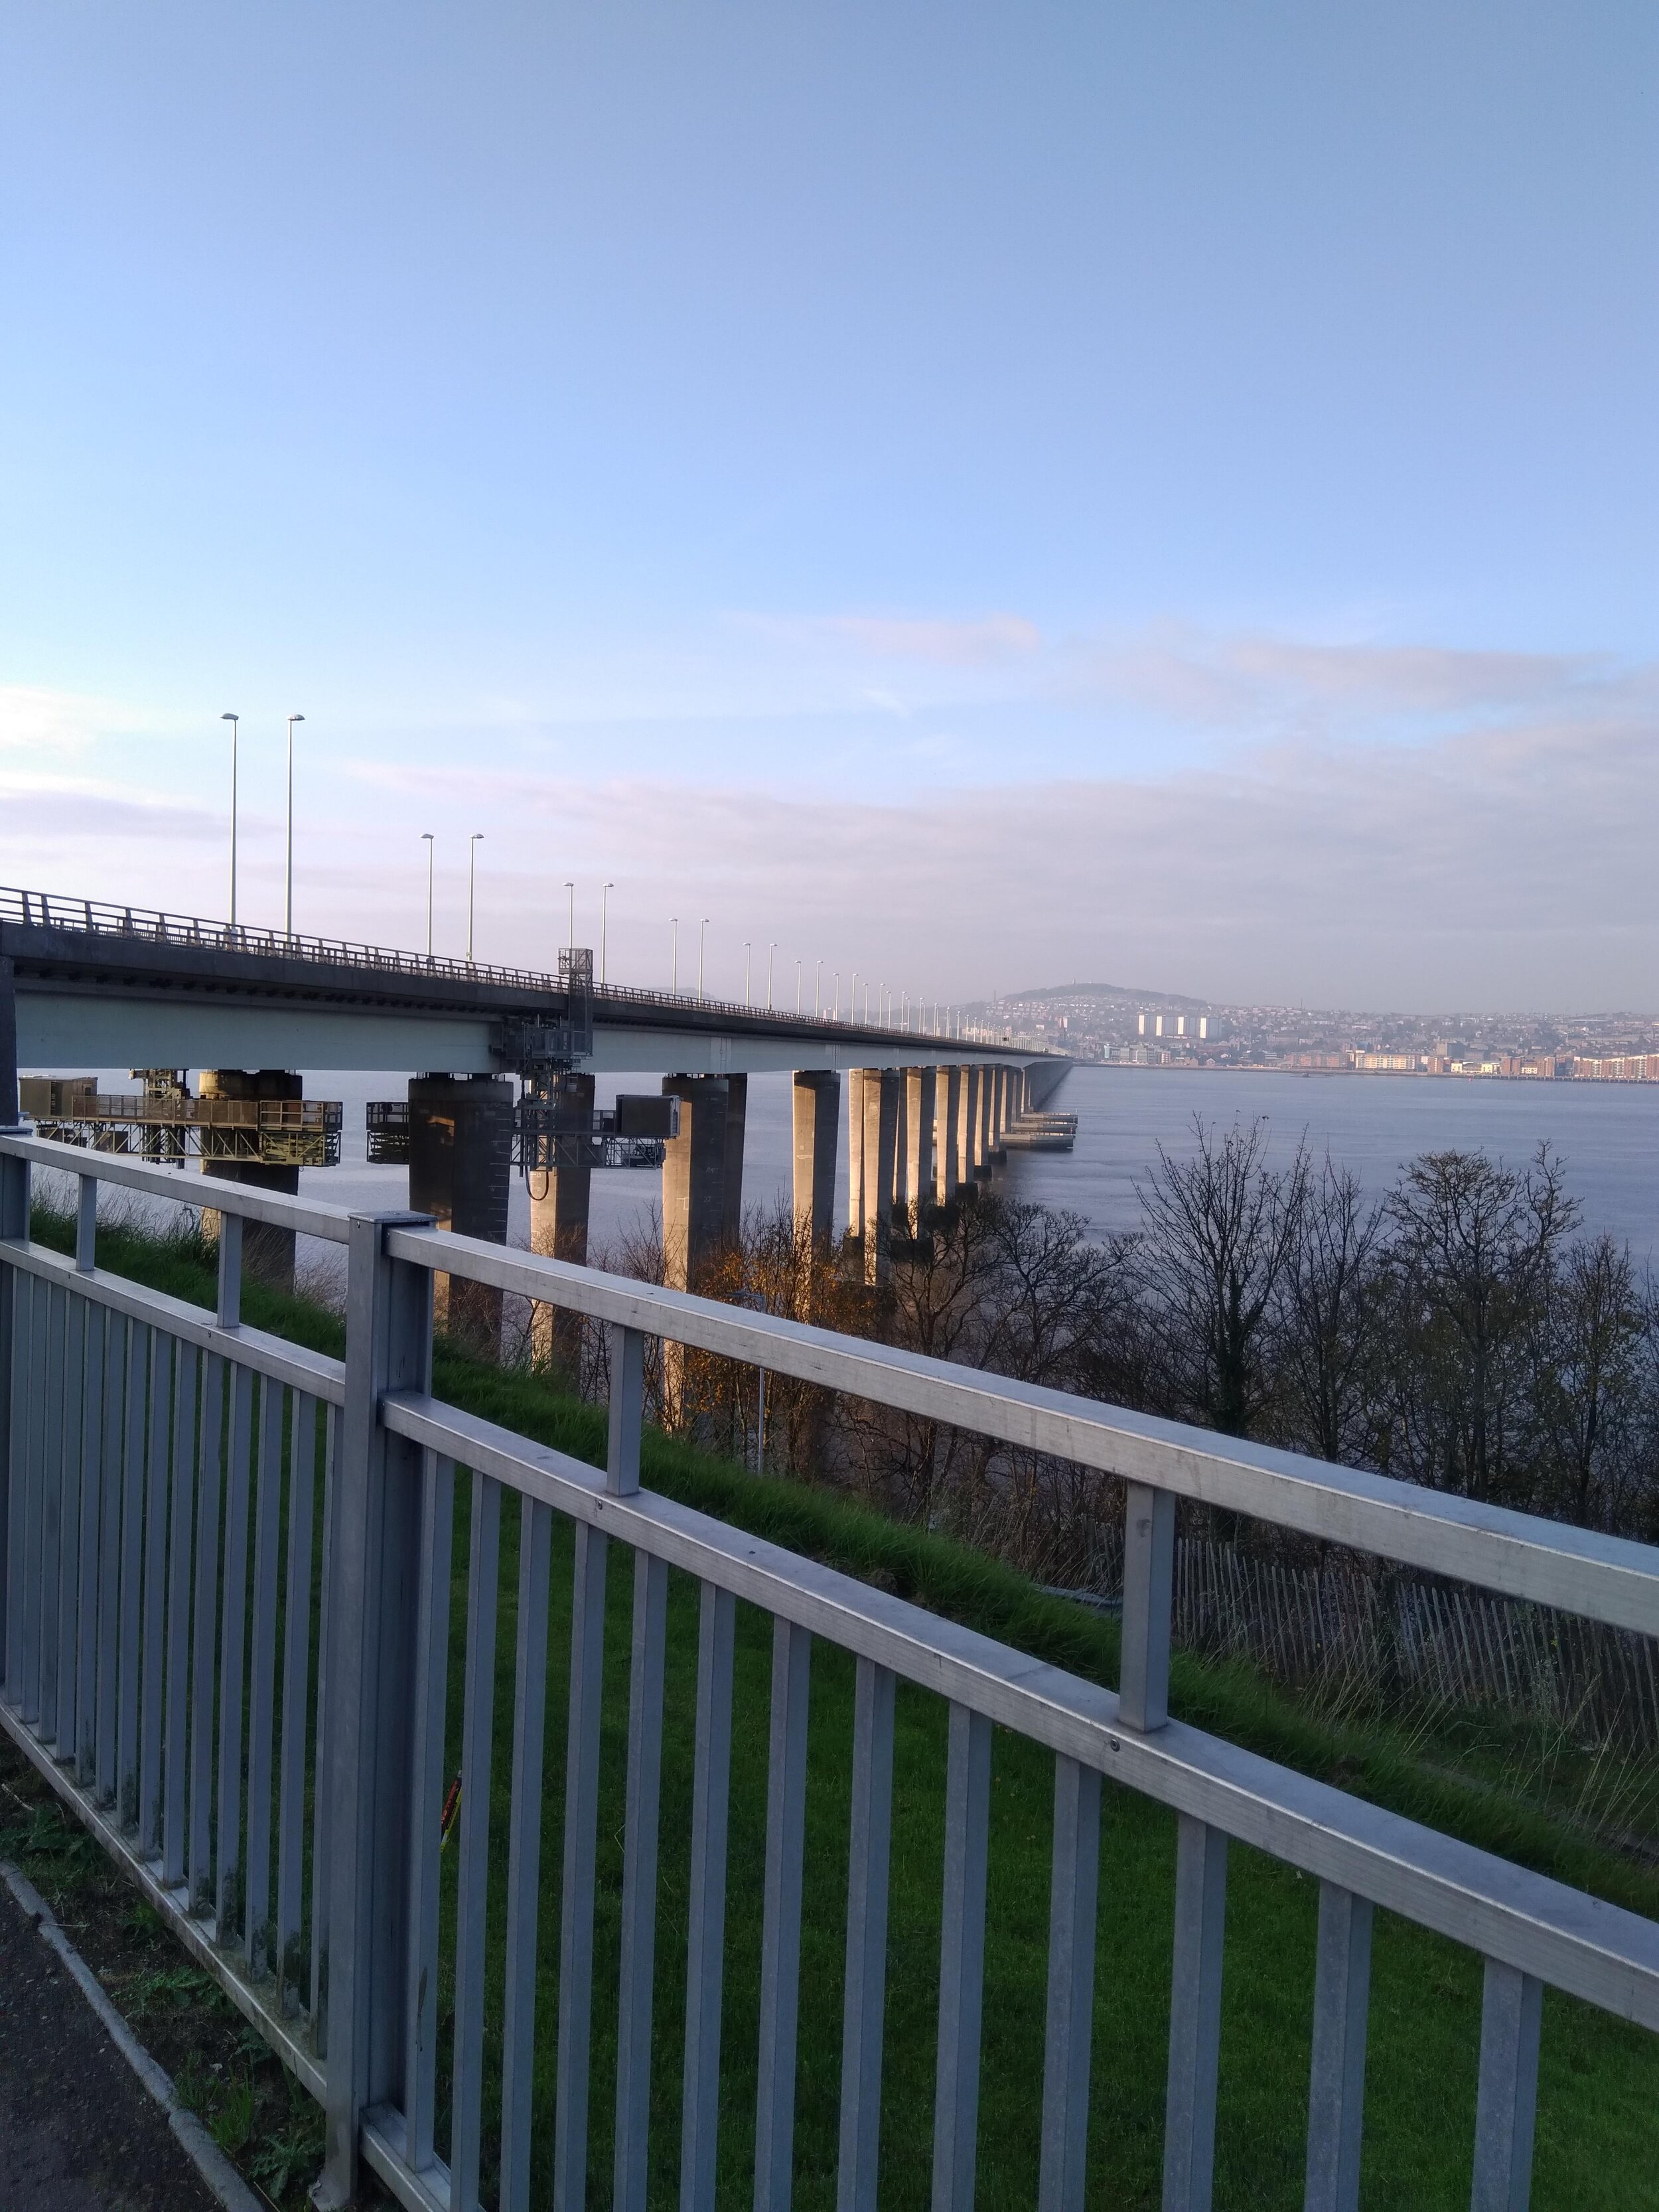
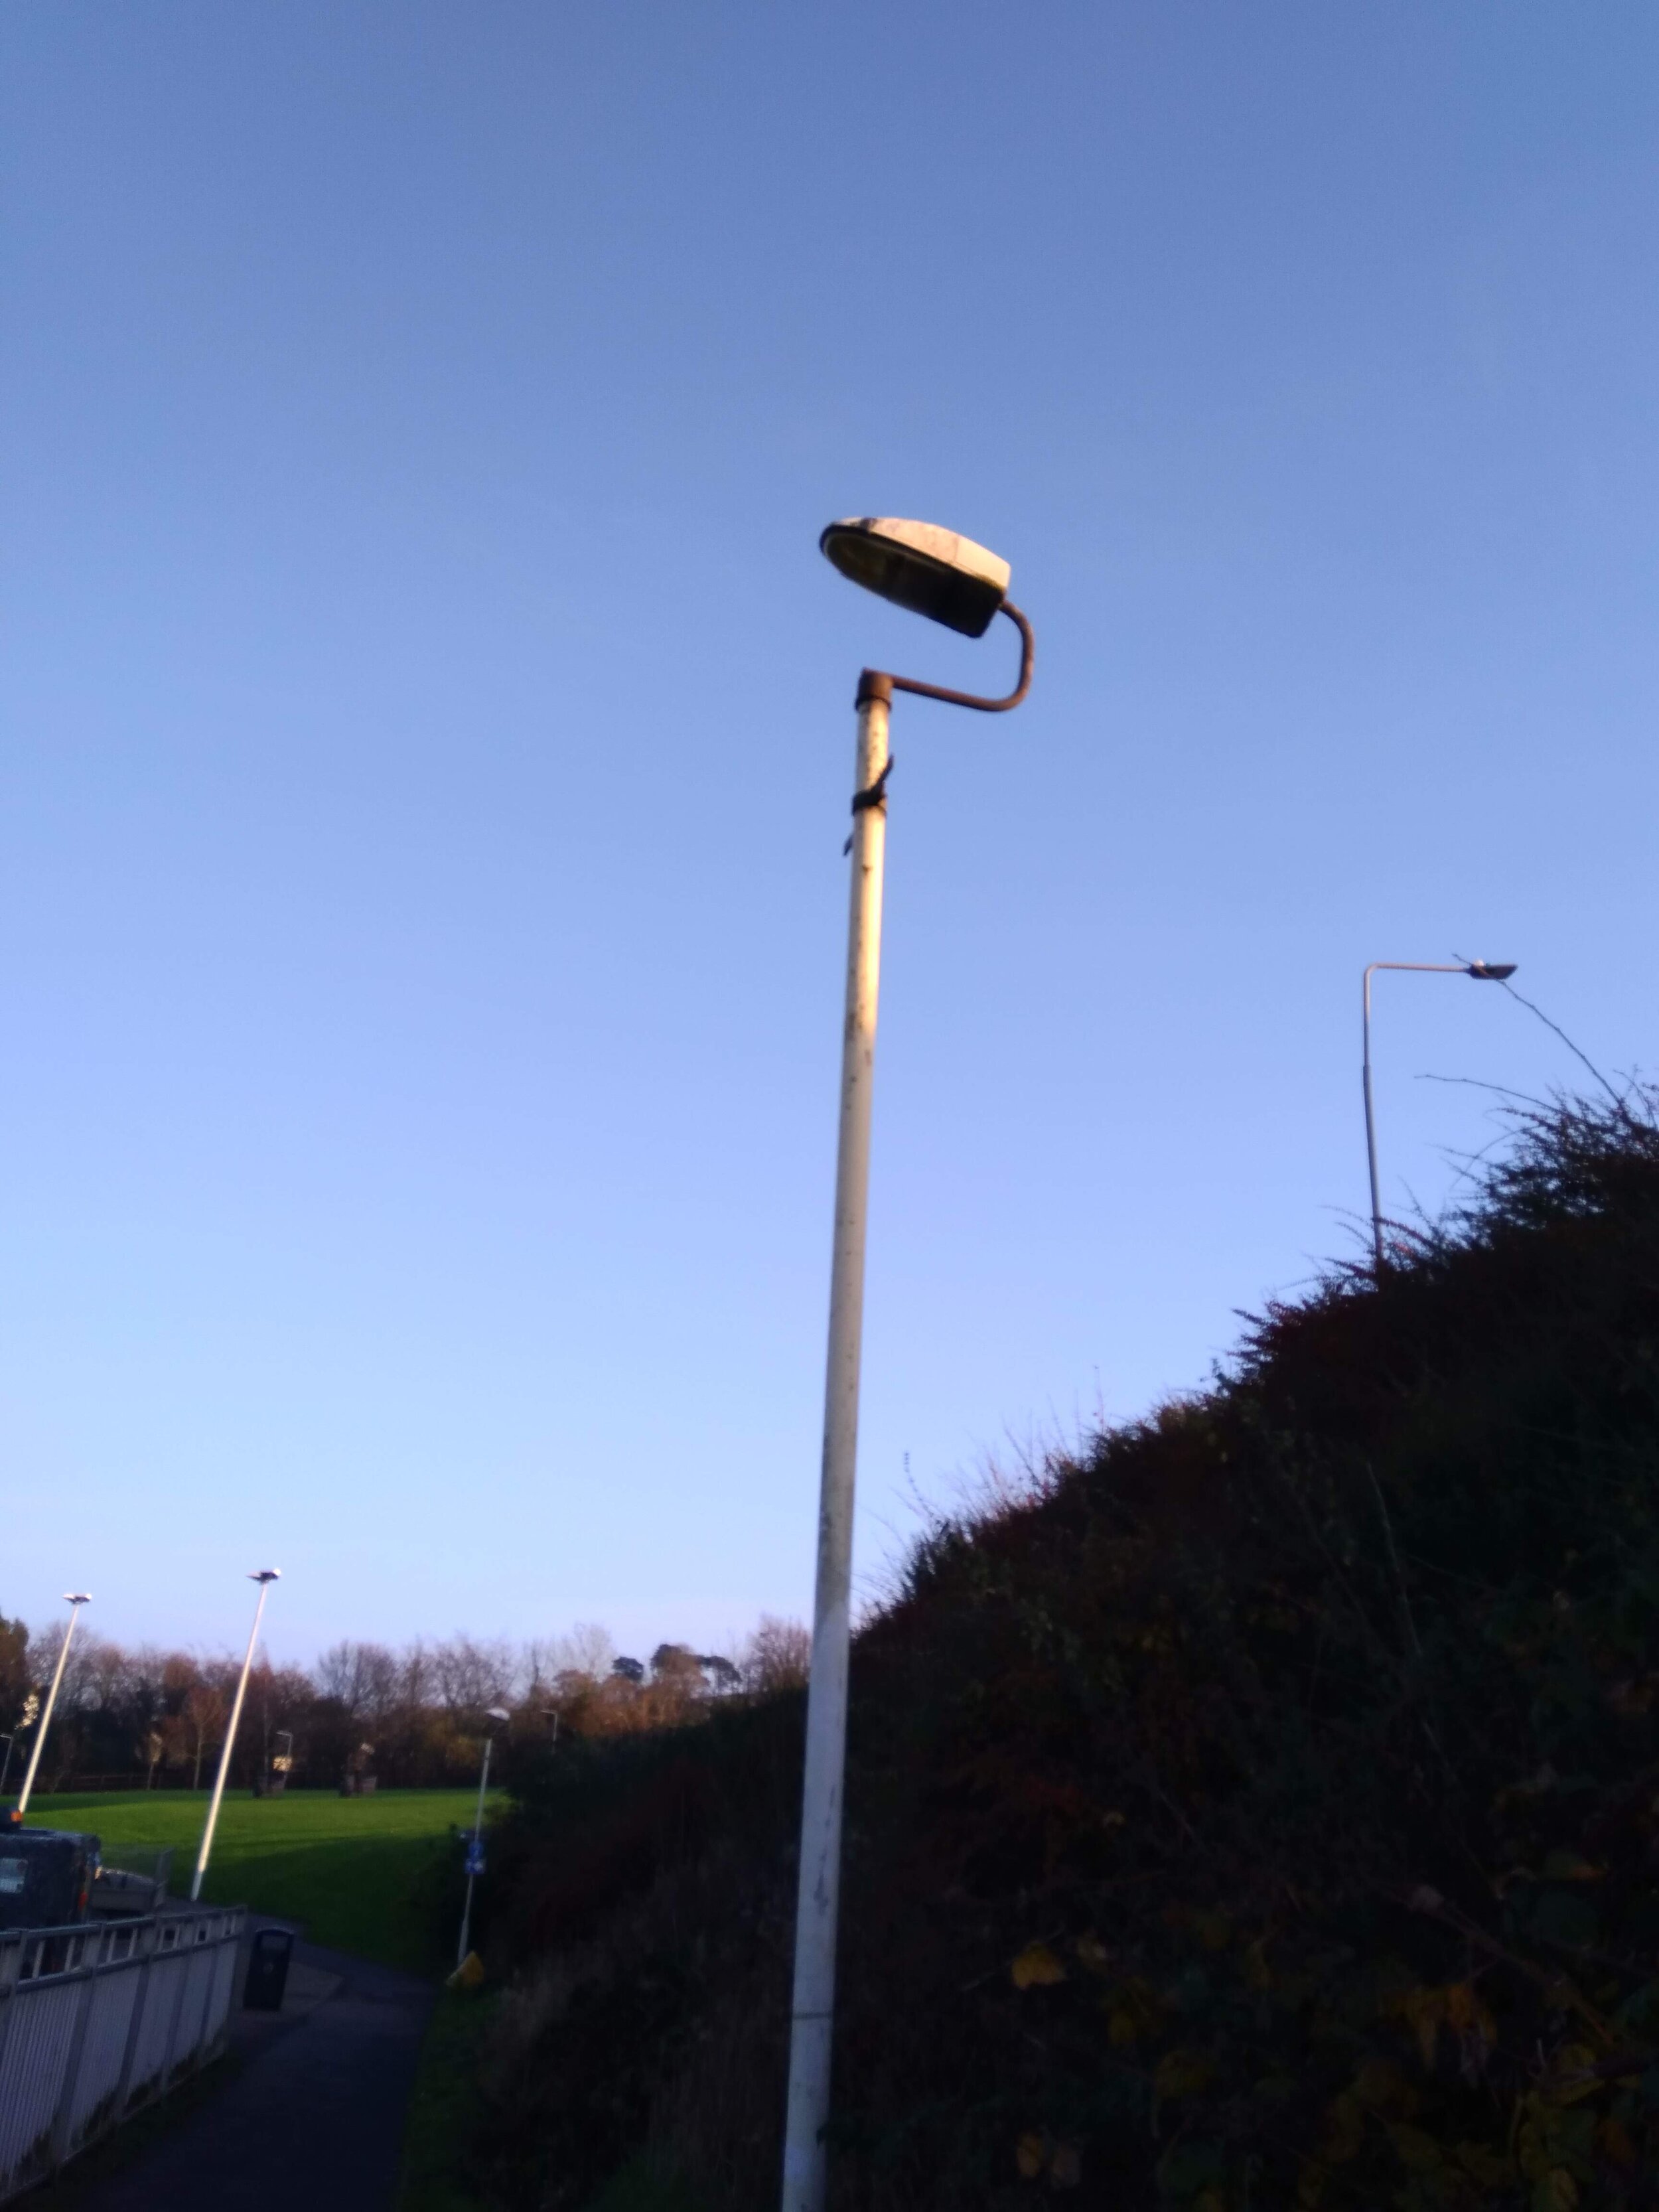
Before starting development of The Longest Walk, it was necessary to visit the site that would inform the bulk of the structure for this experience. The Tay Road Bridge has gained notoriety in the Dundee/ Fife area for being a spot where those wishing to end their life decide to go. The above gallery contains a series of images captured on an evening walk across the bridge, highlighting the textures, signage, natural landscape and local landmarks. These reference images will aid # in the recreation of the environment in 3D space.
3: Whiteboxing
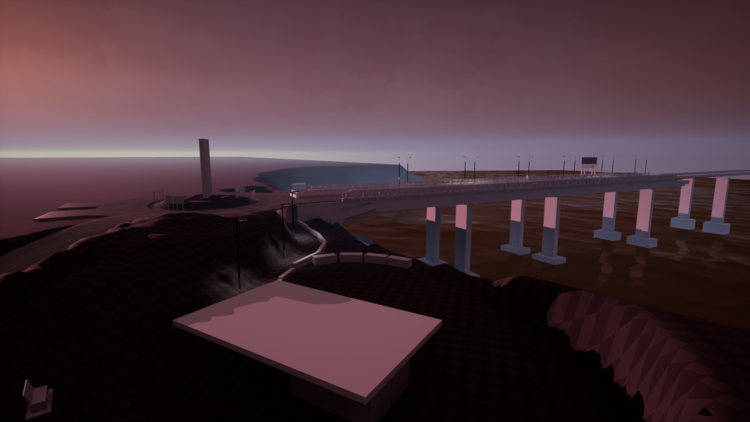

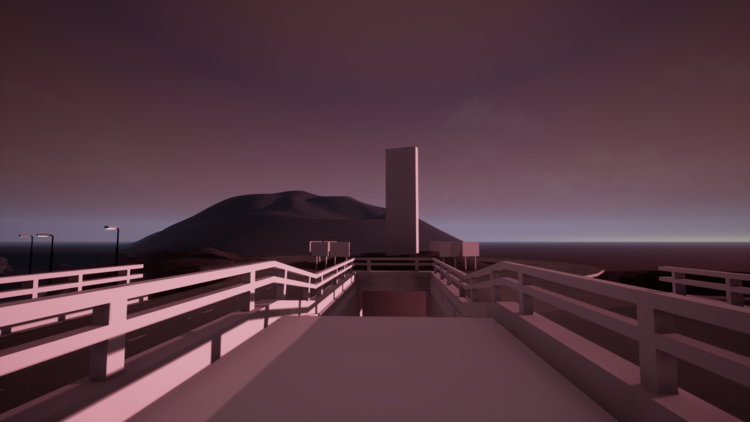
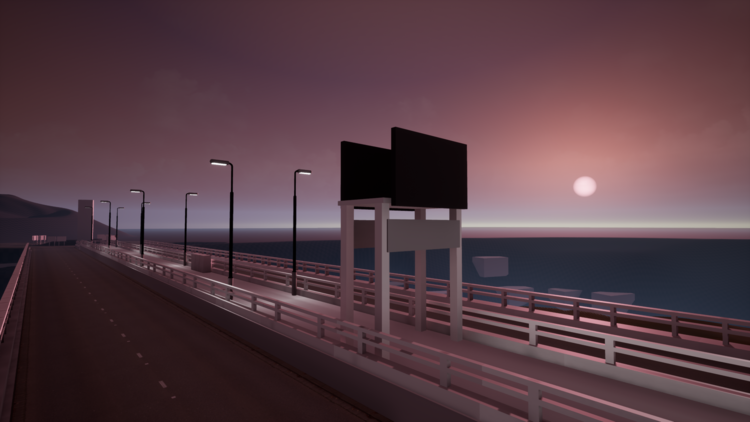
Considering that the game takes place namely on the Tay Road Bridge, most of the pre-production planning regarding the level structure was already there. Use of reference imagery and moodboards helped inform blocking out the landscape and core aspects of the environment. Pacing, the placement of storybeats, etc are all considerations for later in development as they require the interview to have been conducted and the data to be coded, edited, and imported into the engine. I decided that it would be best to begin whiteboxing the main scene. Although the above whitebox is not a 1:1 recreation of the bridge area, later work will hone the layout to better resemble the surrounding environment, width of path and carriageways. As it currently stands I believe that there is enough resemblance to start introducing some first-pass assets and dialogue to begin testing game flow. To obtain the audio assets required for constructing the narrative I will be conducting a semi-structured interview with my father. This interview will be quite difficult for the both of us, as whilst we have talked about his depression, we haven’t discussed the topic in great detail before. There are some aspects of his journey that I am aware of through first-hand experience, however, my parents went to great lengths to shield us from the extremity of the situation. I could not be more proud of him for agreeing to carry out this interview and I hope that the work I produce here can tell his story with the respect and quality that it deserves.
4: Interview Preparation


To read the interview questions please click the image above.
This will be the first time that I had conducted a formal semi-structured interview. Previous works I have created (Forget-Me-Knot) were informed by informal discussion with participants and additional research to obtain the insight necessary to complete the project. The process and the final product were not perfect by any means and I hope to build a stronger foundation for this experience. Through conducting a formal interview and ensuring that the encounter is correctly captured (rather than scripted and recorded), the ‘raw’ audio and emotions can be captured for coding and restructuring at a later date. This method strives for stronger indexicality as the recorded audio maintains the formal characteristics of the interview, unlike reconstruction or fiction.
In terms of set-up, my equipment consisted of my old Canon EOS 600D DSLR camera with a Takstar SGC-598 external microphone. For higher quality audio capture I also ran my Blue Snowball through Audacity. Having two audio capture sources meant that I could ensure that at least the context of the interview would not be lost. Given further budget I would have liked to have a two-camera set-up (B-Cam), one capturing the wide angle and the other a close-up of the interview participants face. This would allow for me to cut to the close-up camera to highlight particularly emotional expressions on the participant’s face in the accompanying interview video. For a backdrop I chose to shoot the interview in front of a plain wood wall in a ‘homely’ setting. If I was to restructure the scene I would ensure that the interview participant was slightly more central and closer to the camera. In the current framing the viewer’s attention is drawn to the overly-bright light(s). Given the option I would eliminate the wall light and use a dim-able bulb in the ‘practical’ background light. In the top-right image, you can see the the ‘highlight’ lamp positioned at the window with the main ‘key light’ mounted to an angle-poise to the right of the image.
The interview questions were structured to introduce the participant to the question-answer format and ease them in to the more difficult subject matter. Unlike a typical conversation, this interview would be weighted toward the participant’s response; the interviewer poses the question, the participant responds in depth, and the interviewer leaves dead air at the end of the response to allow for easier editing. Whilst the questions shown above are not exhaustive, I feel they provided an effective guideline to form a narrative and allowed some flexibility for the interviewer to include reactive questions.
5: The Interview
The above video is the raw output from the interview that I conducted with my father. The exposure settings were set low to counteract the brightness of the background lamp. If I had the opportunity to go back and re-shoot this I would have kept the exposure settings as they are, but brought in a brighter key light to better illuminate the subject and changed my f-stop settings to further differentiate the participant from their background. As expected, I did not stay too strictly to the structure questions as I feel reactive questioning can prompt further details from the participant that you may not hear otherwise. What came as a surprise however, was that the participant divulged information about suicidal intent much sooner than expected. This was the first proper discussion that my father and I had about his depression and we found talking openly about it was informative and acted as a form of cognitive unpacking exercise for my father. I was not mic’d up, so my questions may sound muffled in the recording. Whilst recording, we discovered my camera seems to have a 30-minute recording auto-stop function. This proved rather irritating as we would be half-way through a response and it would stop filming. We would then have to revisit the question and do another ‘take’.
The above video is the first colour-grading pass I have ever done, so was just as much an exercise in learning software as it was trying to learn values. Whilst not perfect, I am pleased with this first attempt as it highlights the participant’s facial expressions and helps bring his silhouette out from the background. The use blue hues help reflect the tone of the interview, whilst the warm orange and yellow hues help retain a ‘homely’, ‘safe’ feeling. This was my first time conducting an interview, recording film/audio, and editing. This process in most Documentaries is conducted by a small crew so it was a difficult learning curve to research, plan, and carry out. In future projects I will likely focus solely on the audio component of the interview as that is all that is necessary for the completion of the game.
6: Transcript

To read the interview transcript please click the image above.
Attached to the above image is the transcript from the interview. Transcribing the interview helps with the coding of data and the next phase of development which will involve isolating sound bites from the interview and restructuring them in such a way to form a compelling narrative for the game and for the creation of the accompanying short documentary. The document above is a faithful transcription containing Scottish-isms, slang etc. I have ensured that it is legible.
KEY:
A - Interviewer
J - Participant
7: Highlighting Impactful Areas

Without any formal training in coding or editing interview data, I began by re-reading the transcript and highlighting areas of the interview that I felt were either emotionally impactful or essential to conveying a cohesive story.
8: SGSSS Narrative Portraits Workshop

I signed up - and was accepted - for an online workshop on Narrative Portraits in Qualitative Research through The Scottish Graduate School of Social Science. This workshop was run over four sessions by Edgar Rodriguez-Dorans and Paula Jacobs. These workshops were:
A Systematic Approach (09:30-11:30 - 14/04/21)
Phronesis and Ethics (09:30-11:30 - 21/04/21)
Imagined Portraits (09:30-11:30 - 28/04/21)
Performative Portraits (09:30-11:30 - 05/05/21)
Unfortunately due to a bereavement in the family I was unable to attend workshops 3 and 4, however these sessions were recorded and hosted on the SGSSS portal so upon return from bereavement leave I completed these workshops in my own time. Sadly this did not allow me the opportunity to present my portraits to my peers. This workshop was incredibly beneficial to my practice and write-up as it provided a lens for analysis and re-structuring of interview data that was a previously difficult method to describe. Narrative Portraits are a way of preserving the ‘magic’ of the research encounter and stories that are shared during the interview process.
What are narrative portraits? They are a structured account that describes a phenomena or experience as told or written by an individual from the perspective of that individual. They attempt to let the participants ‘speak by themselves’ by using their own words and are an aesthetic effort to give a glimpse into the live of a person and attempt to work with the complexities of human life. It is about building a bridge between participants, researchers, and audience by communicating people’s experiences more directly.
The process of making a Narrative Portrait involves the coding of your interview data. There are 5 categories highlighted which are: 1. Characters, 2. Time, 3. Space and Circumstance, 4. Key Events, 5 Intersection of Phenomena of Interest.
An example of Rodriquez-Doran’s coding is displayed. This pass of coding highlighted characters, orientation in space and circumstance and his phenomena of interest (which in this case was erotic, romantic, and the crisis of the self). Rodriguez-Doran’s coding was conducted in a word processor, however the standard for such studies makes use of the software Nvivo 12. This software is a little clunky, however it allows for the coding and highlighting of multiple file types (text and audio) using Nodes and Relationships. Whilst Nvivo allows you to assign specific colours to Nodes, unfortunately this only displays in the ribbons on the right-hand side rather than in the text. This seems like a slight oversight in the software and would help improve readability.

Edgar’s transcript coded in a word processor with Key

My transcript coded in Nvivo 12 using Nodes
We were tasked with an exercise where we were to choose a phrase that delivers a powerful idea about the phenomenon of interest. For this task I wanted to convey a narrative about the difficulties of communicating your struggles and the impact of stigma surrounding depression. I believe the portrait that I managed to create for this assignment provided good context of timescale, space, circumstance and impact on the person’s immediate network. My ‘explicit’ which triggers the curiosity was through introducing the topic without explicitly stating what condition the character in the portrait was suffering from.
During the second week we were set another task of devising a 150-300 word ‘kernel scene’ with a focus on highlighting passages of text that we felt were relevant. Rather than the formulaic approach of Character, Time, Space & Circumstance, Key Events etc,. this exercise was more interested in exploring artistic intuition and trying to understand why we are drawn to certain paragraphs of the text. We were also asked to mark our own opinions of the content in our data; whether we agree or disagree with something that the interview participant has said. This would highlight areas of dialogue that were contradicting the message that we wanted to convey and could provide another angle of representing the topic. Below you can listen to my attempt at creating a Narrative Portrait based on the emotionally evocative text that I highlighted from my excerpt of the transcript.
I believe the second portrait had a better ‘flow’ to it due to the nature of the constraints that I had placed upon myself. The first dialogue attempt was 4 minutes long, which, for only covering one aspect of the topic would be too long to represent in a game. The second attempt I wanted to distil the transcript down further to convey a more powerful emotive experience using less dialogue. I feel I succeeded in this attempt and can use learnings from this coding and editing method going forward to create a narrative for the “The Longest Walk” prototype.
9: Head in the (Point)Clouds
It was crucial to convey the narrative in as raw a format as possible. Whilst there is always the ability to use the transcript as a basis for Imagined Portraits or Performative Portraits (those using the interview transcript but having it read/ acted out by additional talent), I feel that re-enactment or reciting text can be detrimental to the quality due to either flat, or overly-dramatised presentation. Even if you were to request the original participant to re-read their transcript part of the ‘magic’ of the original delivery would be lost.
During the start of my PhD I began experimenting with the idea of using an Xbox Kinect to capture point cloud data of interview participants in order to capture a digital representation of the interview participant whilst retaining some sense of anonymity. These experiments were somewhat successful, however without the technical know-how, I couldn’t find a way to export the moving point cloud data as a playable animation for use in a games engine. As such, for Genetic Lottery, The Longest Walk, and Not Alone I reverted to exploring visual representation through low-poly 3D models.
Although the concept was shelved it was something that I had always looked to try and revisit in future, whether for one of my PhD projects or an external project. Recently I discovered an application for the iPad Pro called “3D Scanner App” which was both free, and could export in a data format that could be read and displayed by by Unreal Engine (.pts). This Point Cloud plugin (LiDAR Point Cloud) is only compatible with Unreal Engine version 4.24.
The application allows for full .obj model scans and textures in both high and low resolutions, allowing for a realistic representation of locations and persons. Whilst this was also a potential route to go down, I much preferred the imperfect and ‘arty’ look that comes from only displaying coloured data points in space.
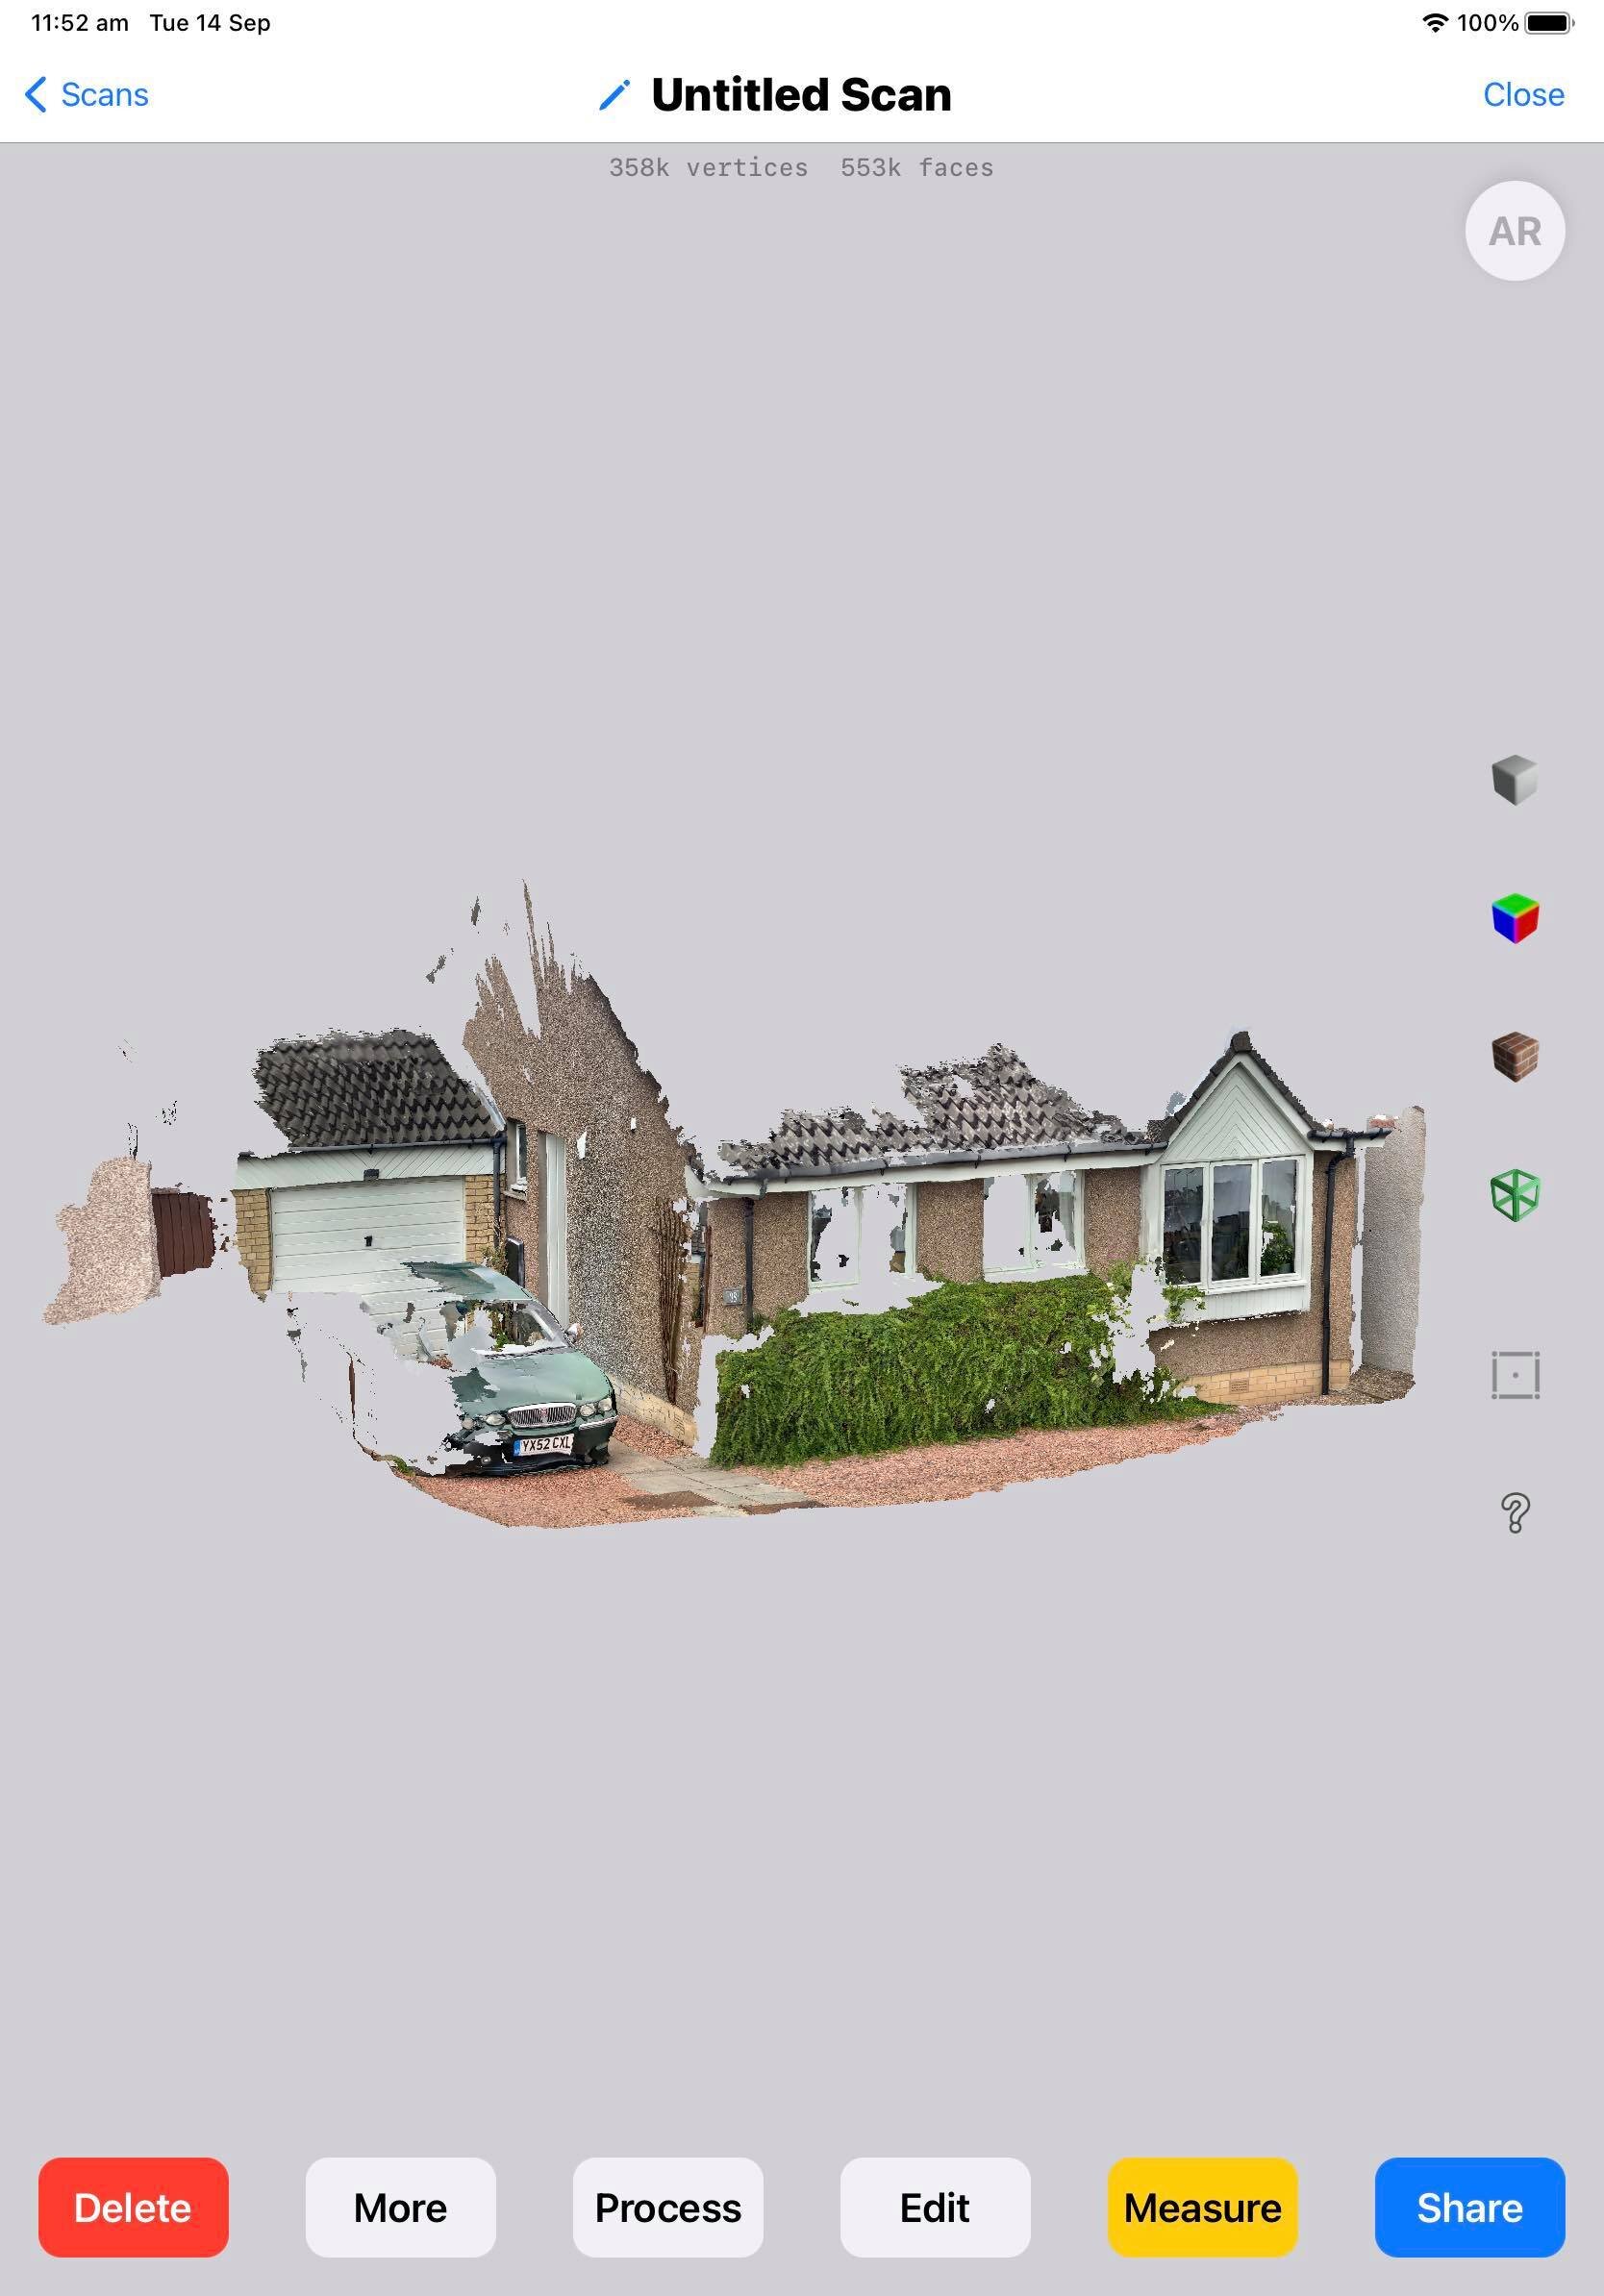
Below you can see some images and video footage taken from the initial scan tests using this application.

Kinect Portrait - Alexander Tarvet
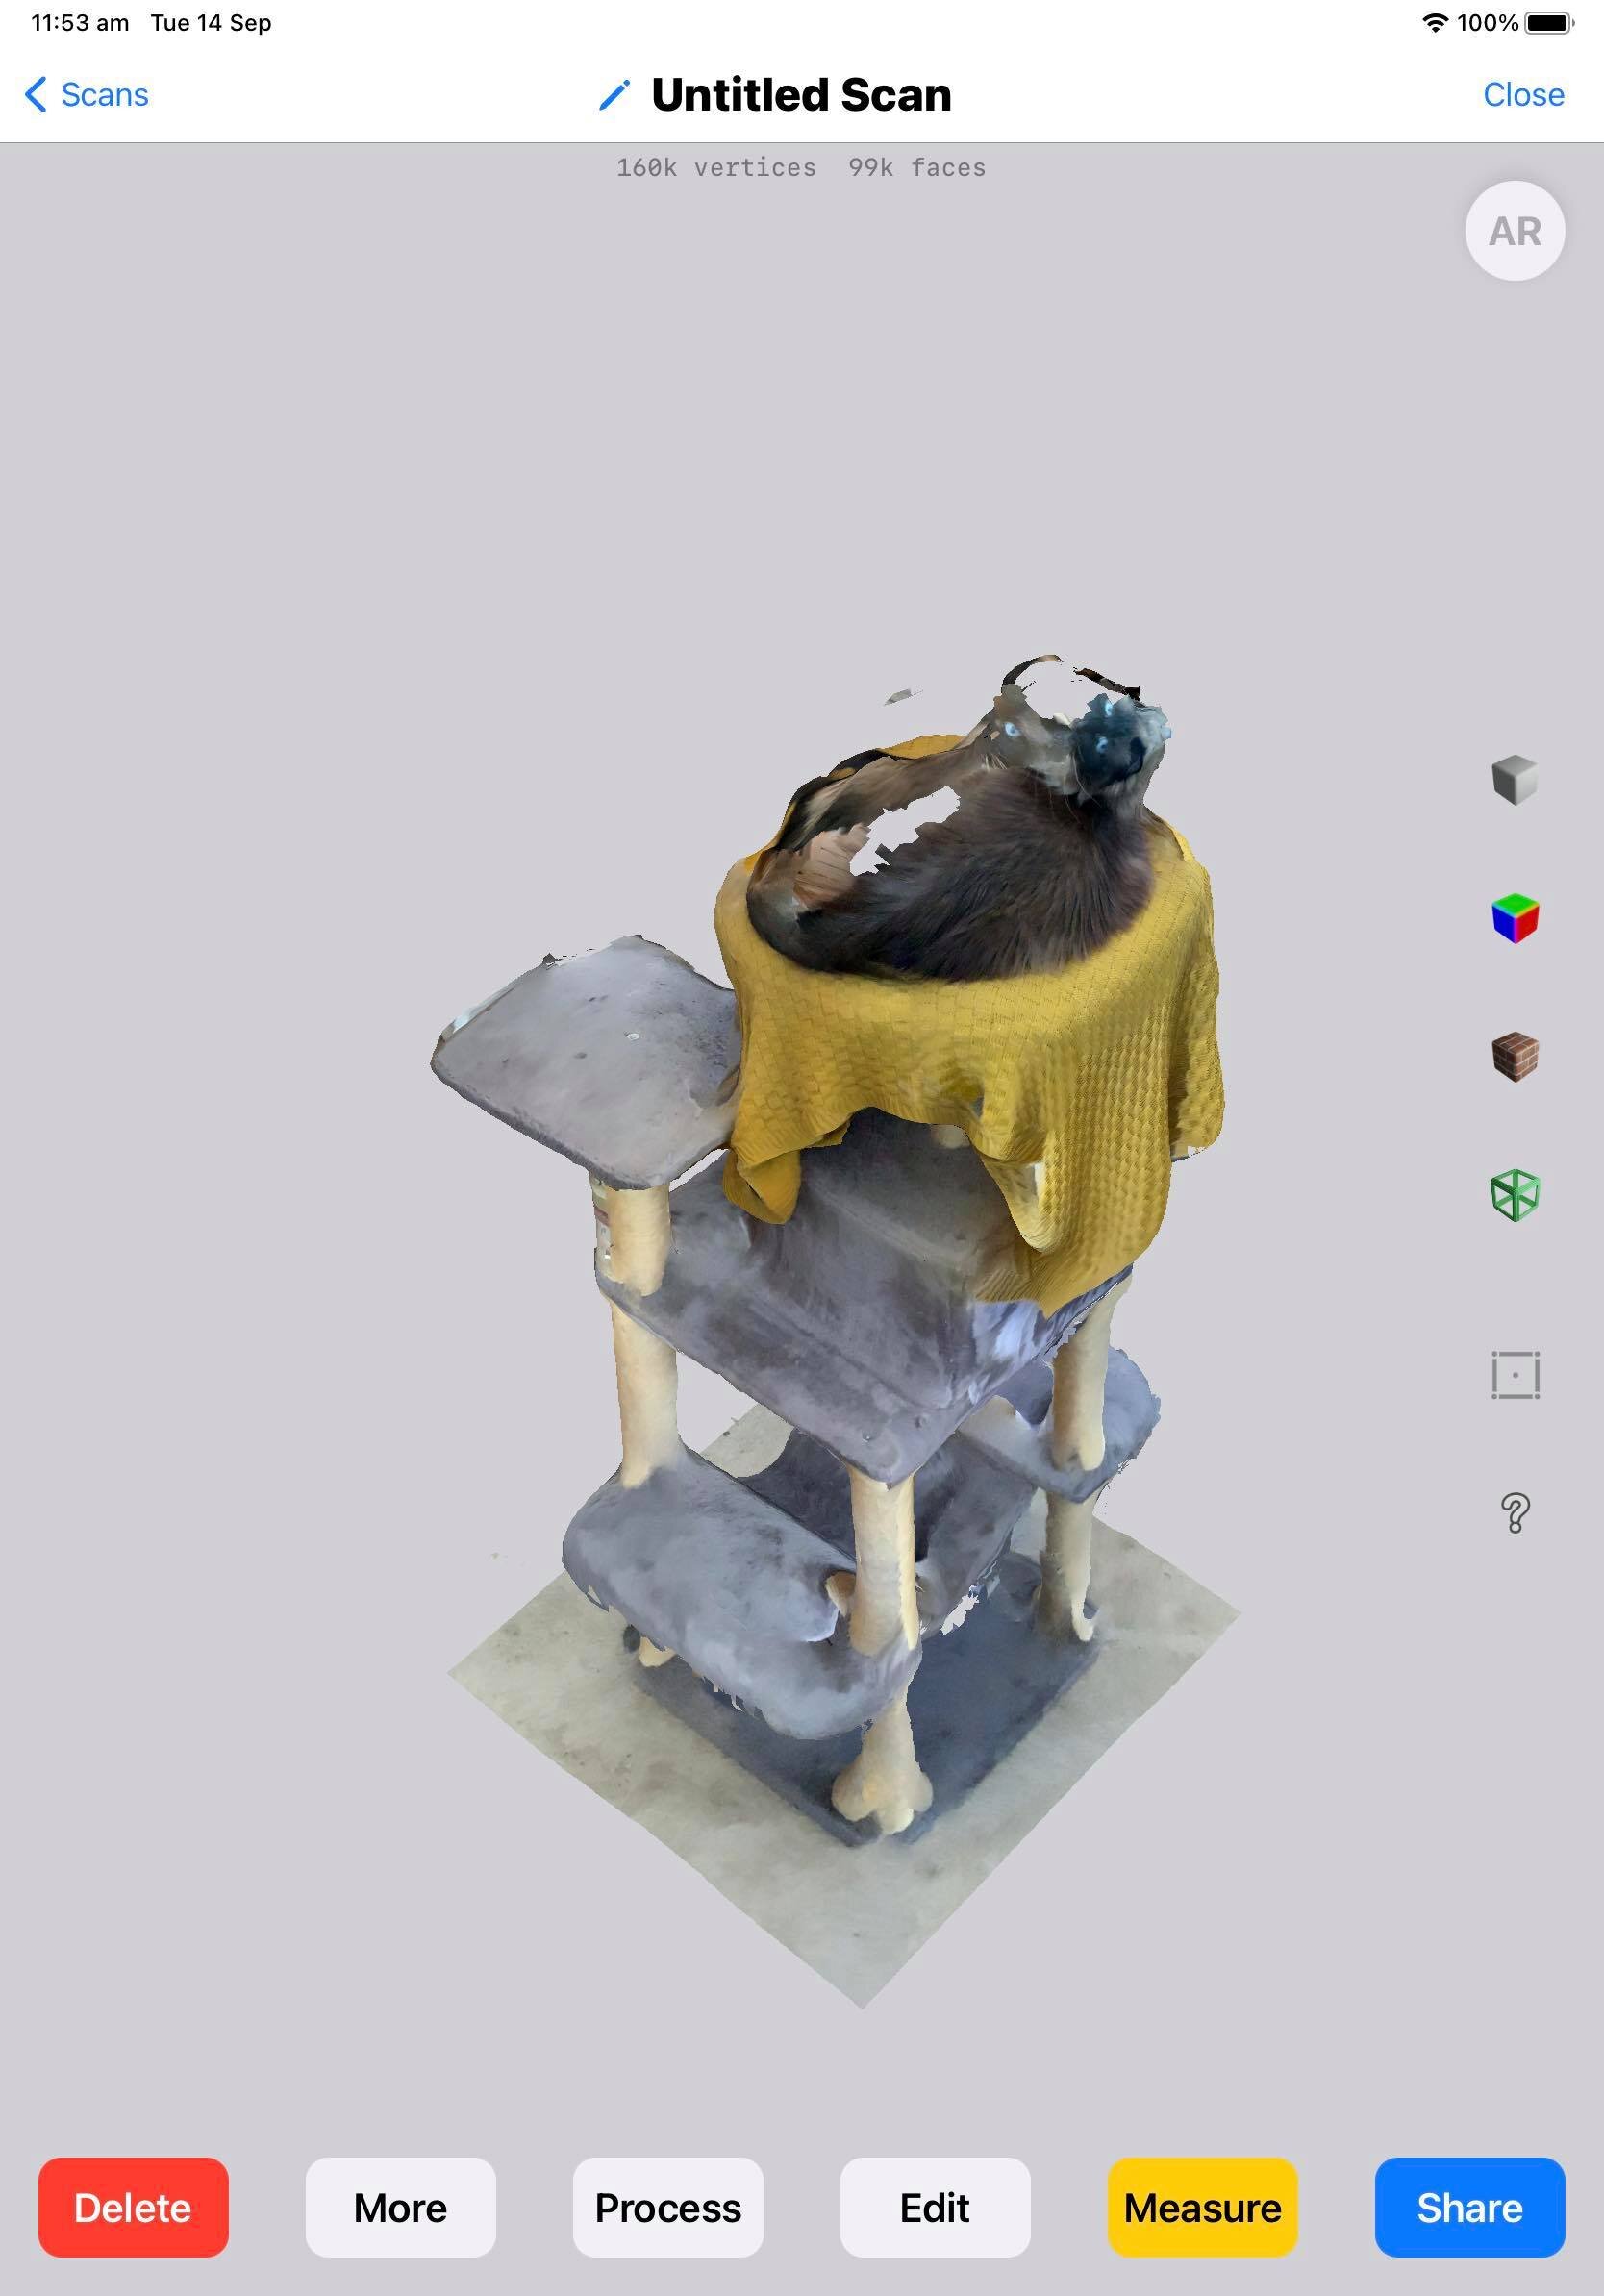
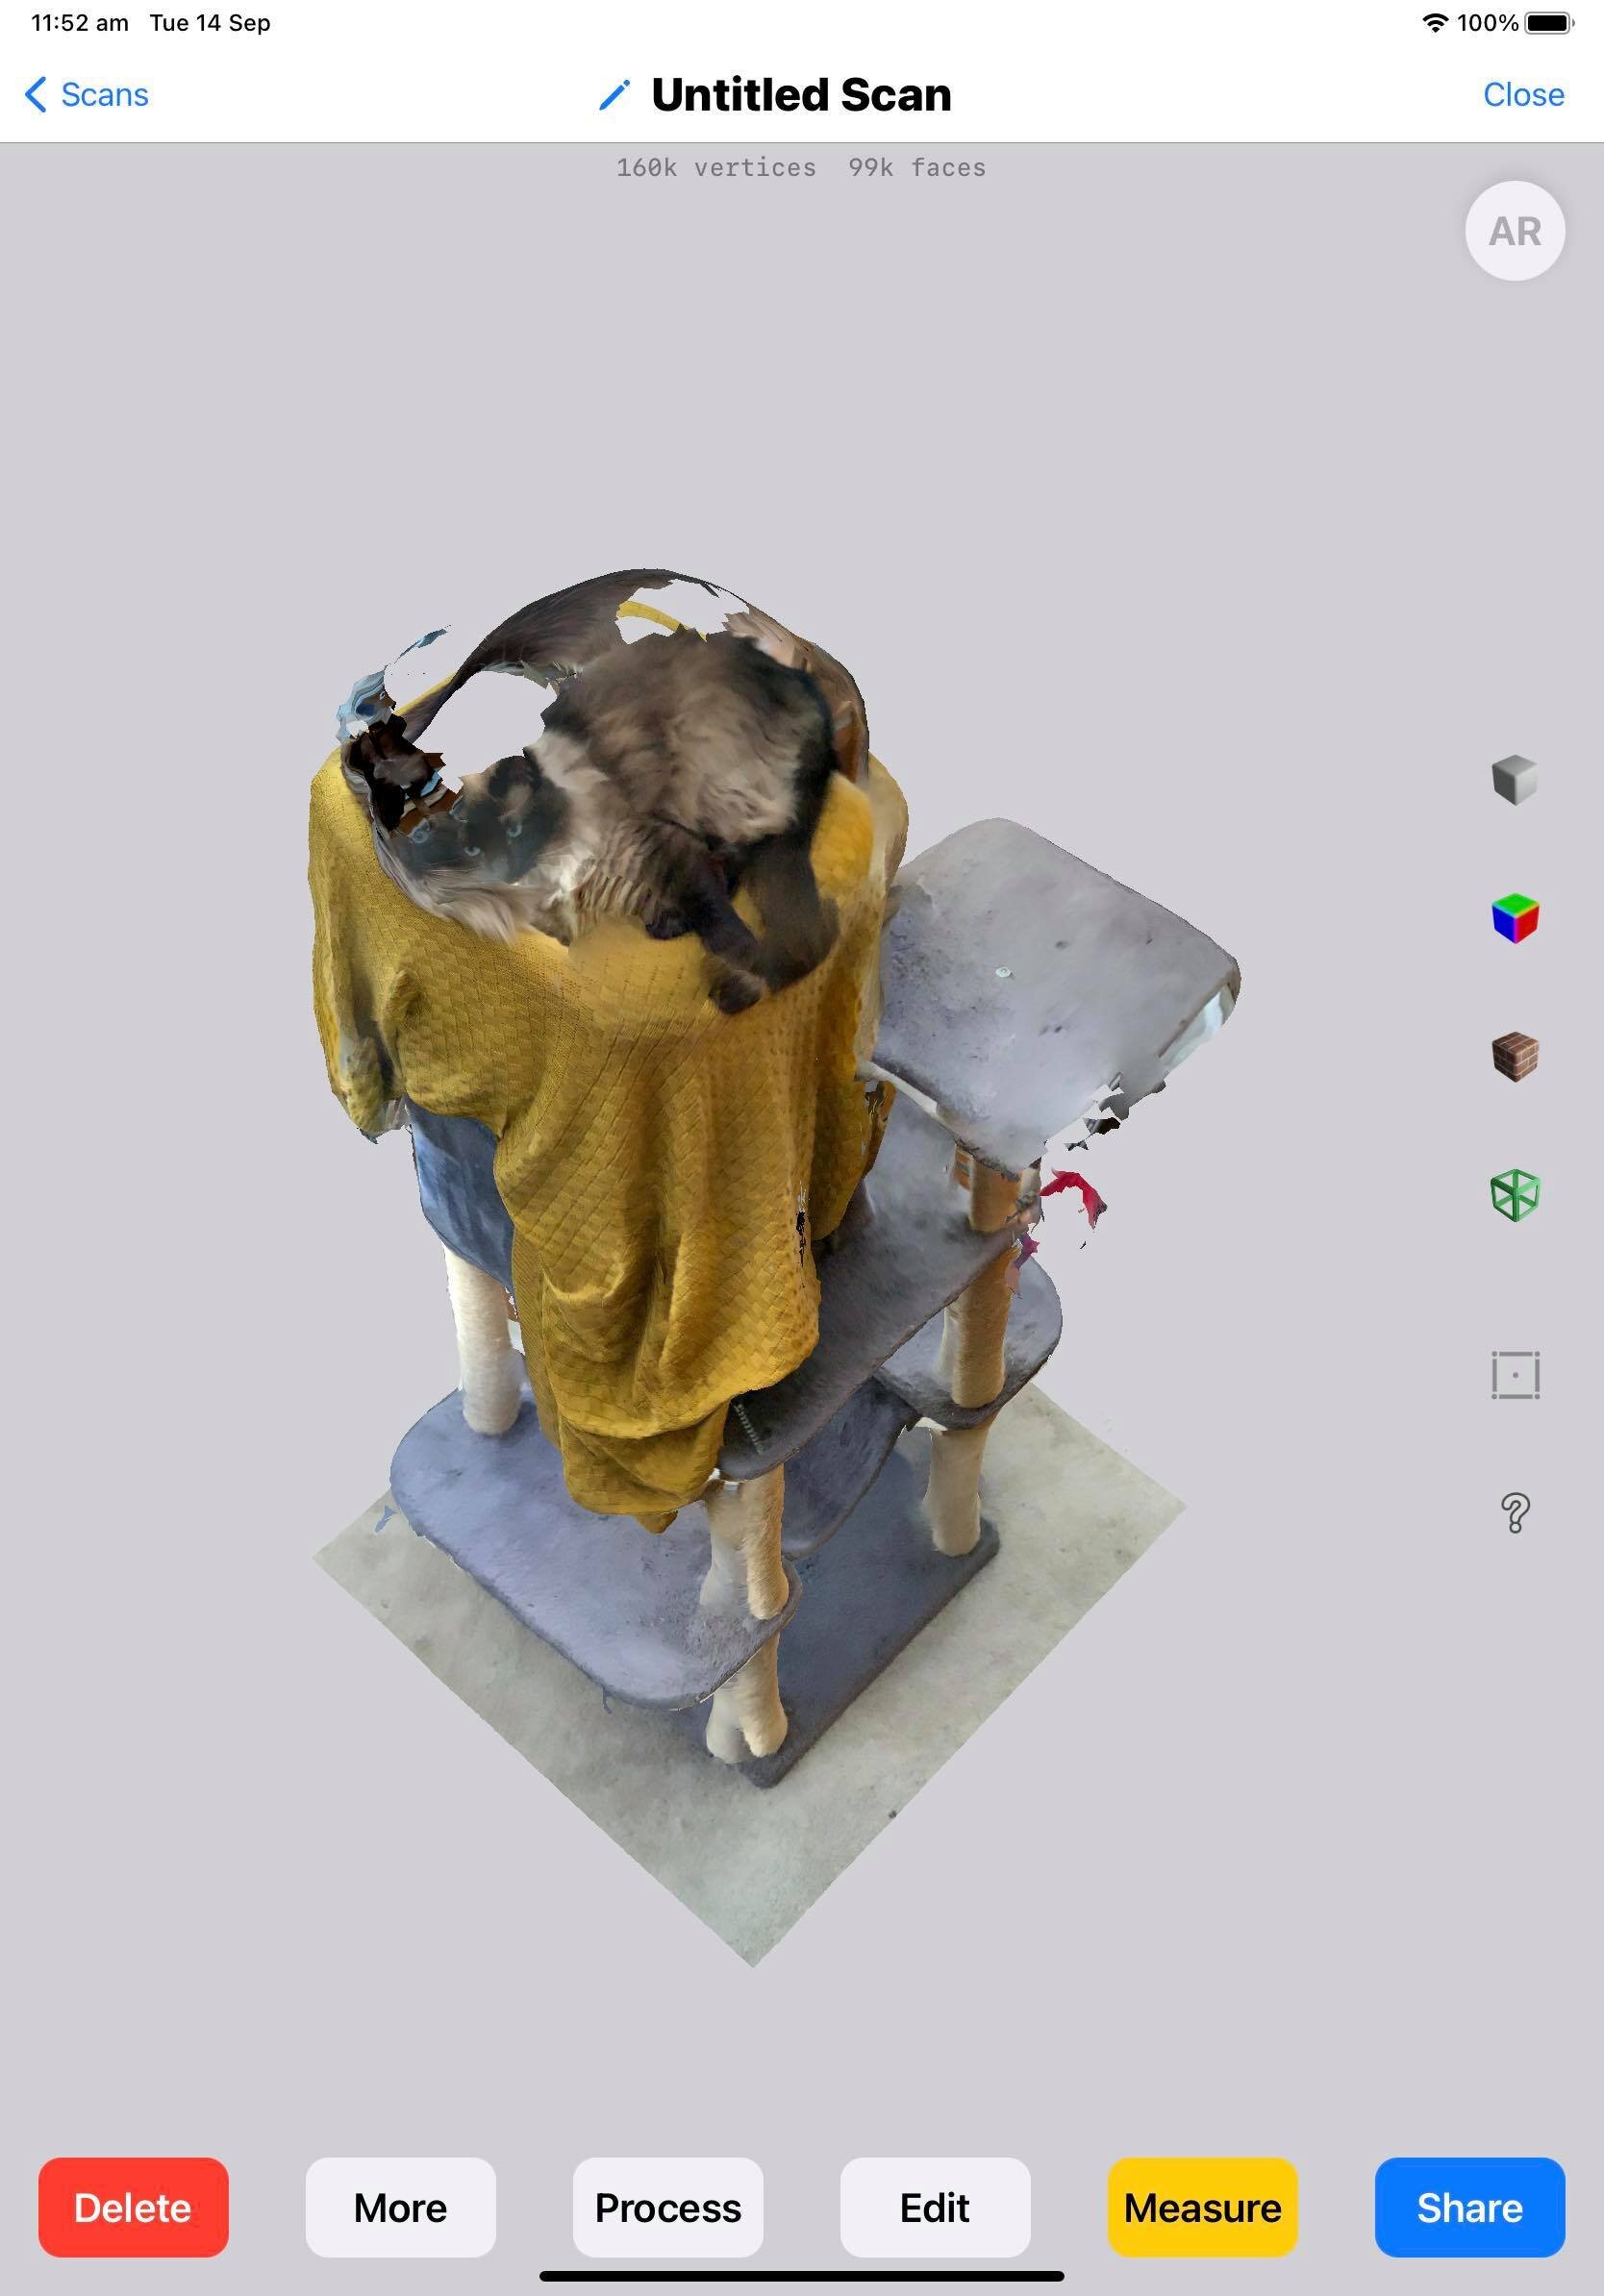
The above screenshots show one of my original tests of an interior object (cat tower + cat). Whilst the tower itself scanned OK, this render highlighted the importance of capturing only stationary objects. As seen in the image, the cat has multiple faces and her movement caused there to be missing data and patches in the mesh. The above video demonstrates a 3D scanned environment imported into Unreal Engine 4. This video also includes a test for constraining the spawning of Niagra particle effects within the constraints of a model, in this case, a person. This method of portraying additional characters can aid in portraying key narrative storybeats whilst ensuring the anonymity of the persons referenced.
10: Preproduction & Introduction
My main intention with this project is to make it accessible to play by those who are not typically into games. To introduce the player to the game, the opening level will take place in a pitch black abstract space. In the distance the player will see a swirling fog - the only notable feature in the barren landscape) this should prompt the player to move towards the fog. The original, basic implementation depicted in the video below shows the dialogue playing as the player moves slowly towards the fog, and upon entering the fog a second set of dialogue will play. During this first pass I noticed that it was difficult for the player to be able to gauge progress due to the lack of defined landmarks and the slow walking pace. To remedy this, footprints were added to depict my father’s footsteps as he walks towards where you find him lying curled on the floor in a ball. These footsteps act as breadcrumbs guiding the player towards the fog and help the player gauge their progress.
Introduction first pass video

Added footsteps to lead the player

Updated pre-production level map for “All Black” level.
11: Subtitles
Due to the nature of my dad’s Scottish accent and for accessibility reasons I did some research on how add subtitles to the project. Thankfully, Unreal Engine has a built in subtitling tool that can be accessed directly through the Details panel of the Sound Wave. This allows the developer to manually assign and time subtitles to the imported sound wave. By default Unreal Engine displays the subtitles in an incredibly small and unreadable font. In the Project Settings, the developer can find an area for using a custom font for the subtitle system, however, it is not clear that the font size can also be altered. The developer should also ensure that “Subtitled Enabled” is checked in the details panel for these to draw to the screen.
After importing your font .ttf into Unreal Engine you need to ensure that you create a “Font” from the imported “Font Face”. In the details panel of the font the developer can change the “Legacy Font Size” to change the scale of the font at runtime. Currently I have chosen to use Stay Writer as my default font as it has a handwritten feel to it but is still legible. In the below images you can see the difference in scale and readability from the system default font to the custom import font for the subtitle system.

The subtitle section of the sound wave file.

Default subtitle font.

Stay Writer custom font.
12: Making the Bridge
Talk about how these step segments will allow for surreal transition to different locations. a few of these scans will need cleaning up
13: PGRS Winter Conference 2021
Below is a video recording of my presentation for the PGRS Winter Conference 2021 where I discuss the current state of the project and my intentions going forward. The conference took place on the 13/12/22 - 14/12/22, with my presentation taking place on the Monday. The Schedule & Book of Abstracts for the conference can be found through this link: Click me!
14: Unveiling Islands
To ensure that the player could only navigate one storybeat at a time, I had to devise a system for unveiling each ‘island’ one at a time. The current system involves a dynamic material mask sphere that triggers the next island to become visible once the player has entered the current island. This method allows for the player to always see the location of their next objective and serves to guide them through the experience. Whilst imperfect, it is a big step forward for pacing and delivery of content.
14: Pennstate Visit & London Science Museum Build
Text